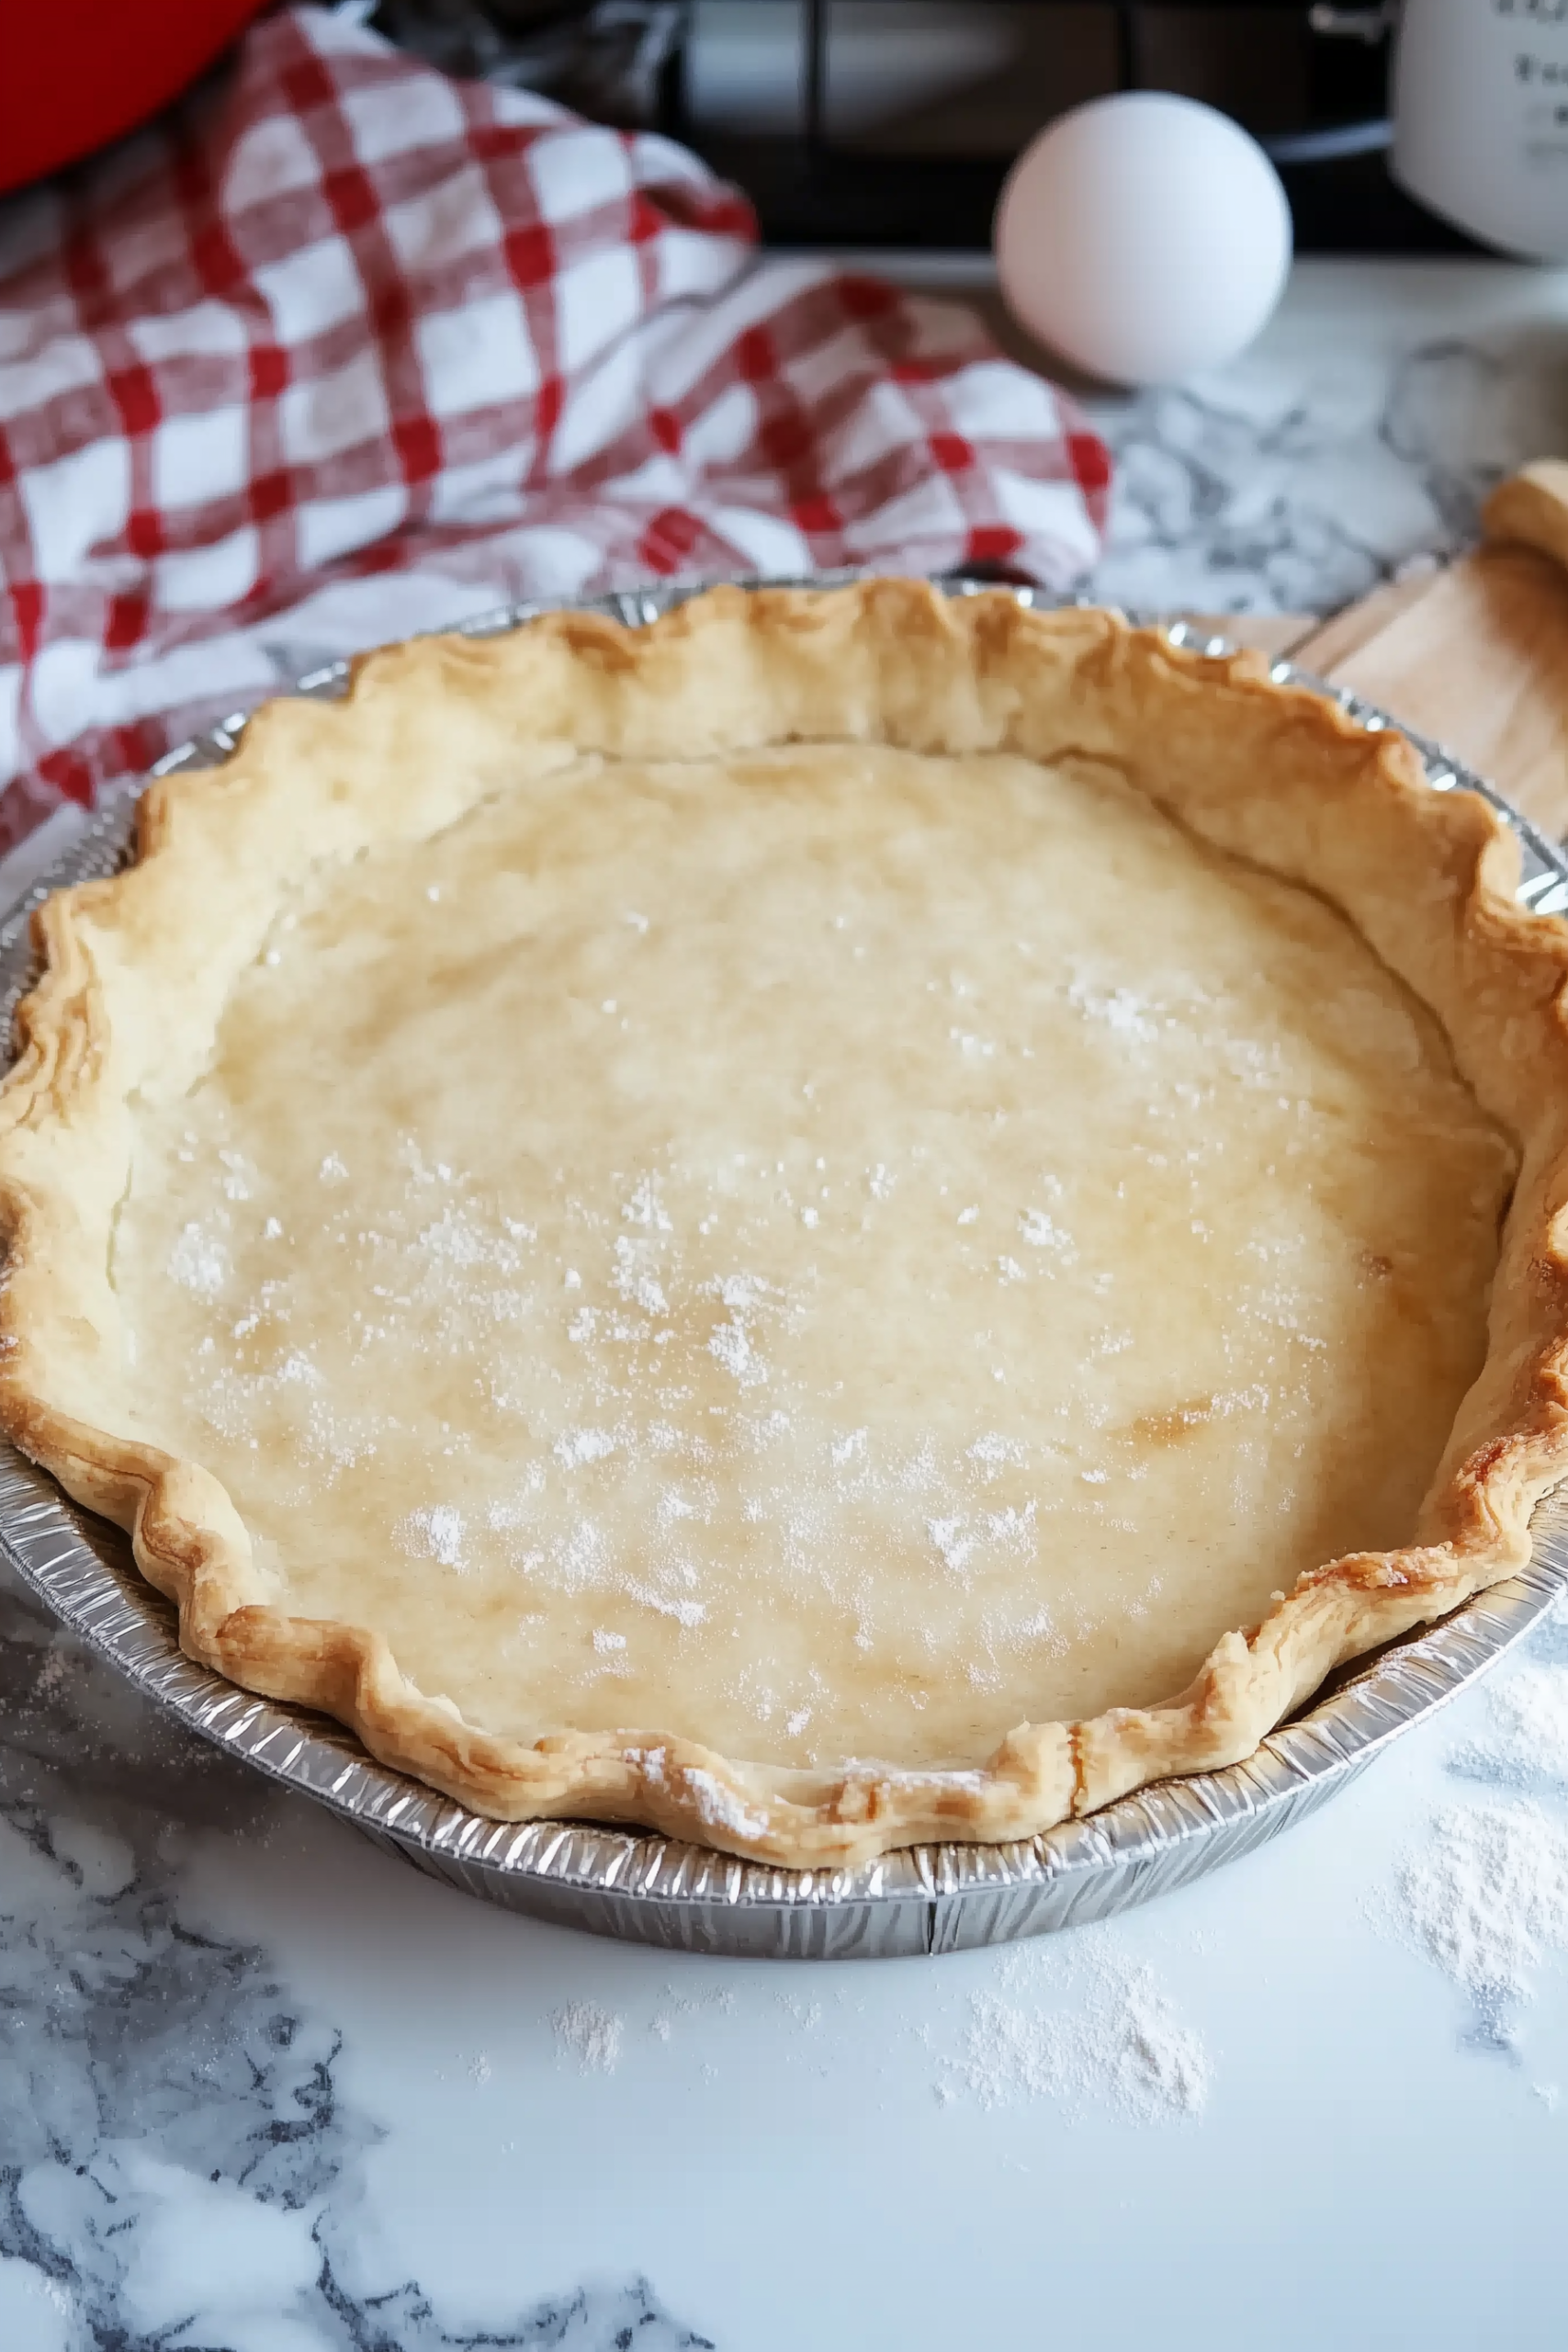
There’s something timeless and comforting about a good pie crust. For many bakers, the crust is the foundation of any pie, and getting it right can mean the difference between a so-so dessert and one that has everyone coming back for seconds. This particular recipe is special—it’s been passed down for over 100 years. That alone tells you something about its quality and dependability. Recipes that survive a century are the ones that truly work.
Back in the day, lard was the fat of choice, giving pies their ultra-flaky texture and deep flavor. Over time, shortening became the go-to substitute, offering convenience and consistency. This recipe, though old-fashioned in origin, is just as relevant today. It makes a flaky, flavorful crust that works beautifully for sweet and savory pies alike. Whether you’re baking an apple pie for Sunday dinner, a pecan pie for the holidays, or even a savory pot pie, this crust will deliver.
The best part? It makes enough dough for multiple pies. With this recipe, you’ll have enough for four 8-inch crusts or three 9-inch crusts, which means you can prep ahead, freeze extras, or whip up several pies for a gathering. That practicality is another reason this recipe has stood the test of time.
Why You’ll Love This Recipe
- Tried and True: Over 100 years of family kitchens can’t be wrong.
- Flaky & Flavorful: Perfect texture every time.
- Versatile: Works for both sweet and savory pies.
- Make Ahead Friendly: Dough can be chilled or frozen for future baking.
- Big Batch: Enough dough for multiple pies, saving time in the long run.

Ingredients
- 4 cups all-purpose flour
- 1 3/4 cups shortening (or lard for a traditional version)
- 3 tablespoons sugar (reduce if making a savory pie)
- 2 teaspoons salt
- 1 egg
- 1/2 cup ice water
Step-by-Step Directions
Step 1: Blend the Dry Ingredients
In a large mixing bowl, combine the flour, sugar, and salt. Add the shortening (or lard, if you want to go traditional). Use a pastry cutter or fork to work the fat into the flour until the mixture resembles coarse crumbs. This step is crucial—it’s what creates that signature flakiness.
Step 2: Mix Wet Ingredients
In a separate small bowl, whisk the egg and ice water together. Slowly add this mixture into the flour and fat mixture. Stir just until combined. Overmixing here can make your crust tough, so stop once it comes together.
Step 3: Form and Chill
Divide the dough into 3–4 equal portions, depending on the pie size you’ll be making. Shape each portion into a ball, then flatten it into a disk. Wrap each disk tightly in plastic wrap and refrigerate until ready to use. Chilling allows the fat to firm up again, ensuring a flaky crust once baked.
Step 4: Roll and Bake
When ready to bake, lightly flour a surface and roll out the dough to about 1/8 inch thick. Fit it into your pie pan, trim the edges, and crimp or decorate as desired. For a blind bake (such as for cream pies), bake at 400°F for about 20 minutes until golden.
Tips for Success
- Keep Everything Cold: Cold fat equals flaky crust. If your kitchen is warm, you can even chill the flour before mixing.
- Don’t Overwork: Handle the dough as little as possible once the liquid is added. Overmixing develops gluten and makes the crust tough.
- Add Water Slowly: You may not need the full 1/2 cup, so add it gradually until the dough just comes together.
- Resting Time Matters: Chilling the dough relaxes the gluten and helps prevent shrinkage during baking.
- Use Lard for Authenticity: If you want to taste the original version of this 100-year-old recipe, try lard instead of shortening—it gives unmatched flakiness.
Variations
- Sweet Pie Crust: Keep the sugar as written for apple, berry, or custard pies.
- Savory Pie Crust: Reduce the sugar to 1 tablespoon or omit completely for chicken pot pies, quiches, or meat pies.
- Whole Wheat Twist: Substitute up to 1 cup of the all-purpose flour with whole wheat flour for a nuttier flavor.
- Buttery Blend: Swap half the shortening with butter for a rich, buttery flavor along with flakiness.
- Spiced Crust: Add a pinch of cinnamon or nutmeg for sweet pies, or herbs like thyme and rosemary for savory versions.
Make Ahead & Storage
- Refrigerator: Wrapped disks of dough can be stored in the fridge for up to 3 days.
- Freezer: Wrap dough tightly in plastic wrap and freeze for up to 3 months. Thaw overnight in the fridge before using.
- Par-Baking: For custard or cream pies, you can blind bake the crust ahead of time and store it, covered, at room temperature for 1–2 days.
Frequently Asked Questions
Why add an egg to pie crust?
The egg enriches the dough, adds tenderness, and helps bind everything together. It also makes the crust a little easier to work with.
Can I substitute butter for shortening?
Yes. Butter will give a richer flavor, but shortening (or lard) creates more flakiness. Many bakers like to use a mix of the two for the best of both worlds.
What’s the difference between lard and shortening in pie crust?
Lard produces the flakiest crust with a unique savory flavor. Shortening is neutral and convenient, while butter provides flavor but can make the dough a bit harder to handle.
Do I need to blind bake the crust?
If you’re making a pie with a wet filling, like cream or custard, blind baking helps prevent sogginess. For fruit pies, it’s usually not necessary unless you want extra crispness.
How do I keep the crust from shrinking?
Chilling the dough before rolling and again after placing it in the pie pan helps. Using pie weights during blind baking also prevents shrinkage.
Final Thoughts
This 100 Year Old Pie Crust Recipe is proof that sometimes the simplest recipes are the best. With only a handful of ingredients and a straightforward method, it creates a flaky, tender crust that elevates any pie. It’s a recipe that has been passed down through generations, and for good reason—it works every single time.
If you’ve ever felt intimidated by homemade pie crust, this recipe is the one to try. It’s forgiving, easy to handle, and makes enough for multiple pies so you can practice and perfect your technique. Whether you’re filling it with apples, pumpkin custard, or savory chicken and veggies, you’ll taste the difference of a homemade crust immediately.
So the next time you’re baking, honor tradition and whip up this century-old crust. After all, if it’s been around this long, you know it’s something special.
100 Year Old Pie Crust Recipe
Ingredients
- 4 cups all-purpose flour
- 1 3/4 cups shortening or lard for a traditional version
- 3 tablespoons sugar reduce if making a savory pie
- 2 teaspoons salt
- 1 egg
- 1/2 cup ice water
Instructions
Step 1: Blend the Dry Ingredients
- In a large mixing bowl, combine the flour, sugar, and salt. Add the shortening (or lard, if you want to go traditional). Use a pastry cutter or fork to work the fat into the flour until the mixture resembles coarse crumbs. This step is crucial—it’s what creates that signature flakiness.
Step 2: Mix Wet Ingredients
- In a separate small bowl, whisk the egg and ice water together. Slowly add this mixture into the flour and fat mixture. Stir just until combined. Overmixing here can make your crust tough, so stop once it comes together.
Step 3: Form and Chill
- Divide the dough into 3–4 equal portions, depending on the pie size you’ll be making. Shape each portion into a ball, then flatten it into a disk. Wrap each disk tightly in plastic wrap and refrigerate until ready to use. Chilling allows the fat to firm up again, ensuring a flaky crust once baked.
Step 4: Roll and Bake
- When ready to bake, lightly flour a surface and roll out the dough to about 1/8 inch thick. Fit it into your pie pan, trim the edges, and crimp or decorate as desired. For a blind bake (such as for cream pies), bake at 400°F for about 20 minutes until golden.


Leave a Comment