


Want to save this recipe?
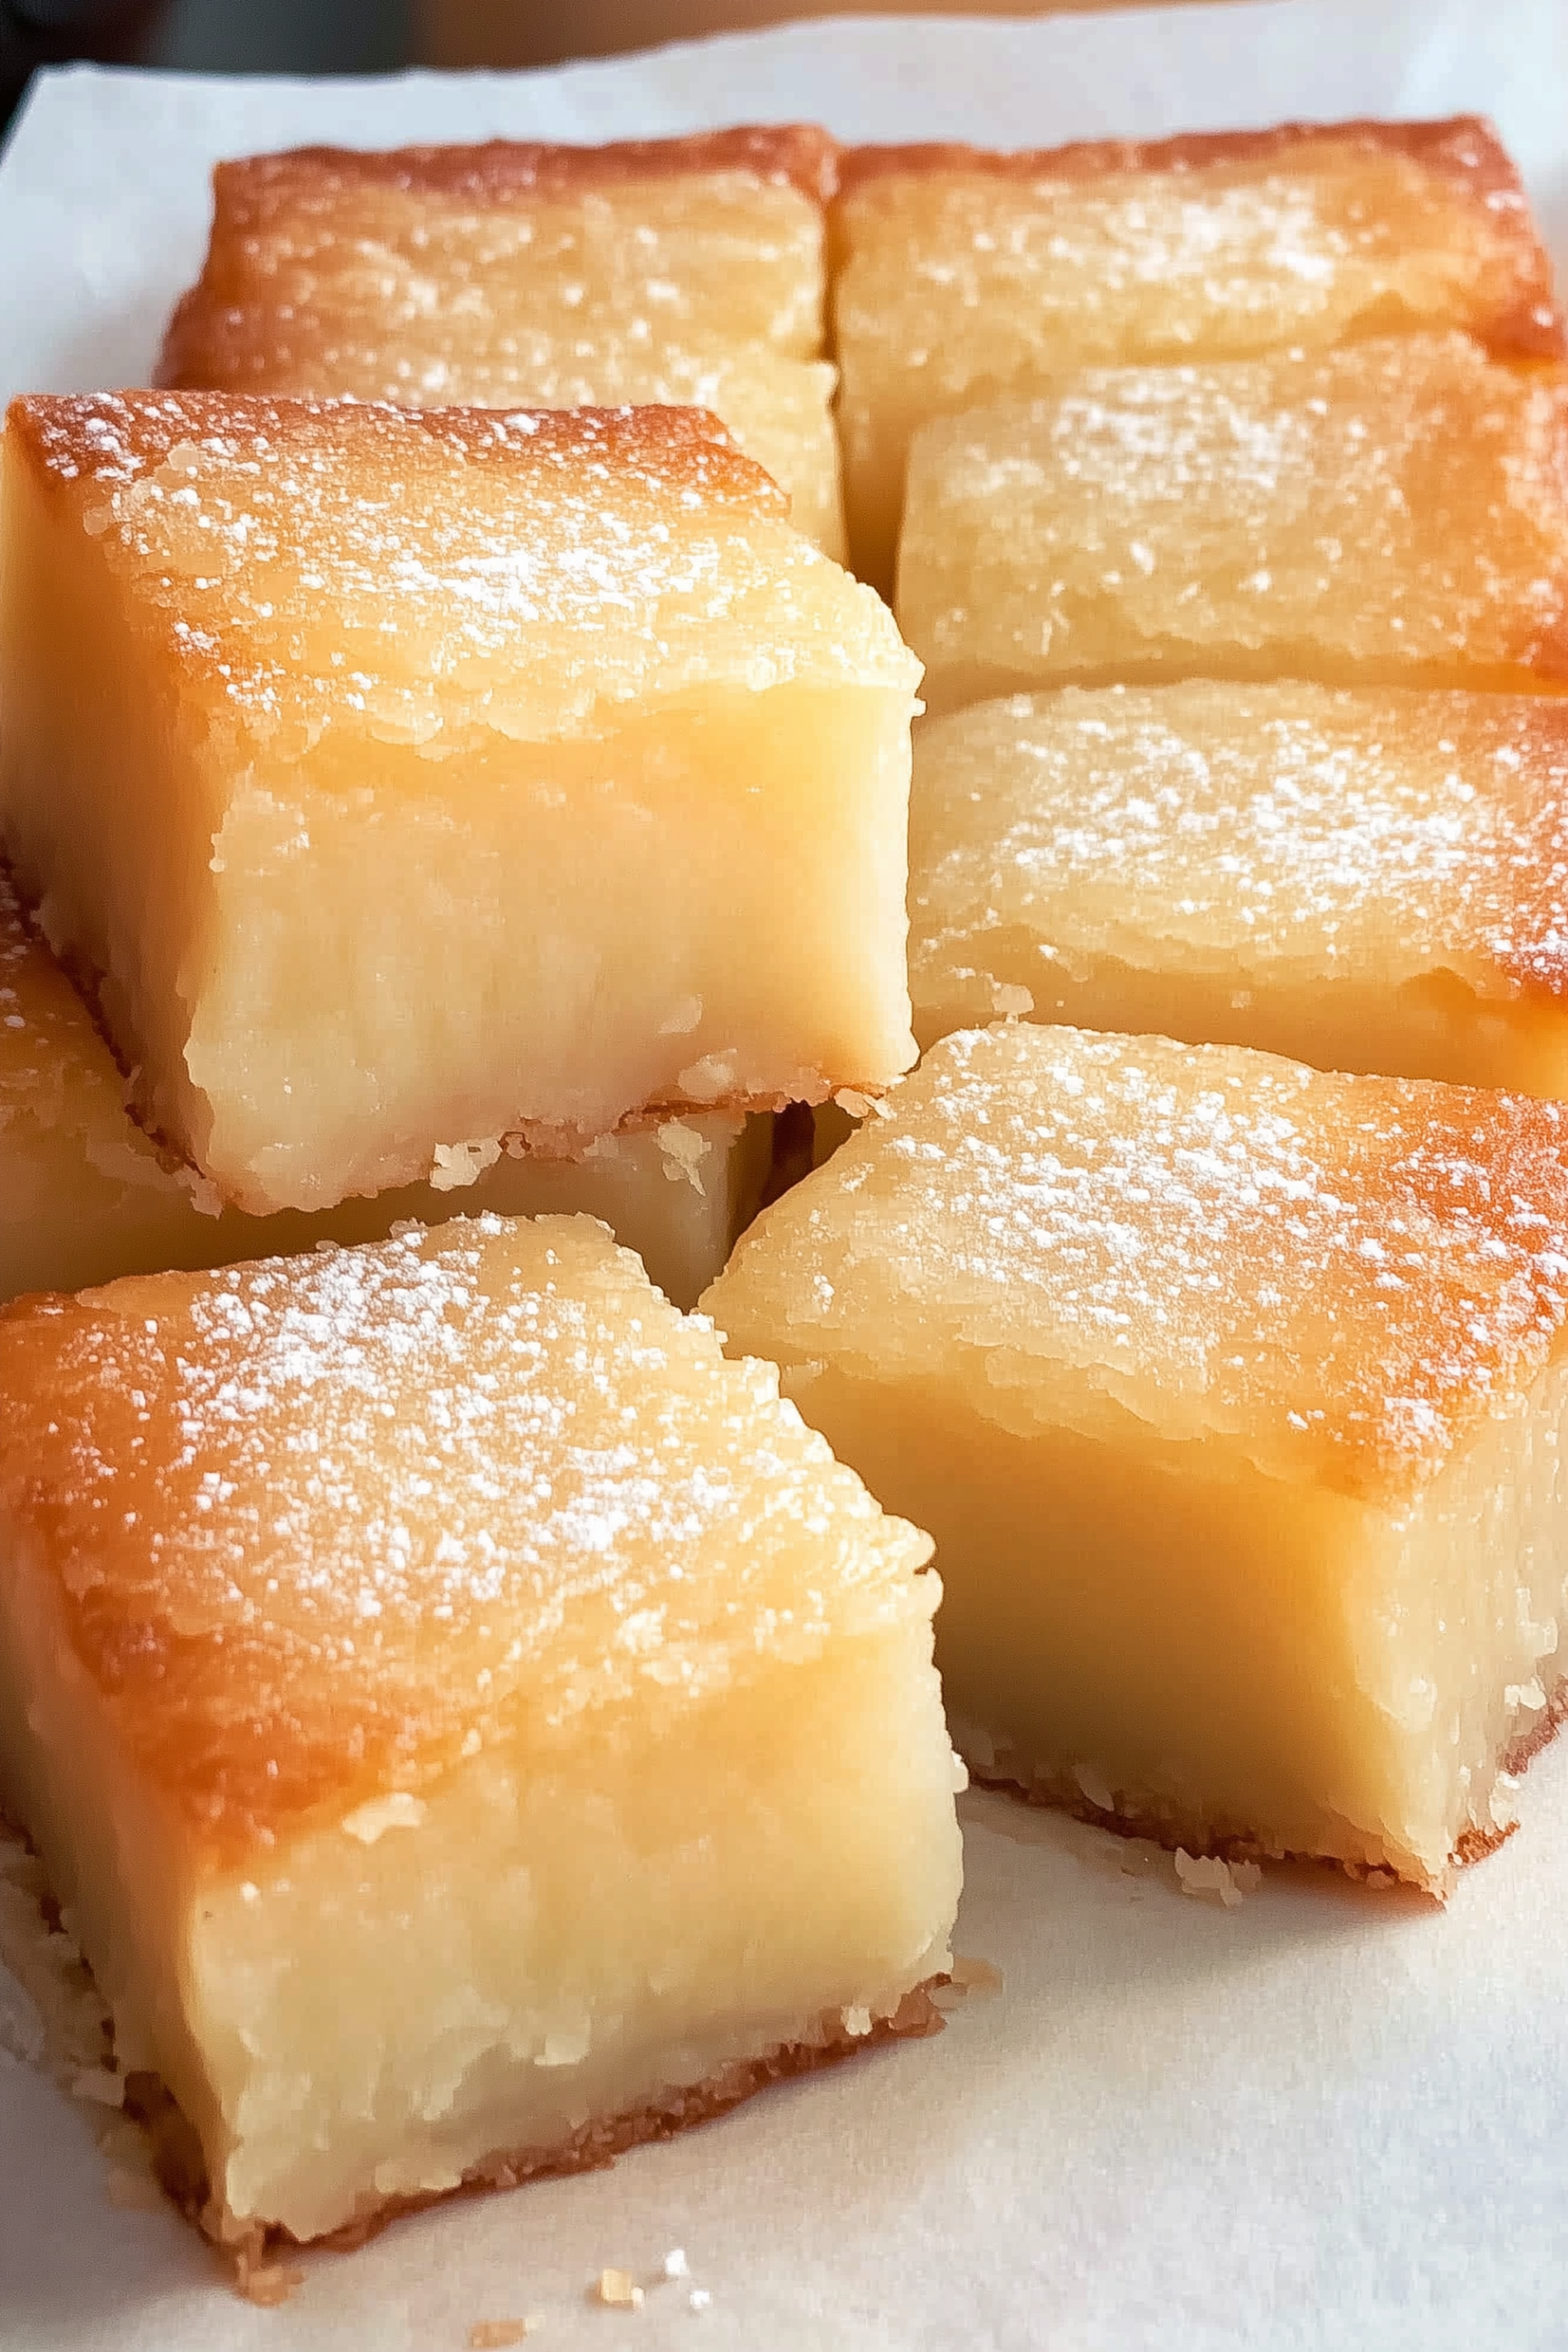
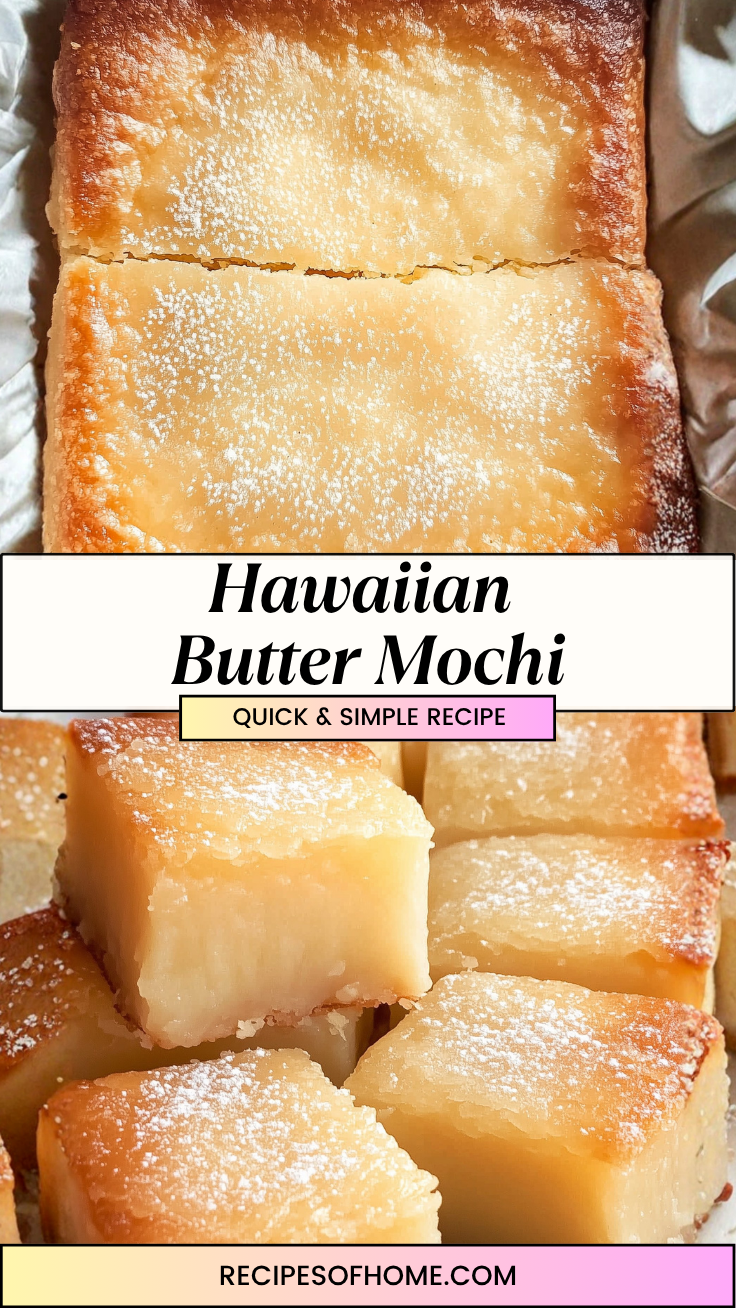
Baking a fresh pan of Hawaiian butter mochi transforms your kitchen into a warm tropical escape, filling the air with the intoxicating, sweet aroma of toasted coconut, rich butter, and warm vanilla. This beloved island staple delivers a truly magical texture playground: it features a paper-thin, golden-brown top crust that breaks away to reveal a dense, custard-like center with an incredibly satisfying, bouncy chew. It is the type of comforting local treat that makes it impossible to stop at just one square.
Serving a plate of these glossy, hand-held squares to my family brings a beautiful, relaxed island energy to our afternoon. My husband loves how the rich, buttery depth balances the tropical sweetness of the coconut milk, while the kids can’t get enough of the fun, stretchy bounce. It looks like an exotic bakery masterpiece but is actually an effortless, foolproof bake that relies on simple pantry items to bring ultimate comfort food joy straight to your table.
Why You’ll Love It
- Naturally gluten-free: Made with sweet rice flour instead of wheat flour, providing a wonderful, stomach-friendly alternative for everyone to enjoy.
- Effortless dump-and-whisk prep: Requires no fancy kitchen equipment, standalone mixers, or complicated techniques—just two bowls and a hand whisk.
- The ultimate “Q-texture” bite: Fuses a crispy, decadent upper crust seamlessly into a soft, elastic, and stretchy mochi center.
- The ultimate potluck champion: Slices into incredibly clean, transportable squares that travel perfectly and stay fresh for days without turning stale.
- Incredible shelf life: Unlike traditional cake that dries out rapidly, the unique starches in this batter lock in moisture effortlessly over time.
Ingredient Notes & Details
- Glutinous rice flour: Typically sold under the Koda Farms Mochiko brand. This is the structural backbone of the entire dish and cannot be substituted with regular rice flour, as it contains the specific starches required to create that signature chewy bounce.
- Canned coconut milk: Use full-fat coconut milk to give the mochi a rich, velvety mouthfeel and a subtle tropical undertone.
- Evaporated milk: Adds a concentrated, creamy dairy sweetness that deepens the custard flavor of the center.
- Unsalted butter: Melted and cooled; provides that classic, rich local bakery flavor profile and helps create the glossy, crinkled top skin.
- Granulated sugar: Sweetens the batter thoroughly while helping the outer edges caramelize beautifully into a deep golden-brown.
Natural Substitutions: To make this recipe completely dairy-free, simply swap the evaporated milk for an equal amount of canned coconut cream or a rich plant-based milk alternative, and use melted coconut oil in place of the regular butter. If you want to add a vibrant color twist, stir a teaspoon of ube extract or a tablespoon of green matcha powder directly into the dry mix.
Step-by-Step Instructions
We begin by melting our unsalted butter and letting it cool down slightly so it doesn’t accidentally cook the eggs upon contact. In a large mixing bowl, whisk together the melted butter, granulated sugar, large eggs, canned coconut milk, evaporated milk, and a heavy splash of vanilla extract until the liquids are completely smooth, glossy, and unified.
In a separate bowl, stir together your sweet glutinous rice flour, baking powder, and a tiny pinch of salt. Pour the wet ingredients directly into the dry Mochiko flour base, whisking continuously until a completely smooth batter forms. Don’t be alarmed if the mixture looks incredibly thin, watery, and pourable—this is precisely how it is supposed to look! The liquid consistency is required so the rice starches can expand fully and steam evenly in the oven.
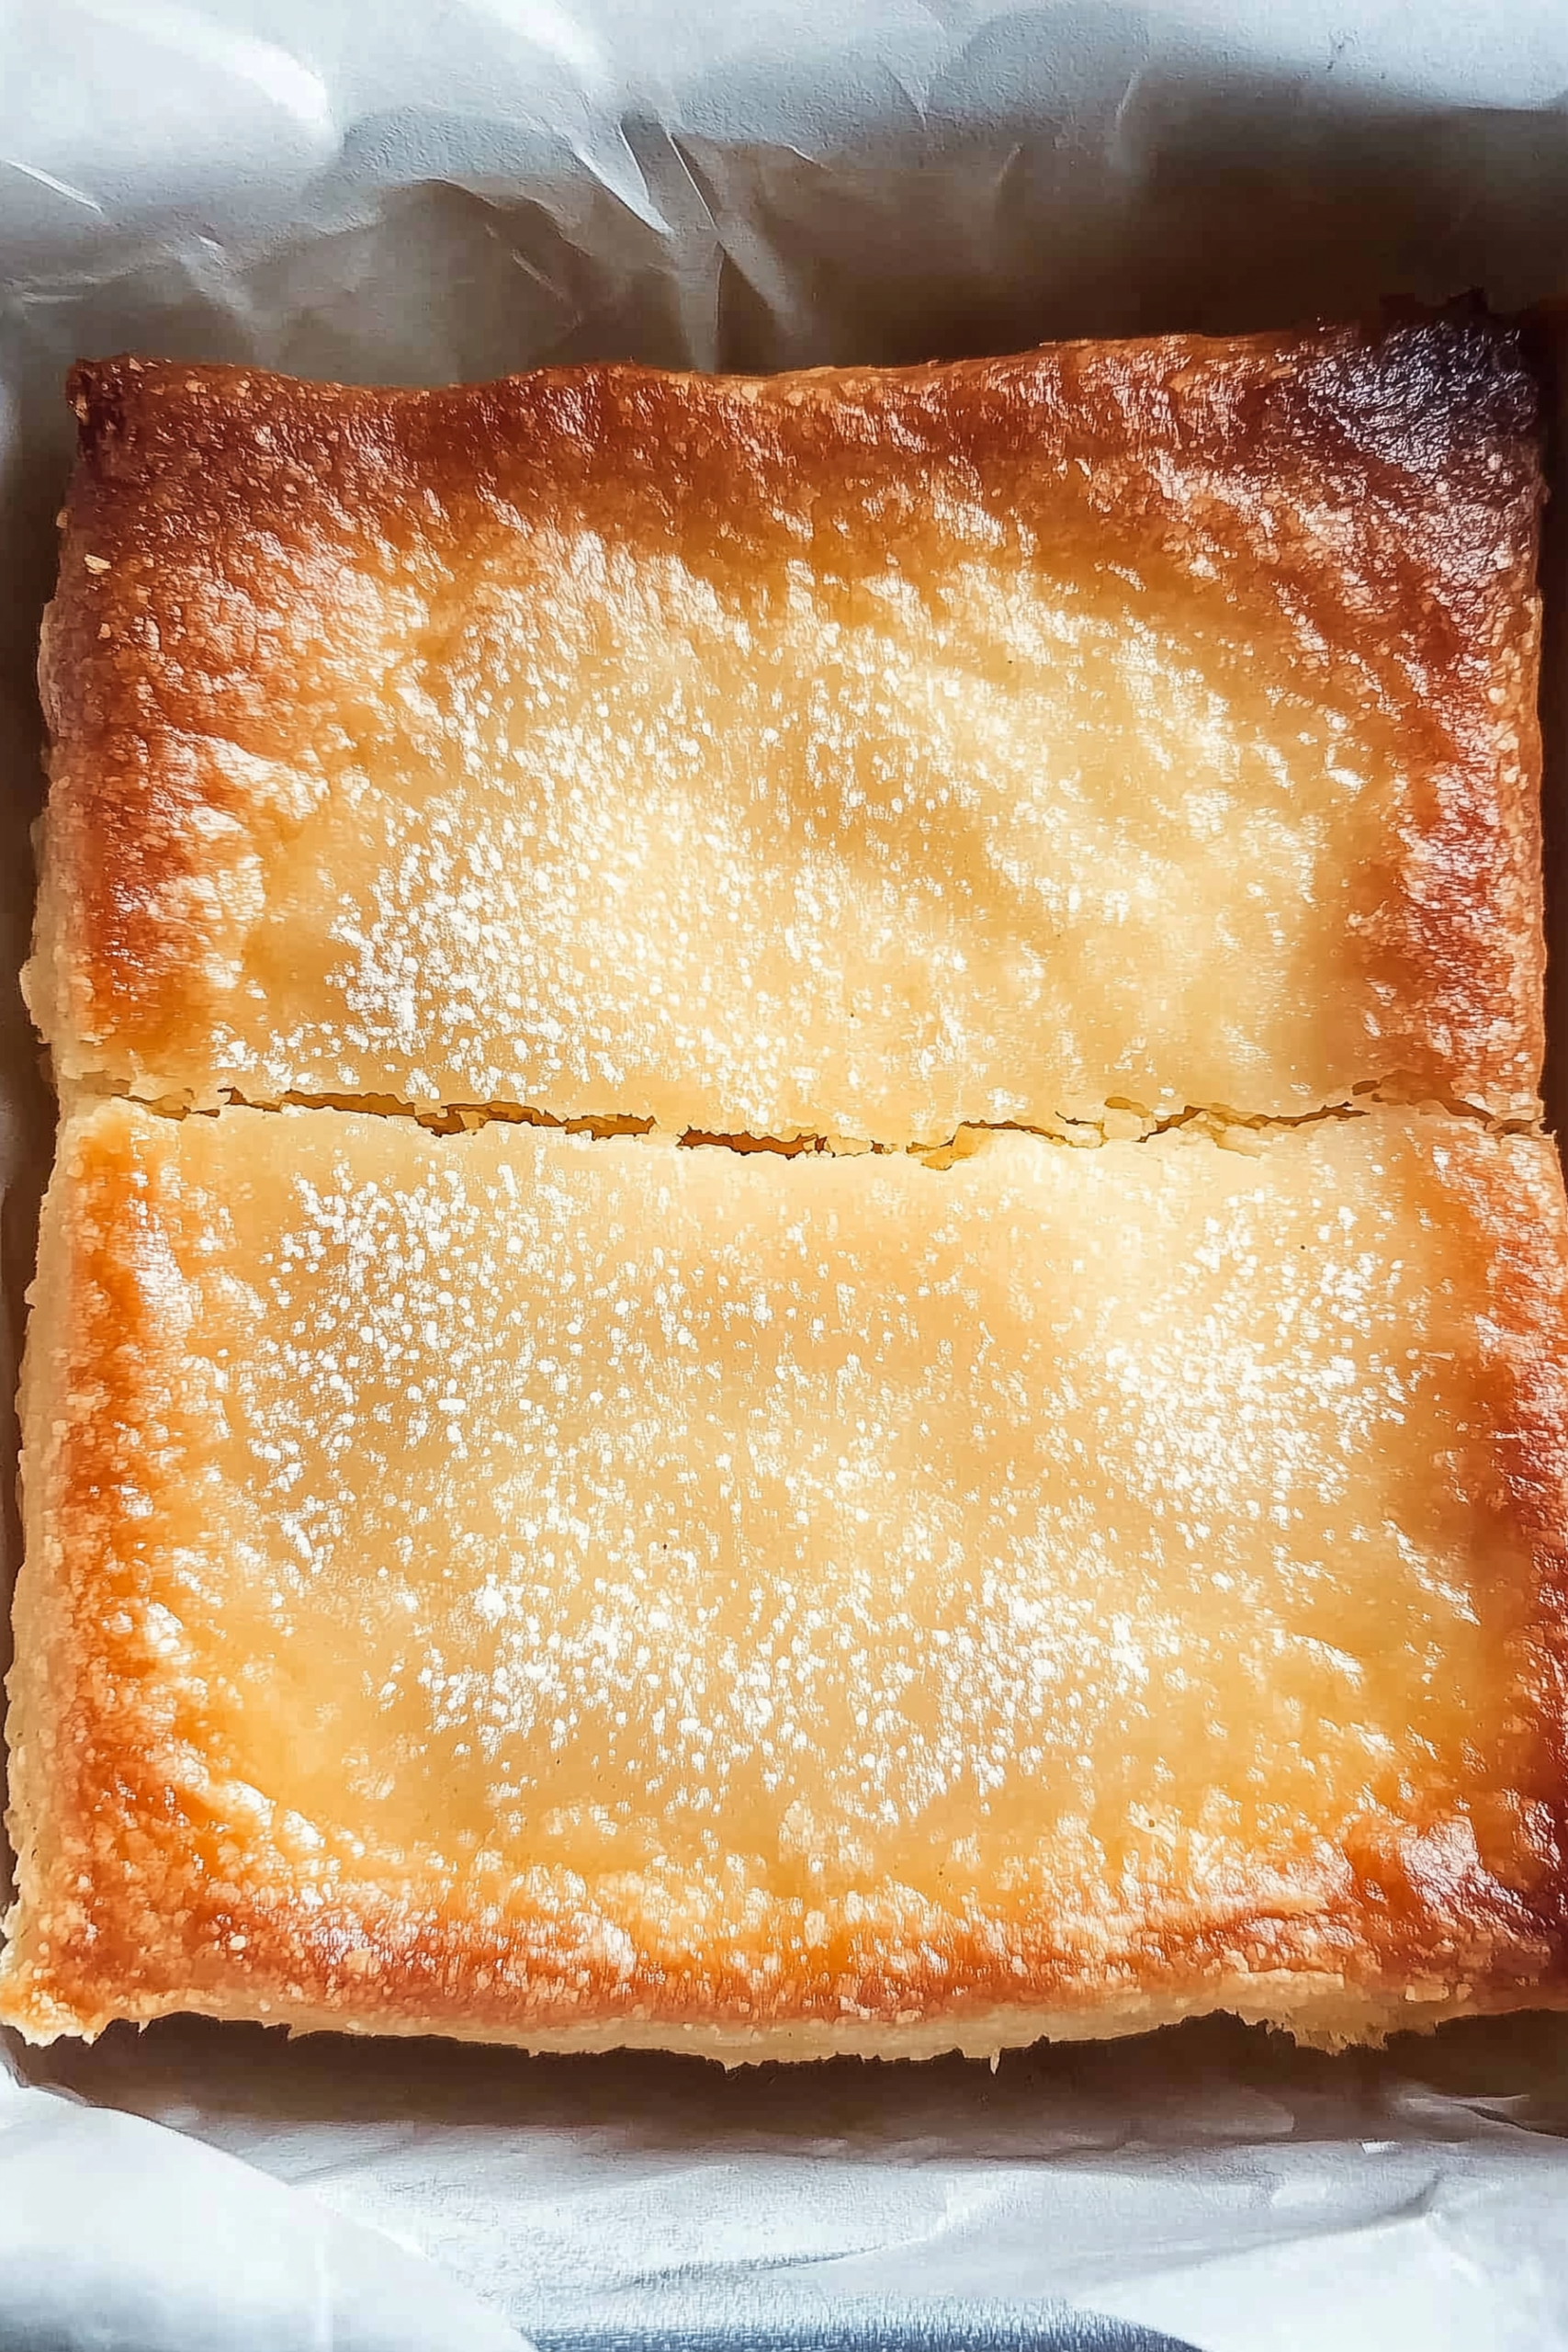
Pour the liquid gold into a well-greased 9×13 baking pan, tapping it gently on the counter to pop any trapped air bubbles. Bake low and slow until the top transforms into a beautiful, deeply bronzed, and crackled crinkle crust. Let the pan cool completely to room temperature on your counter before cutting; slicing hot mochi will cause the center to stick to the blade, so patience is key to achieving those pristine, professional-looking squares.
Tips
- Use the correct flour: Always verify your bag reads “Glutinous Rice Flour” or “Sweet Rice Flour.” Regular white or brown rice flour lacks the necessary sticky starches and will leave your cake hard, gritty, and chalky.
- Do not use a food processor: A simple hand whisk is all you need; over-whisking won’t build gluten because it’s rice-based, but keeping it simple prevents excessive air from forming giant hollow gaps inside.
- Slice with a plastic knife: The ultimate pro-baker insider secret to cutting sticky mochi cleanly is using a simple plastic lettuce knife or an oiled chef’s knife, wiping the blade down with a damp towel between every single cut.
- Cool down completely: Leave the baked pan undisturbed for at least 1 hour before slicing so the gelatinous interior settles cleanly into its dense, chewy matrix.
- Tap out the air bubbles: Thump the filled baking dish firmly against your kitchen counter three times before placing it in the oven to ensure a flat, uniform bake.
Storage & Reheating
Store your butter mochi in an airtight container at room temperature for up to 3 days. Avoid storing it in the refrigerator, as cold temperatures cause the cooked rice starches to retrograde, turning the beautifully stretchy center hard and unpleasantly stiff. You can freeze individual squares wrapped tightly in plastic wrap for up to 2 months. To restore that authentic, fresh-from-the-oven stretchy magic, simply pop a room-temperature square into the microwave for 10 seconds to warm the starches completely.
Serving & FAQs
This comforting local treat pairs spectacularly with a hot cup of black coffee, an iced matcha latte, a glass of cold milk, or served next to a bowl of fresh tropical fruits.
Why is my mochi batter so liquidy compared to regular cake mix? Wheat flour recipes build thick, sticky gluten structures. Glutinous rice flour absorbs liquid entirely differently and expands heavily while steaming in the hot oven, meaning a thin, pourable batter is completely normal and expected.
Can I bake this in a muffin tin instead of a large pan? Absolutely! Pour the batter into well-greased muffin wells and reduce the baking time to 25 to 30 minutes, keeping a close eye on the tops until they turn golden-brown. This yields excellent individual portions with crispy edges all around.
Traditional Chewy Hawaiian Butter Mochi
- Prep Time: 10 minutes
- Cook Time: 1 hour
- Total Time: 1 hour 10 minutes
- Servings: 24 squares
Ingredients
- 1 box (16 ounces / approx. 3 cups) sweet glutinous rice flour (Mochiko)
- 2 cups granulated sugar
- 2 teaspoons baking powder
- ½ cup unsalted butter, melted and cooled slightly
- 1 can (13.5 ounces) full-fat coconut milk
- 1 can (12 ounces) evaporated milk
- 4 large eggs, room temperature
- 2 teaspoons vanilla extract
- ¼ teaspoon salt
Instructions
- Preheat your oven to 350°F (177°C) and grease a 9×13-inch baking dish thoroughly with butter or non-stick cooking spray.
- In a large bowl, whisk together the sweet glutinous rice flour (Mochiko), granulated sugar, baking powder, and salt until completely uniform.
- In a separate large bowl, whisk the melted unsalted butter and eggs together until smooth.
- Pour the canned coconut milk, evaporated milk, and vanilla extract into the egg mixture, whisking vigorously until the liquid is completely unified.
- Pour the wet ingredients directly into the dry flour mixture. Whisk thoroughly for 1 to 2 minutes until a smooth, pourable, lump-free batter forms.
- Transfer the thin batter into the prepared 9×13-inch baking pan, ensuring it spreads evenly to the corners.
- Firmly tap the pan against your kitchen counter three times to release any large trapped air bubbles.
- Bake for 55 to 60 minutes, or until the top is deeply golden-brown and the edges look lightly crisped and set.
- Remove from the oven and place the pan on a wire cooling rack. Let the mochi cool completely inside the pan at room temperature for at least 1 hour.
- Using an oiled chef’s knife or a plastic knife, slice the cooled mochi cleanly into 24 uniform squares and serve.

Leave a Reply