












Want to save this recipe?
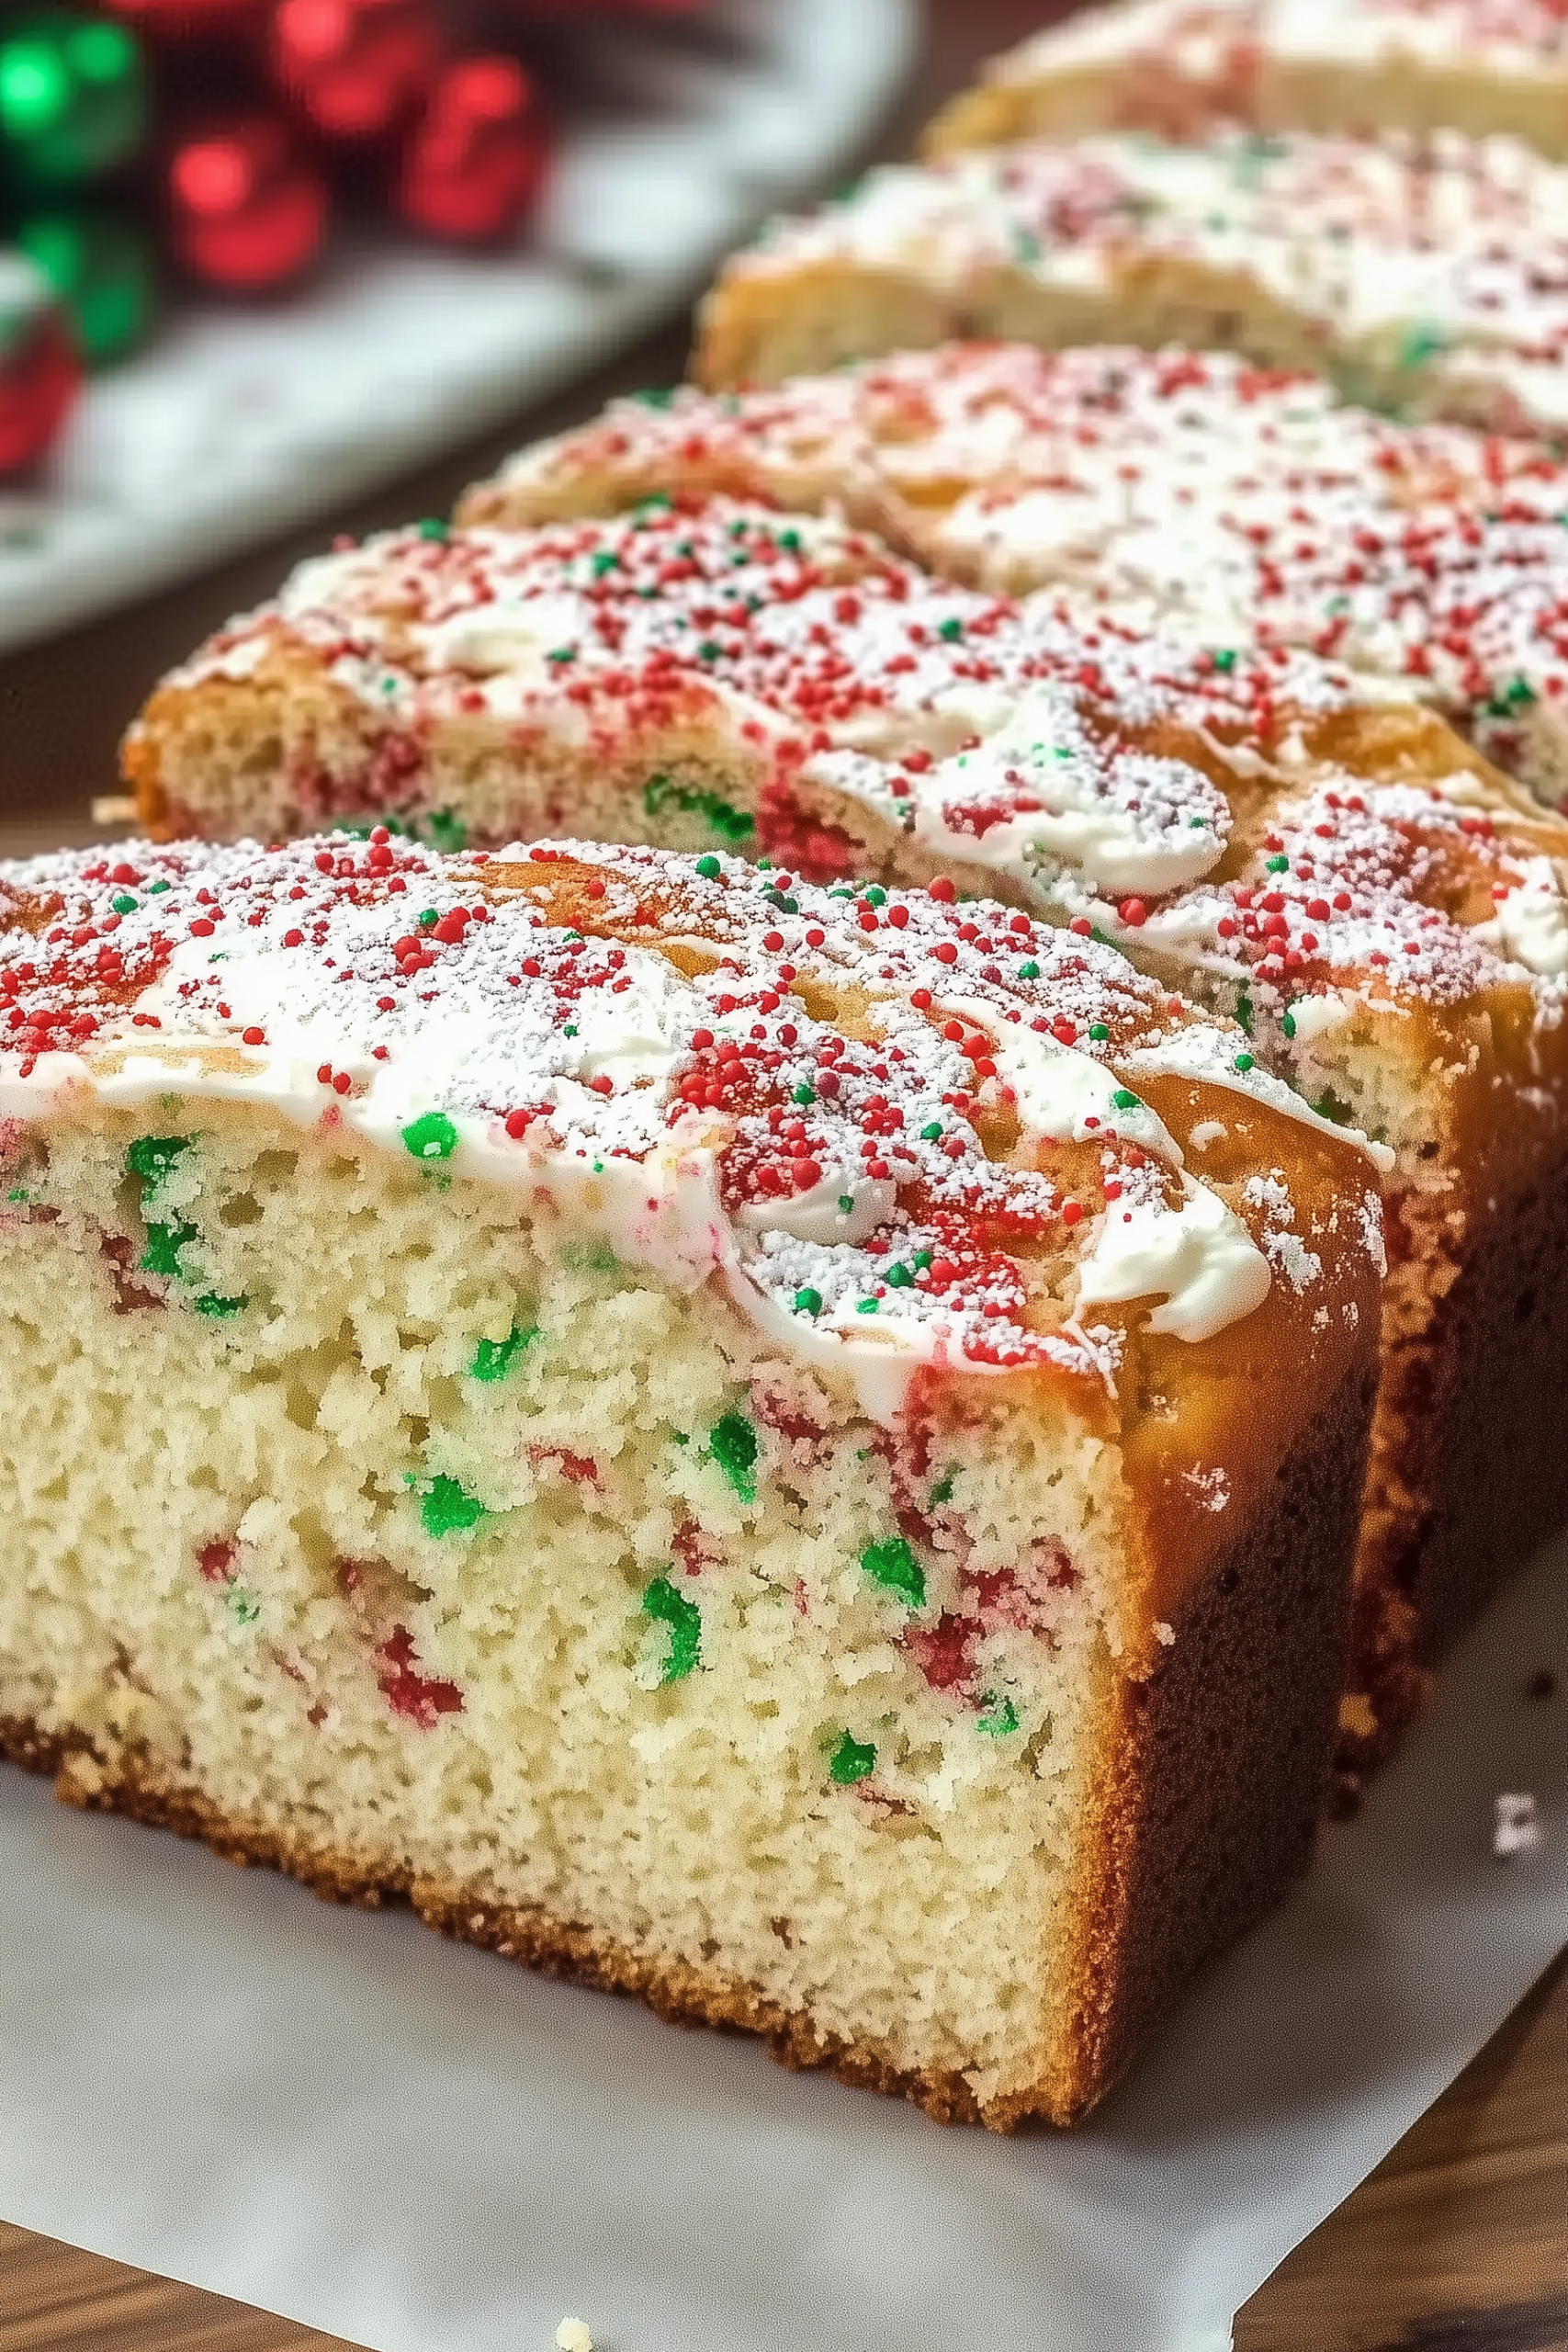
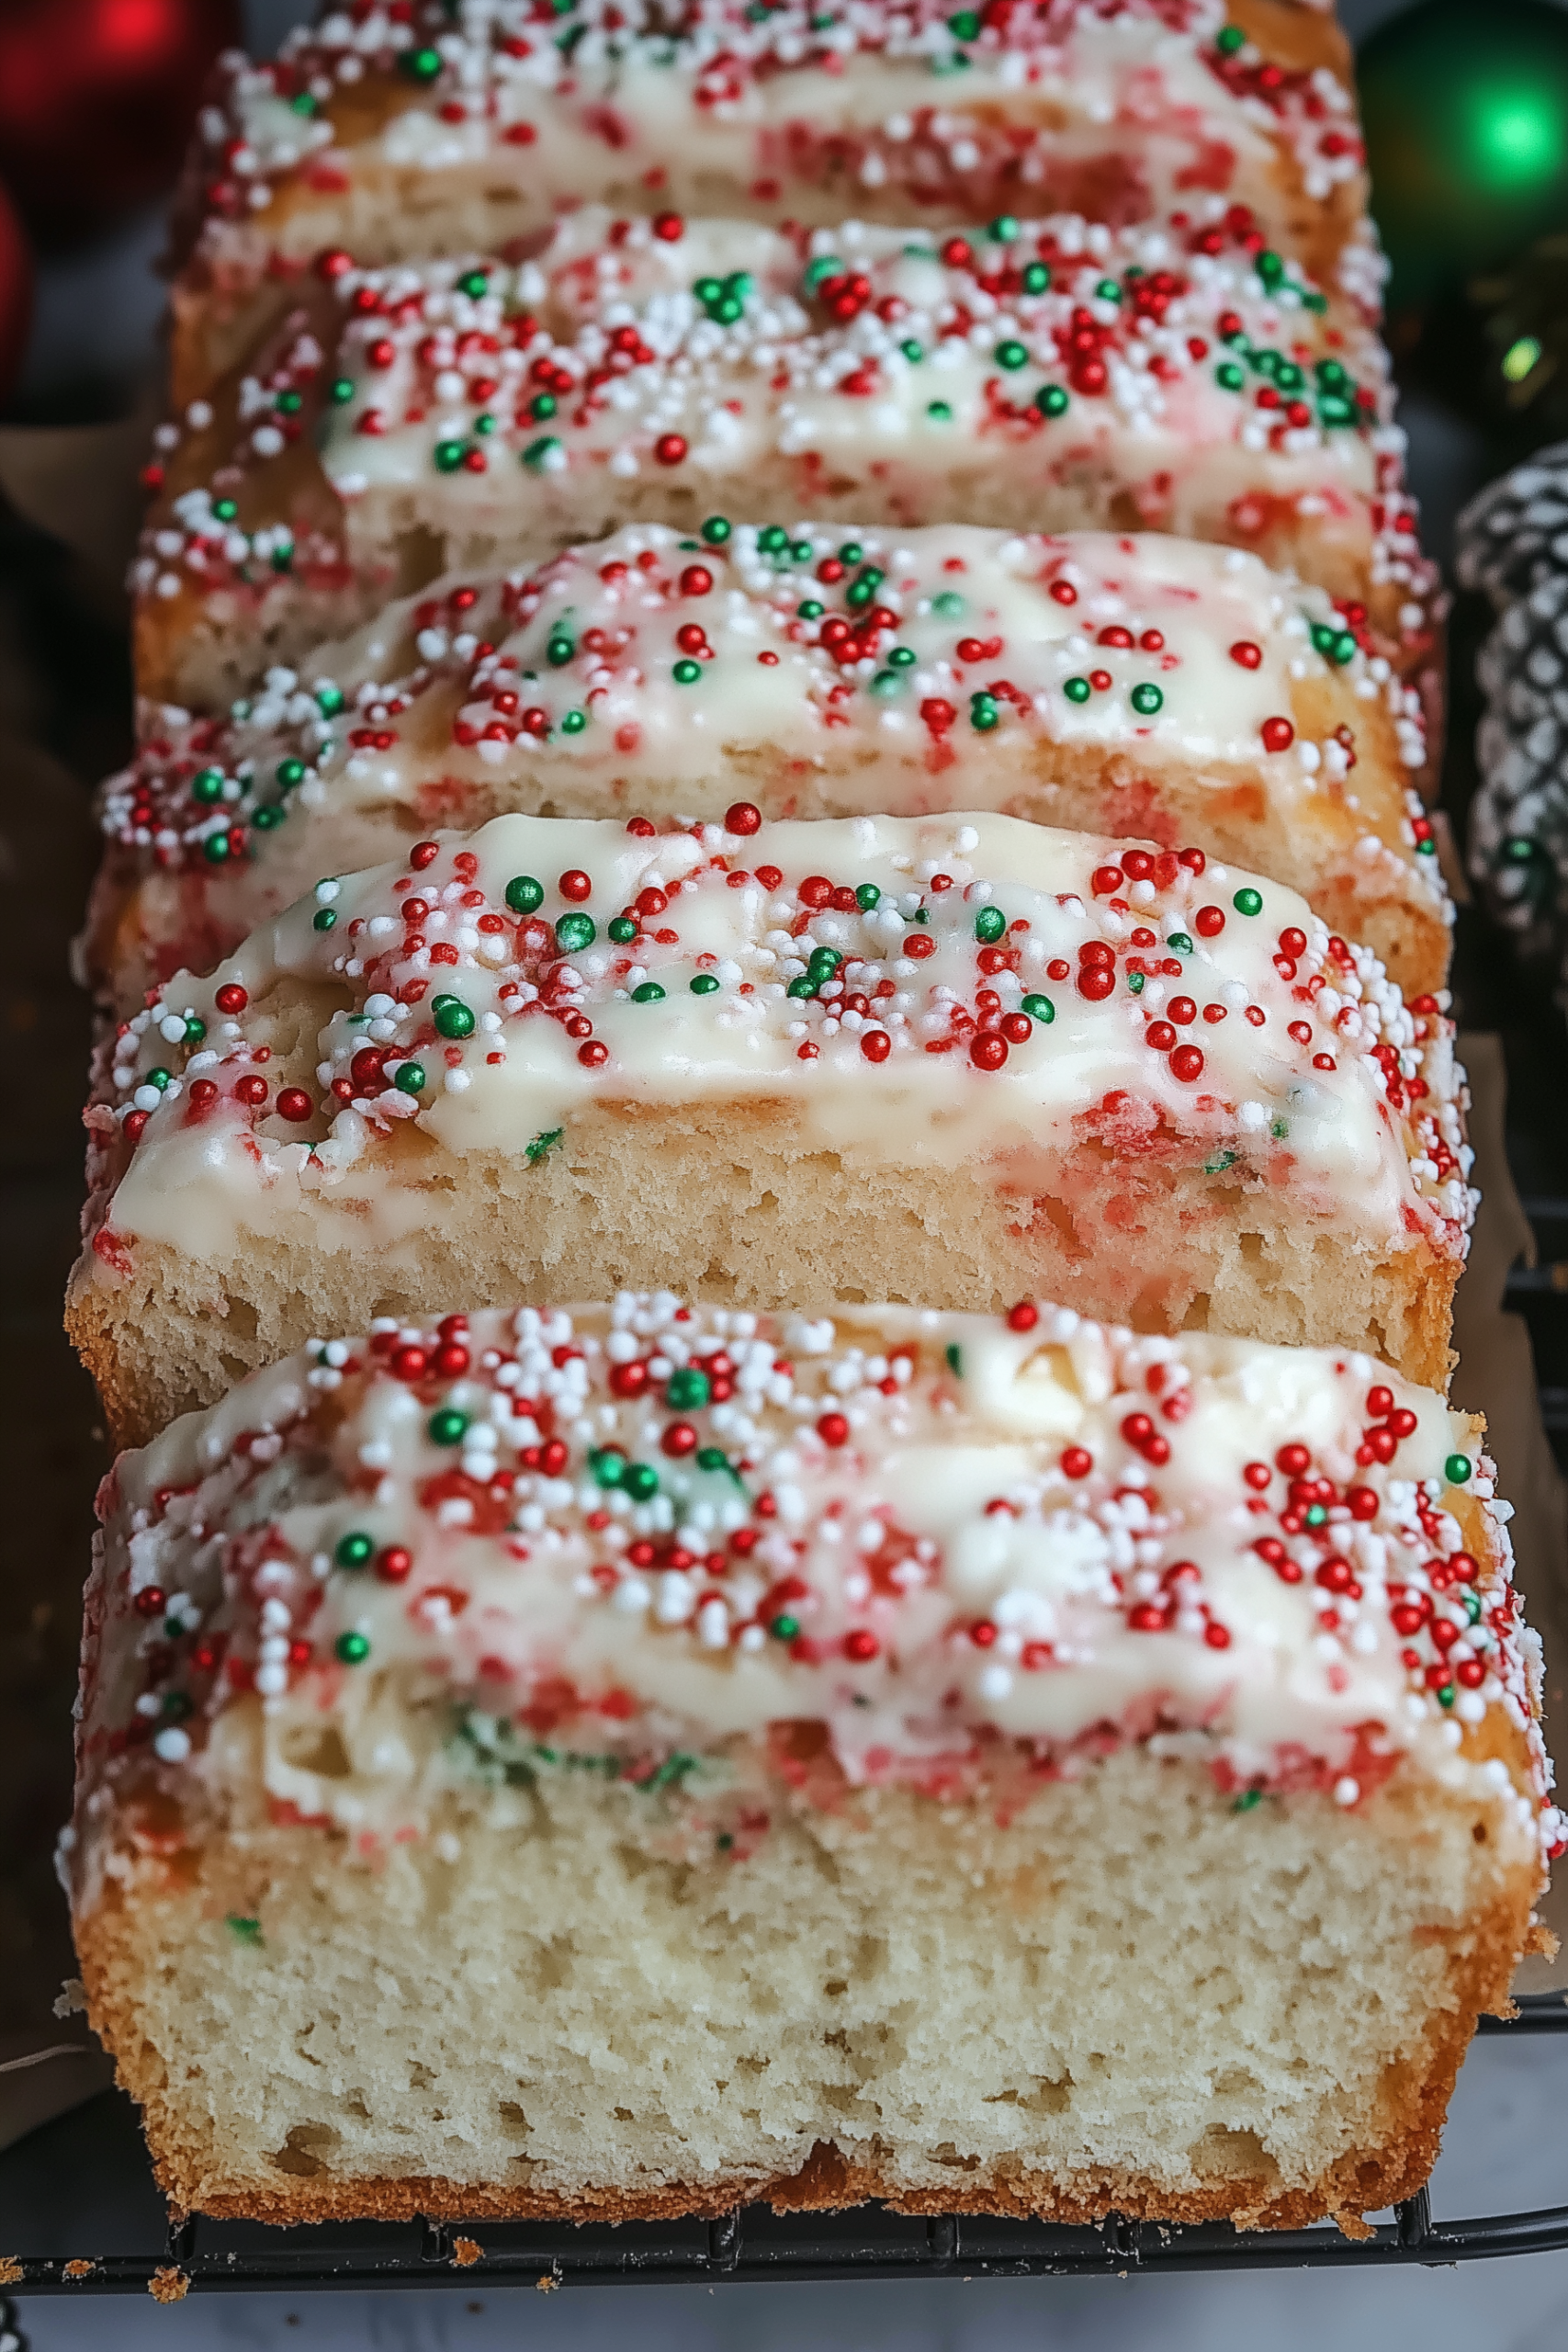
Slicing into a loaf of this vibrant Christmas bread instantly fills the kitchen with the warm, comforting aroma of sweet vanilla and rich cream. The texture is incredibly soft, pillowy, and moist, offering a melt-in-your-mouth crumb that sets a festive, joyful tone for holiday mornings. What makes this loaf truly magical is the striking swirl of festive red and green marbled throughout the slices, crowned with a thick, glossy white glaze and a celebratory shower of holiday sprinkles.
When I bring a platter of these colorful slices to our breakfast table, my kids’ faces light up with pure holiday excitement. It has become a cherished December tradition in our home, providing the perfect, quick sweet treat to enjoy while unwinding by the Christmas tree or wrapping gifts. Pairing a warm slice with a cup of hot cocoa or dark roast coffee instantly turns a standard morning into an intimate, cozy celebration that my family looks forward to all year long.
Why You’ll Love It
- Festive visual appeal: The brilliant red and green marbled swirls topped with festive nonpareils create a stunning presentation that brightens any holiday dessert table.
- Kid-approved sweetness: The combination of a tender, vanilla-infused crumb and sweet glaze makes it an instant favorite for picky young eaters.
- No-yeast quick bread: Eliminates the stress of kneading or waiting for dough to rise, coming together quickly using standard baking staples.
- Excellent gift potential: Bakes beautifully in disposable loaf pans, making it a thoughtful, delicious homemade treat to wrap up for neighbors and teachers.
- Make-ahead convenient breakfast: Can be baked completely the night before, saving you precious time on hectic holiday mornings when company arrives.
Ingredient Notes & Details
- All-purpose flour: Gives the quick bread its essential, dependable structure, holding the colorful swirls perfectly in place without sinking during the bake.
- Granulated sugar: Sweetens the loaf while locking in vital moisture to ensure the crumb remains exceptionally soft and tender for days.
- Buttermilk: The secret to an ultra-moist texture; its natural acidity breaks down gluten strands and activates the leavening agents smoothly. Swap: Mix whole milk with a teaspoon of fresh lemon juice or white vinegar if you run out.
- Vanilla extract: Infuses the entire quick bread with a warm, comforting, and authentic bakery-style aroma. Swap: Almond extract adds a lovely, festive nutty twist.
- Gel food coloring: Crucial for achieving those intense, vibrant red and green swirls without watering down the thick cake batter consistency. Swap: Liquid food coloring works, but you will need significantly more drops to achieve the bright hue.
- Powdered sugar: Melts down with a splash of milk to create the thick, snow-white glaze that securely grips the festive nonpareils.
Step-by-Step Instructions
Start by whisking together your flour, baking powder, baking soda, and salt in a large mixing bowl to ensure the leavening is perfectly distributed. In a separate bowl, cream your softened butter and sugar until the mixture looks light and fluffy. Beating the fats well incorporates essential air pockets that keep your quick bread light rather than dense. Whisk in the eggs, vanilla, and buttermilk until smooth.
Slowly fold the dry ingredients into the wet mixture. Stir gently just until the flour streaks disappear; over-mixing activates the gluten, which leads to a tough, bread-like texture instead of a cake-like crumb. Divide the thick batter evenly among three smaller bowls. Keep one bowl plain, tint one with Christmas red gel coloring, and tint the final bowl with bright green gel coloring.
Spoon alternating dollops of the plain, red, and green batters into a greased loaf pan. Grab a butter knife and gently drag it through the batter layers in a figure-eight pattern to create that gorgeous marbled effect. Bake in a preheated oven until a toothpick inserted into the center comes out completely clean.
Expert Tips
- Use gel colors: Avoid standard liquid food coloring if possible; gel provides a rich, intense holiday color without thinning the consistency of your batter.
- Do not over-swirl: Drag the knife through the batter only two or three times; over-swirling will blend the colors together, turning your beautiful loaf a muddy brown.
- Cool before glazing: Let the loaf cool completely on a wire rack before pouring the white glaze on top, or the residual heat will melt the glaze away.
- Apply sprinkles immediately: Add your red and green nonpareils the exact second you pour the glaze, as it sets quickly and needs to lock the sprinkles in place.
- Measure flour correctly: Spoon your flour into the measuring cup and level it off with a knife rather than scooping directly from the bag to prevent a dry loaf.
- Grease pan thoroughly: Line your loaf pan with parchment paper slings to easily lift the delicate bread out without ruining the sides.
Storage & Reheating
Keep your glazed holiday bread stored in an airtight container at room temperature for up to three days. If you want to keep it fresh longer, store it in the refrigerator for up to a week. To freeze, wrap the unglazed loaf tightly in plastic wrap and heavy-duty aluminum foil for up to three months; thaw completely on the counter before applying the fresh glaze and festive sprinkles.
Serving Ideas & FAQs
Serve thick, colorful slices of this sweet bread alongside a fresh fruit platter, scrambled eggs, or a cozy holiday brunch buffet spread.
Why did my colors bleed together inside the bread? This typically happens if the batter is swirled too aggressively with the knife or if the batter is too thin. Stick to a few gentle figure-eight motions to keep the marbled tracks distinct.
Can I use a different pan for this recipe? Yes, you can easily bake this batter in a standard 12-count muffin tin to create festive individual cupcakes or holiday mini loaves. Just reduce the overall baking time to 18 to 21 minutes.
Homemade Holiday Swirl Christmas Bread
Prep Time: 18 minutes
Bake Time: 48 minutes
Total Time: 1 hour 6 minutes
Servings: 8 slices
Ingredients
For the Bread:
- 2 cups all-purpose flour
- 1 teaspoon baking powder
- ½ teaspoon baking soda
- ¼ teaspoon salt
- ½ cup unsalted butter, softened
- 1 cup granulated sugar
- 2 large eggs, room temperature
- 1 teaspoon vanilla extract
- ¾ cup buttermilk
- Red and green gel food coloring
For the Glaze & Topping:
- 1 cup powdered sugar
- 2 tablespoons whole milk
- ½ teaspoon vanilla extract
- 3 tablespoons holiday sprinkles
Instructions
- Preheat your oven to 350°F. Grease an 8×4-inch loaf pan and line it with parchment paper, leaving an overhang on the sides.
- In a medium bowl, whisk together the all-purpose flour, baking powder, baking soda, and salt.
- In a large bowl, cream the softened butter and granulated sugar together with a hand mixer on medium speed until light and fluffy.
- Beat in the eggs one at a time, then add the vanilla extract and buttermilk, mixing until fully combined.
- Reduce the mixer speed to low and gradually add the dry ingredients, mixing just until the flour disappears.
- Divide the batter evenly into three separate bowls. Leave one bowl plain. Stir a few drops of red gel coloring into the second bowl, and green gel coloring into the third bowl until bright.
- Drop alternating spoonfuls of plain, red, and green batter into the prepared loaf pan.
- Drag a butter knife through the batter in a gentle figure-eight pattern twice to create the marble effect.
- Bake for 45 to 50 minutes, or until a toothpick inserted into the center of the loaf comes out clean. Cool in the pan for 10 minutes, then lift out onto a wire rack to cool completely.
- In a small bowl, whisk together the powdered sugar, milk, and vanilla extract until a thick, smooth glaze forms. Pour evenly over the cooled bread and immediately top with holiday sprinkles. Let the glaze set before slicing.
Leave a Reply