
Want to save this recipe?
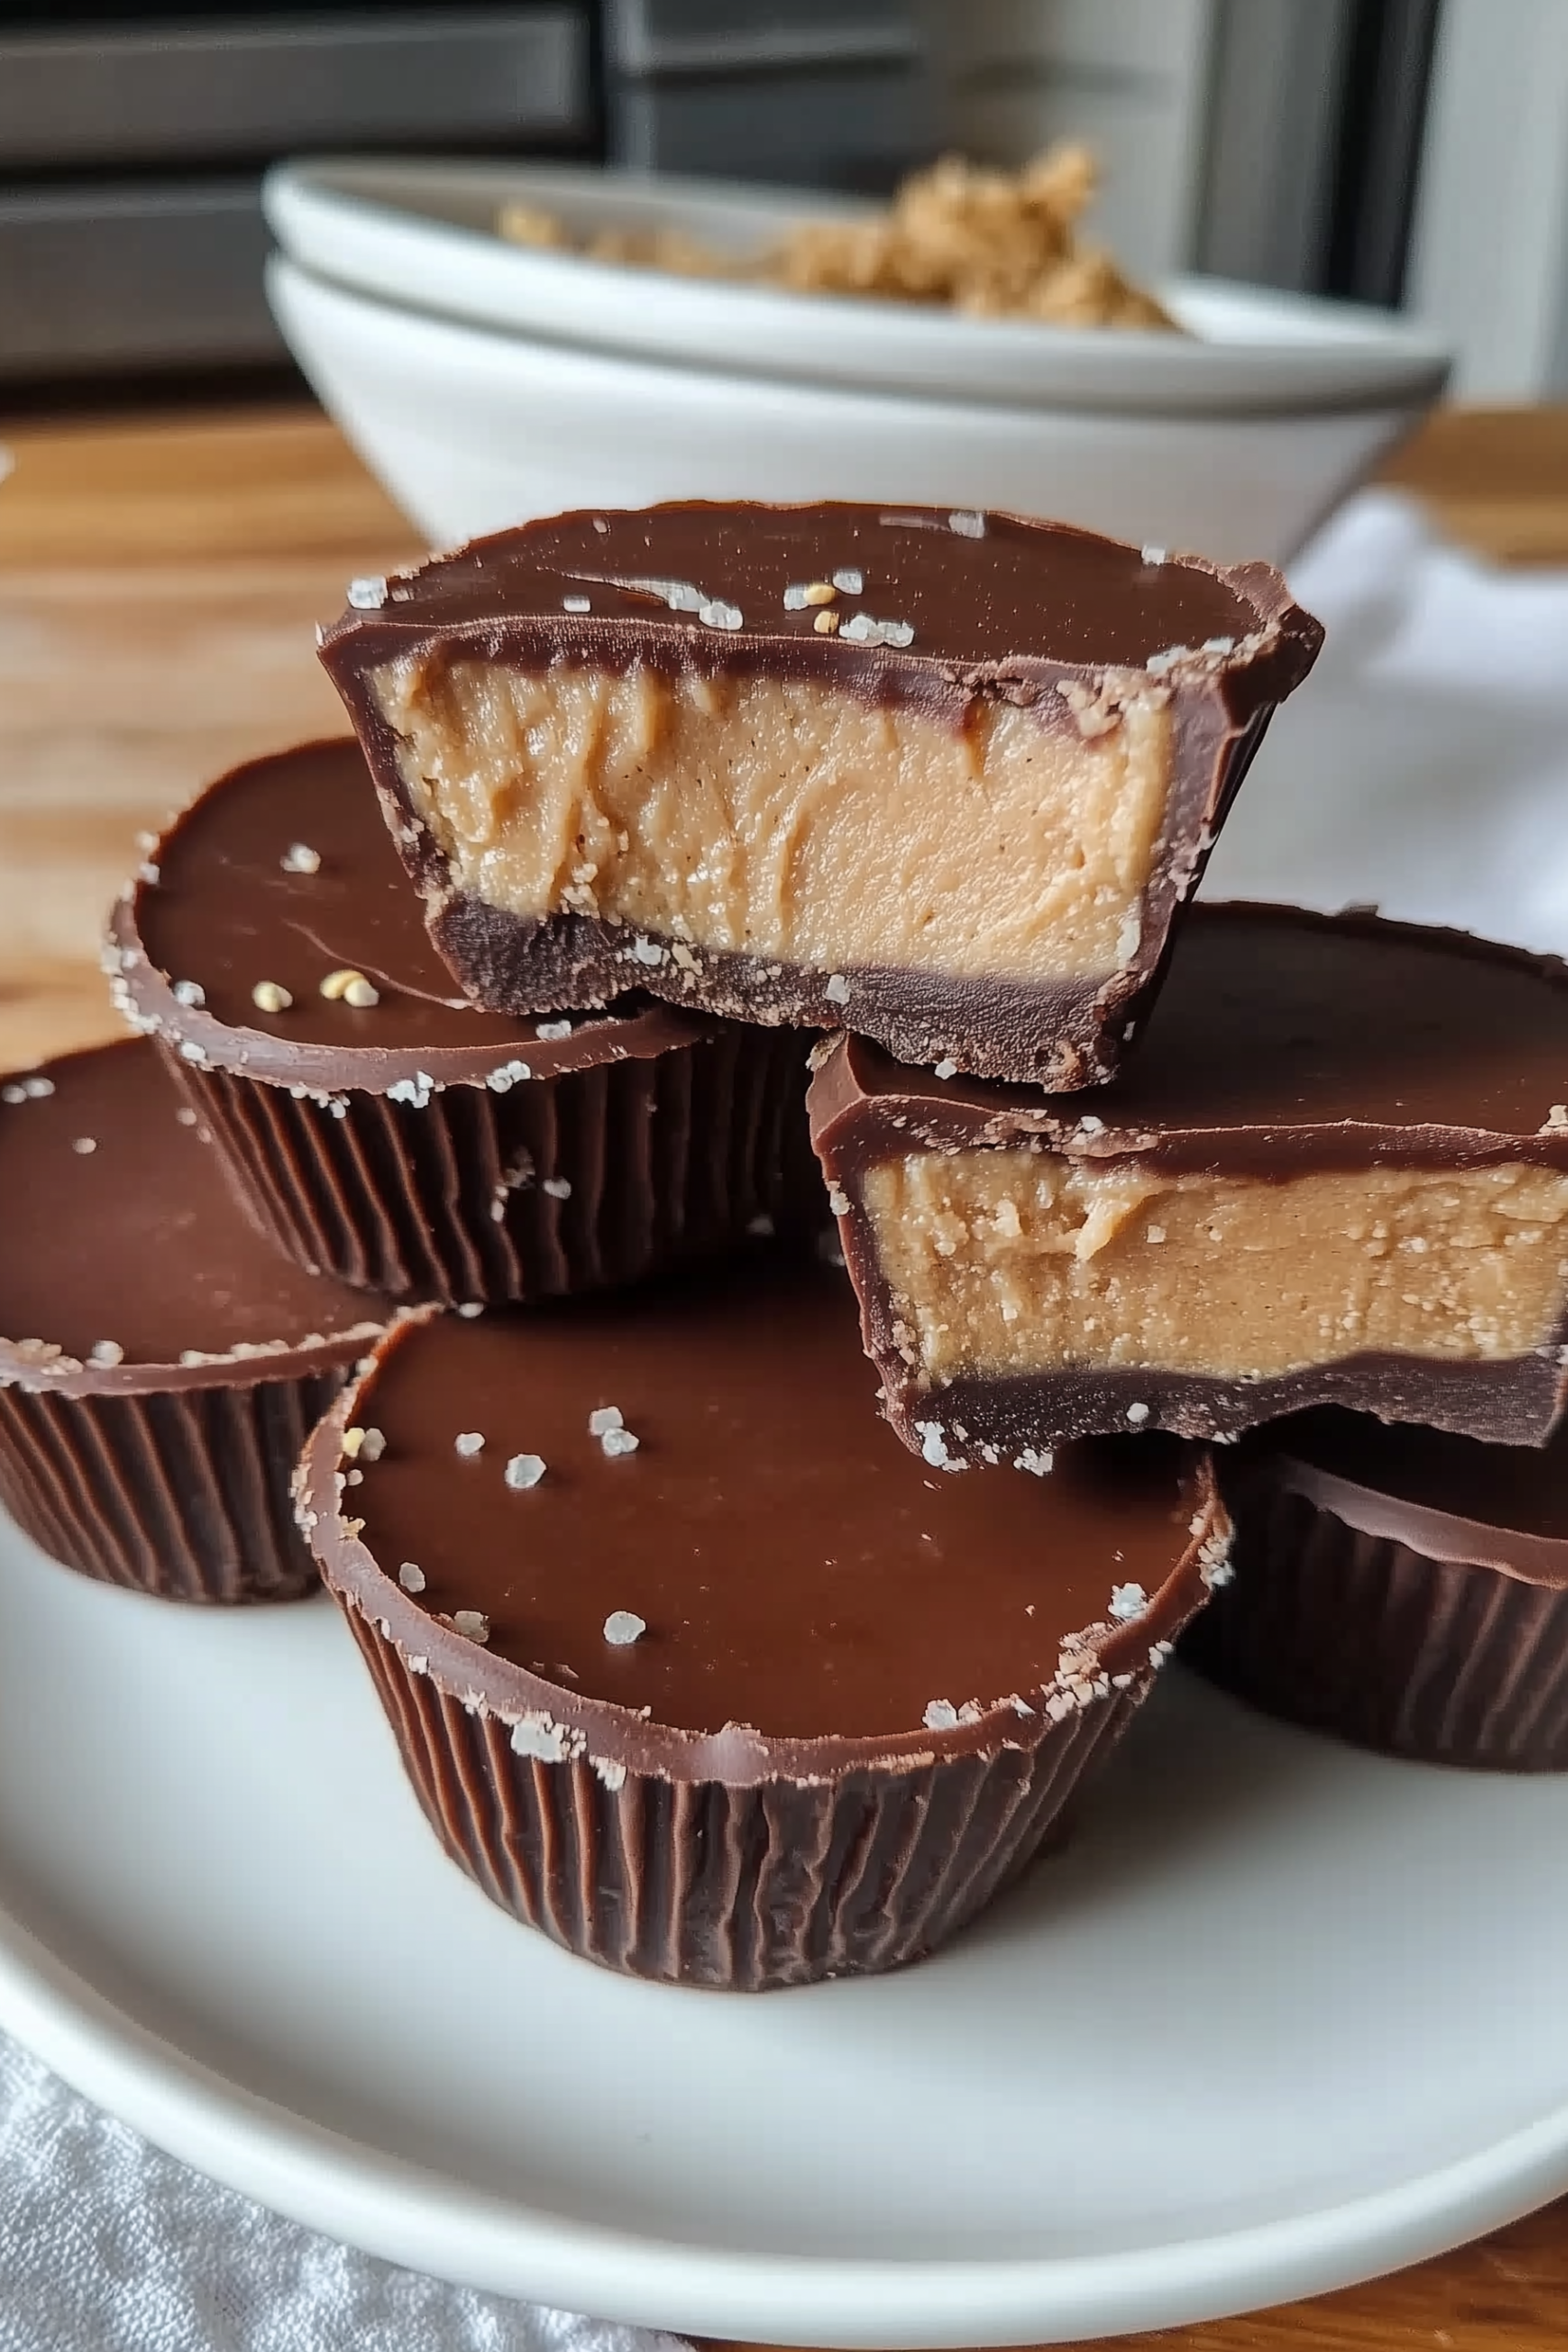
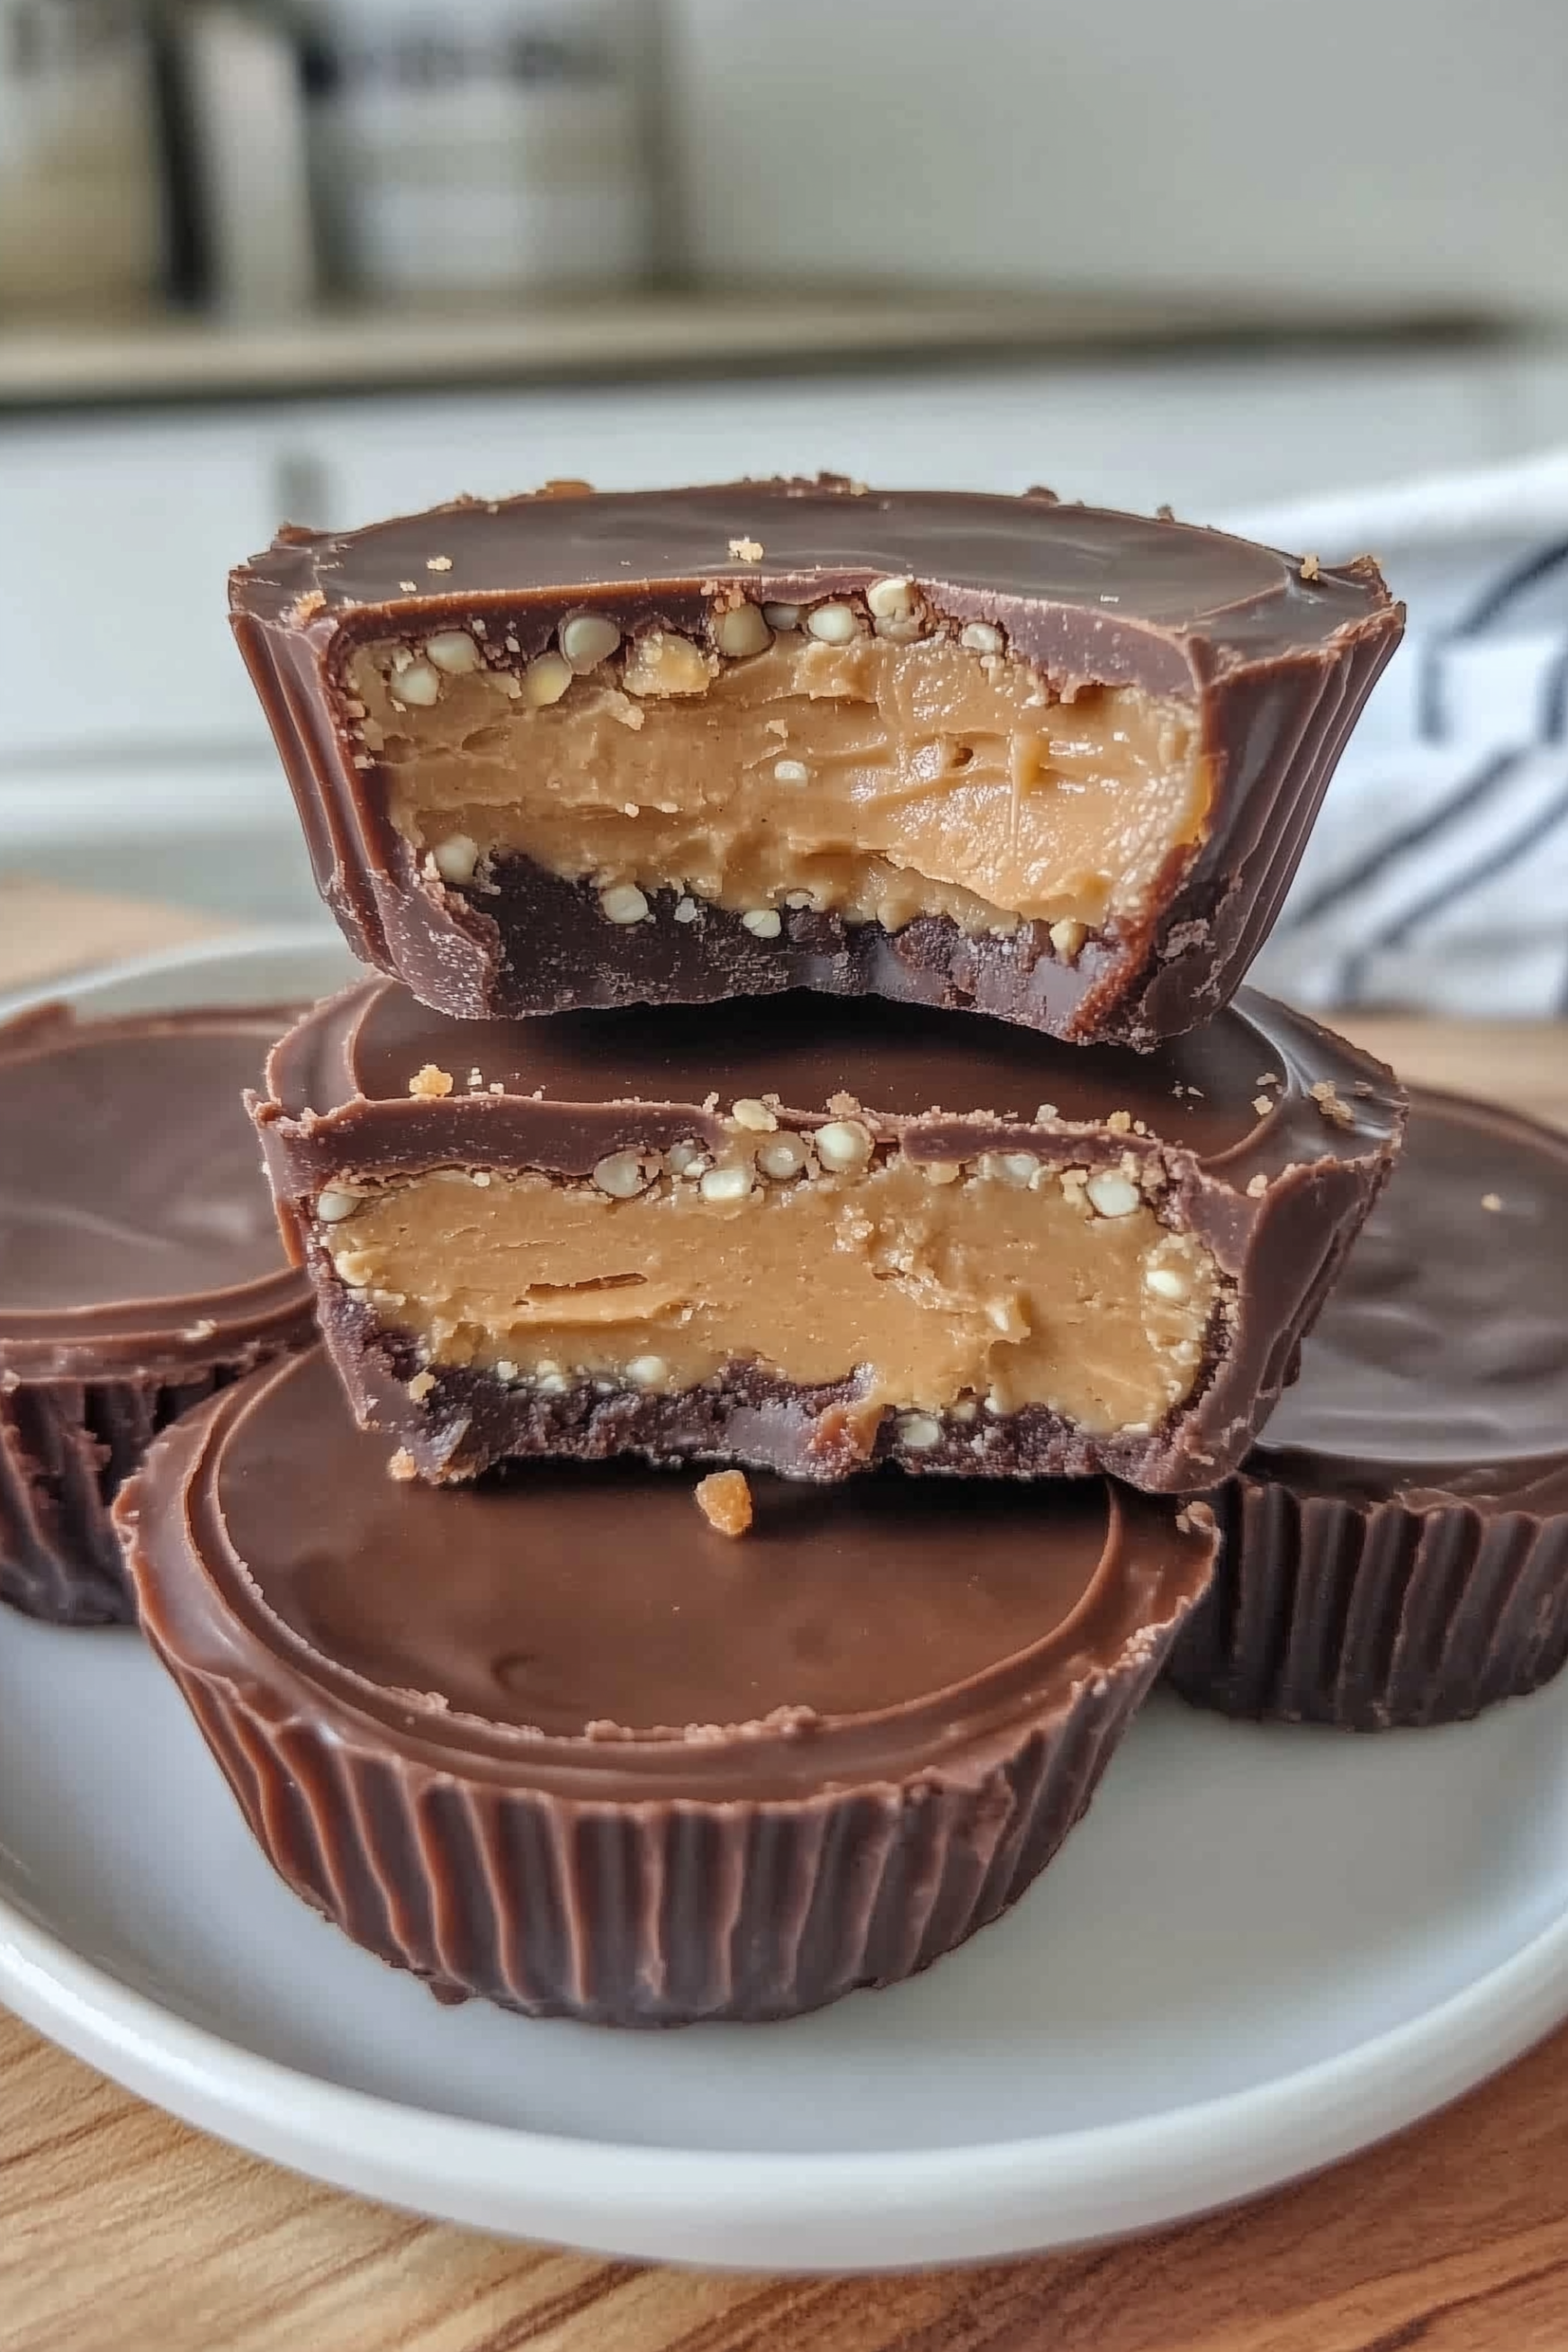
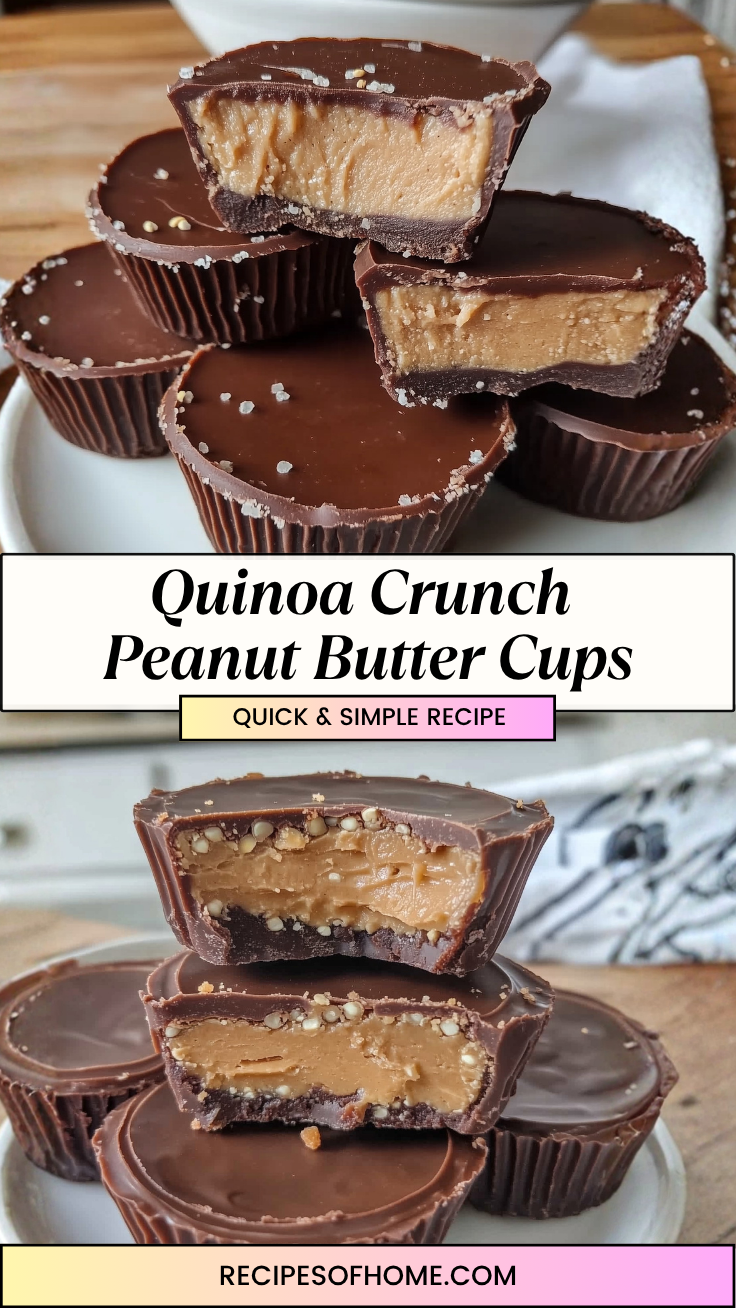
Rich, velvety dark chocolate snaps open to reveal a creamy, salted peanut butter center, all wrapped in a spectacular, crispy shell. The deep cocoa aroma takes over the kitchen the moment you melt the chocolate chips down with a touch of coconut oil. It’s a nostalgic childhood favorite reinvented with a brilliant, crispy twist that makes quick homemade treats feel incredibly gourmet.
Serving these homemade crunch cups to my family is an absolute joy, especially on warm afternoons when everyone is hunting for a cool treat. My kids love the loud, crackling texture that the toasted quinoa brings to every bite, while my husband appreciates having a cleaner, plant-based dessert stashed away in the freezer. It is a perfectly balanced, sweet-and-salty luxury that instantly elevates our weekday snack routine without ever turning on the oven.
Why You’ll Love It
- No-bake simplicity: Skip the oven entirely and assemble these treats on your kitchen counter in just minutes.
- Sneaky protein crunch: Swapping traditional puffed rice for crisped quinoa adds a hidden, nutrient-dense bite kids love.
- Picky-eater approved: Delivers that iconic, universally adored sweet and salty peanut butter cup flavor profile effortlessly.
- Perfect freezer staple: Keeps beautifully for weeks, giving you an instant, pre-portioned dessert whenever a chocolate craving strikes.
- Naturally allergen-friendly: Made completely dairy-free and plant-based, making it excellent for school lunches and sharing with friends.
Ingredient Notes & Details
- Vegan chocolate chips: Provide the rich, glossy outer shell. Use high-quality dark or semi-sweet chips for the cleanest melt.
- Creamy peanut butter: Forms the smooth, decadent center. Opt for a drippy, natural variety for easier layering.
- Crisped quinoa: The secret weapon that introduces a spectacular, light crunch throughout the chocolate layers.
- Pure maple syrup: Naturally sweetens the peanut butter filling while keeping the recipe entirely refined sugar-free.
- Coconut oil: A tiny spoonful thins out the melted chocolate, creating a silkier pour and a cleaner snap once chilled.
Natural Substitutions: If your school has a strict nut-free policy, swap the peanut butter for creamy sunflower seed butter. Exchange the crisped quinoa for toasted sesame seeds or puffed brown rice cereal for a similar light texture. You can also use agave nectar in place of the maple syrup.
Step-by-Step Instructions
We begin by melting our vegan chocolate chips alongside a spoonful of coconut oil. Heating them gently over a double boiler or in short microwave bursts ensures the chocolate stays silky smooth without seizing or scorching. Once completely melted, stir the crisped quinoa directly into the glossy chocolate pool. This distribution ensures that every single square centimeter of the outer shell gets an equal share of that signature, crackly crunch.
Spoon a thin layer of the chocolate-quinoa mixture into the bottom of your silicone muffin liners, popping them into the freezer briefly to set. Meanwhile, stir your creamy peanut butter and pure maple syrup together until smooth and thick. Drop a neat dollop of this sweet filling right into the center of each hardened chocolate base. Cover the peanut butter completely with the remaining melted chocolate, sealing the edges tightly so the creamy center doesn’t escape. Return the tray to the freezer to lock everything into a solid, beautiful, snap-worthy dessert.
Tips
- Use silicone liners: These allow you to peel the hardened chocolate cups away effortlessly without any tearing or sticking.
- Keep layers even: Tap the muffin tray gently on the counter to flatten the chocolate layers before freezing.
- Don’t overheat chocolate: Work in short 20-second bursts to prevent the cocoa fats from separating and turning chalky.
- Choose drippy peanut butter: Natural, well-stirred peanut butter creates a much smoother filling layer than stiff, processed varieties.
- Add a salt finish: Sprinkle a few flakes of coarse sea salt over the top layer right before it sets to amplify the sweet tones.
Storage & Reheating
Store these crunch cups in a single layer inside an airtight container in the freezer for up to 1 month. Because they are made with coconut oil, they will soften quickly at room temperature. Keep them frozen until the exact moment you want to serve them. No reheating is required—these are meant to be enjoyed ice-cold for the ultimate refreshing snap.
Serving & FAQs
Serve these chilled cups as a delightful afternoon pick-me-up alongside a glass of iced almond milk or chopped up as a decadent topping for vanilla bean nice-cream.
Do I need to cook the quinoa first?
No, you want to use pre-puffed or crisped quinoa cereal grains, which are already light and crunchy, rather than raw or boiled quinoa.
Can I use crunchy peanut butter instead?
Absolutely! Using crunchy peanut butter adds an extra layer of texture to the creamy center, making the cups even more satisfying.
Homemade Quinoa Crunch Peanut Butter Cups
- Prep Time: 12 minutes
- Chill Time: 23 minutes
- Total Time: 35 minutes
- Servings: 8
Ingredients
- 1.5 cups vegan chocolate chips
- ½ cup creamy peanut butter
- ½ cup crisped quinoa
- 2 tablespoons pure maple syrup
- 1 tablespoon coconut oil
- ¼ teaspoon sea salt
Instructions
- Line a muffin tin with 8 silicone liners and set aside.
- In a microwave-safe bowl, combine the vegan chocolate chips and coconut oil. Heat in 20-second intervals, stirring in between, until completely melted and smooth.
- Stir the crisped quinoa into the melted chocolate until evenly distributed.
- Spoon one tablespoon of the chocolate mixture into the bottom of each liner. Freeze for 7 minutes to set.
- In a small bowl, mix the creamy peanut butter, pure maple syrup, and sea salt together until smooth.
- Place a generous dollop of the peanut butter mixture into the center of each hardened chocolate base.
- Spoon the remaining chocolate-quinoa mixture over the peanut butter, covering it completely.
- Freeze for an additional 16 minutes until completely firm, then peel away the liners and serve chilled.
Leave a Reply