












Want to save this recipe?
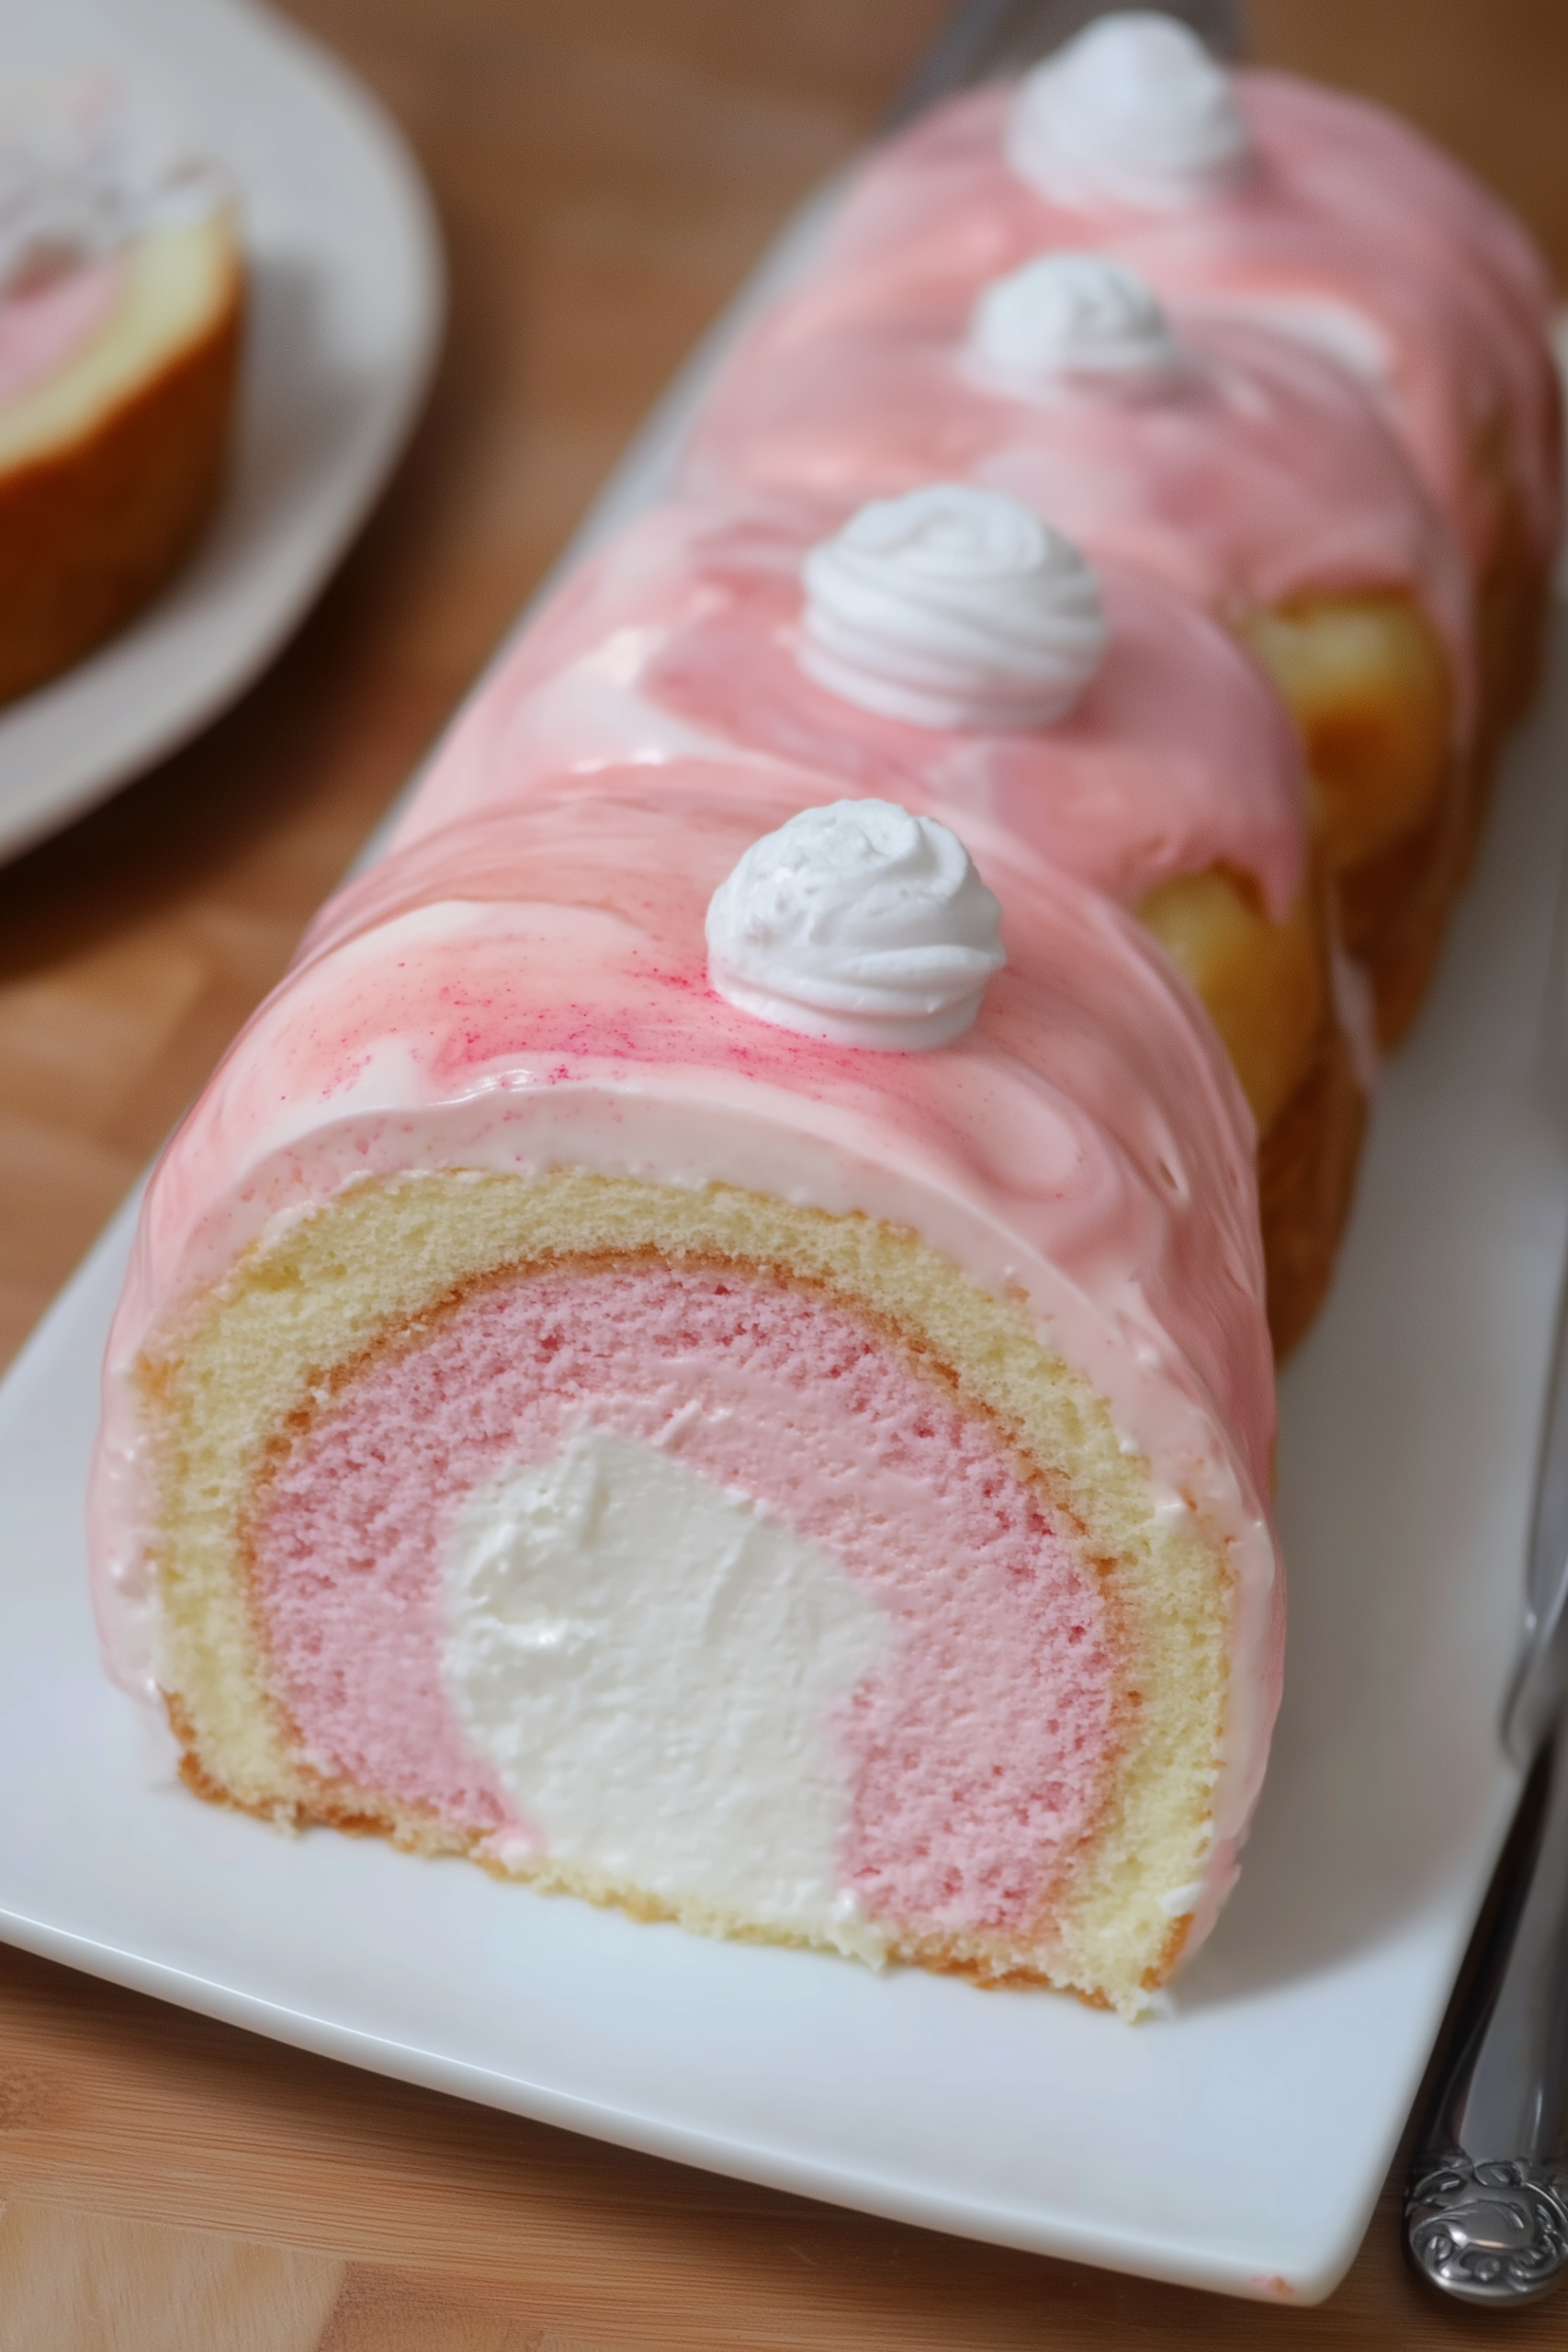
Soft, fluffy Japanese chiffon rolled with cotton candy whipped cream for a dreamy pastel dessert.
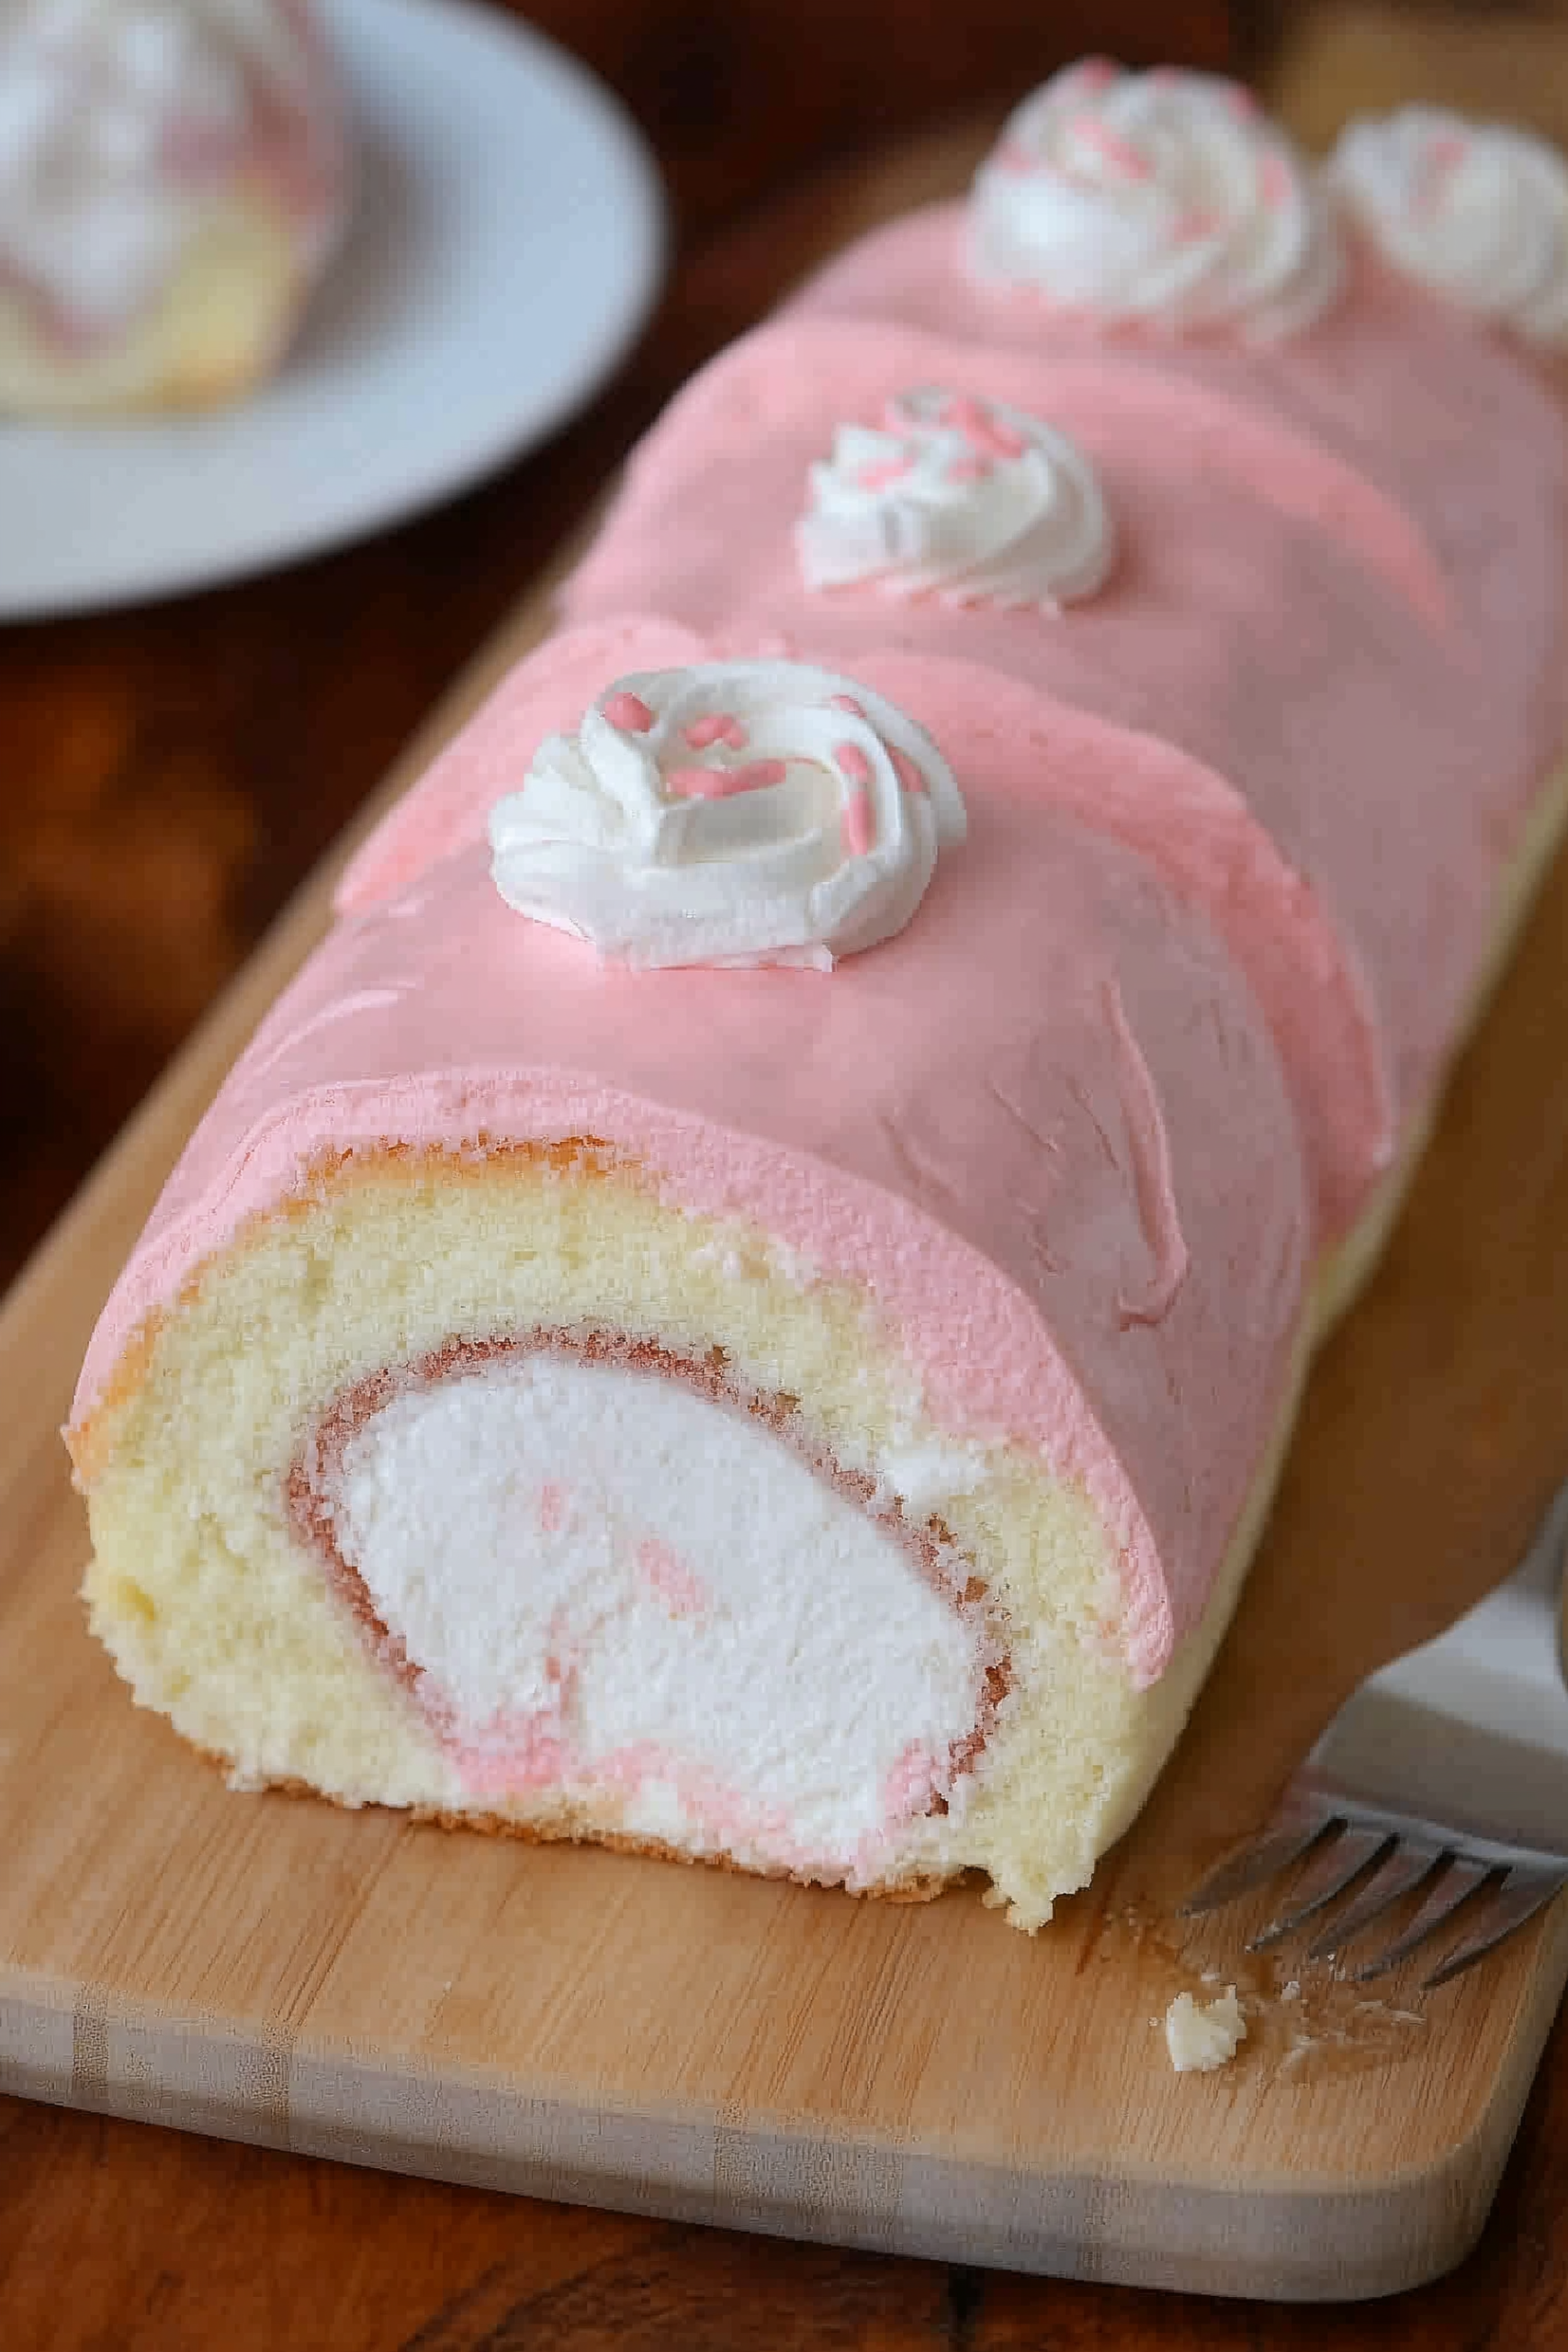
This Japanese Cotton Candy Swiss Cake Roll is everything you love about light, cloud-like Asian-style cakes with a nostalgic carnival twist. A delicate, yolk-free chiffon sponge is tinted the prettiest pink and flavored with cotton candy extract, then filled with ultra-stable cotton candy whipped cream that holds its shape beautifully.
Unlike dense Western sponge rolls, this version is subtly sweet, soft, and bouncy, with a flexible texture that resists cracking when rolled—making it ideal for beginners and special occasions alike. Serve it for Valentine’s Day, baby showers, birthdays, tea parties, or any pastel-themed celebration.
Why You’ll Love This Japanese Cotton Candy Cake Roll
- Super fluffy Japanese-style chiffon: Light, airy, and tender with a fine crumb.
- Subtle cotton candy flavor: Sweet and nostalgic without being artificial or overpowering.
- Flexible, crack-resistant roll: The tested chiffon base and technique make rolling much easier.
- Gorgeous presentation: Soft pink spiral with whipped cream looks stunning on dessert tables.
- Stable whipped cream filling: Gelatin-stabilized cream stays smooth, tall, and neat for hours.
- Customizable flavor and color: Swap extracts or gel colors to match any theme or season.
Ingredients
Dry Mix for Cake Base
- 70 g cake flour
- ¼ teaspoon sea salt
Wet Mix for Cake Base
- 90 ml whole milk
- 20 ml vegetable oil (neutral, such as canola, grapeseed, or avocado)
- 30 g granulated sugar
- ½ teaspoon cotton candy extract
Meringue
- 6 large egg whites, at room temperature
- 55 g granulated sugar
- ¼ teaspoon cream of tartar
- Gel food coloring, pink or desired color
Stabilized Cotton Candy Whipped Cream
- 1 cup heavy cream (36%+ milk fat), chilled
- 1 tablespoon + 1 teaspoon granulated sugar (to taste)
- 1 teaspoon cotton candy extract
- 1 teaspoon unflavored gelatin powder
- 4 teaspoons water
Instructions
1. Make the Cotton Candy Chiffon Cake
-
Prep the pan and oven
- Line an 8 x 12-inch (20 x 30 cm) rectangular cake pan with a silicone baking mat or parchment paper.
- Preheat oven to 325°F (160°C).
-
Combine dry ingredients
- In a large mixing bowl, sift together the cake flour and sea salt. Stir to combine and create a well in the center.
-
Combine wet ingredients
- In a small bowl, whisk together the milk, vegetable oil, 30 g sugar, and cotton candy extract until blended.
-
Make the flour batter
- Pour the wet mixture into the well in the dry ingredients.
- Whisk gently until just combined and smooth. Do not overmix to avoid developing gluten. Set aside.
-
Whip the meringue
- In a clean, dry, non-plastic mixing bowl, add the egg whites and beat on low speed until frothy.
- Add the cream of tartar and increase speed to medium.
- When the whites are opaque and the bubbles have tightened, gradually add the 55 g sugar, a little at a time.
- Increase mixer speed to medium-high and beat to soft peaks. Add a few drops of gel food coloring.
- Continue beating to stiff peaks (the tip stands straight when the whisk is lifted).
-
Fold meringue into batter
- Add the meringue to the flour batter in three additions, folding gently with a spatula each time.
- Use broad, sweeping motions, scraping from bottom to top, to keep as much air in the batter as possible.
-
Bake the cake
- Pour the batter into the prepared pan and spread evenly with an angled spatula.
- Tap the pan firmly on the counter a few times to release large air pockets.
- Bake for 10–12 minutes, or until the cake springs back lightly in the center and a skewer comes out clean.
-
Cool the cake
- Let the cake cool in the pan for 5 minutes.
- Place a cooling rack over the cake pan and invert the cake onto the rack.
- Carefully peel off the parchment or mat.
- Let the cake cool completely on the rack. The side now facing up will be the outer surface of the roll.
2. Make the Stabilized Cotton Candy Whipped Cream
-
Chill tools
- Place the mixing bowl, beaters, and cream in the refrigerator until well-chilled.
-
Bloom the gelatin
- Add 4 teaspoons water to a small heatproof cup.
- Sprinkle 1 teaspoon unflavored gelatin evenly over the water. Let sit for 5 minutes to bloom.
-
Melt the gelatin
- Place the cup in a small saucepan with gently simmering water (do not let water enter the cup).
- Heat just until the gelatin is completely dissolved and liquid. Remove the cup and let it cool to lukewarm (not hot).
-
Whip the cream
- In the chilled mixing bowl, add heavy cream and sugar.
- Whip on medium speed until the whisk starts to leave visible tracks in the cream.
-
Add gelatin and extract
- With the mixer running on medium-low, slowly pour in the cooled liquid gelatin in a thin stream, aiming between the whisk and the side of the bowl.
- Add the cotton candy extract.
- Increase speed to medium-high and whip until stiff peaks form. Do not overwhip.
-
Use immediately
- The cream should be smooth, thick, and pipeable/spreadable. Use right away to fill the cooled cake.
3. Assemble the Japanese Cotton Candy Swiss Roll
-
Prepare the cake
- Place the cooled cake on a clean sheet of parchment.
- Decide which short side you’ll roll from; that edge will get slightly more cream.
-
Spread the whipped cream
- Spread an even layer of cotton candy whipped cream over the cake, leaving a small border at the far short edge.
- Add a little extra cream along the short edge that will be rolled first to prevent gaps and cracks.
-
Roll the cake
- Using the parchment to help, gently roll the cake starting from the cream-heavy short edge.
- Apply light, even pressure as you roll, focusing on keeping the log round rather than extremely tight.
-
Wrap and chill
- Once rolled, wrap the cake log tightly in plastic wrap.
- For a rounder shape, place the wrapped log on a fresh sheet of plastic and roll again, gently shaping into a cylinder.
- Refrigerate for at least 1 hour to set.
-
Slice and serve
- Before serving, trim a thin slice off each end for a clean look.
- Slice into 8 even pieces with a sharp serrated knife, wiping the blade between cuts for neat spirals.
Tips, Storage & FAQs
Helpful Tips for Success
- Use cake flour for best texture: The lower protein content keeps the crumb soft and delicate.
- Keep bowls oil-free for meringue: Wipe bowls and beaters with a bit of lemon juice or vinegar to remove grease.
- Whip to proper peaks: Stiff peaks that stand up straight are essential for structure and lift.
- Do not overmix batter: Once liquid meets flour, mix just until combined to avoid tough cake.
- Chill tools and cream: Cold equipment helps the whipped cream whip faster and hold better shape.
- Extra cream at starting edge: More cream at the first rolled edge prevents hollow centers and cracking.
Storage
-
Refrigerator:
Store the cake roll in an airtight container in the fridge for 2–3 days. The stabilized cream helps it stay neat and round. -
Freezer:
For best texture, enjoy fresh or refrigerated. Freezing is possible but may slightly affect the whipped cream texture. If freezing, wrap tightly in plastic wrap and then foil; thaw overnight in the fridge before serving.
FAQs
Why did my cake roll crack?
Common causes include overbaking, over-handling, or using a recipe not designed for rolling. This chiffon base is formulated to stay flexible, but be sure not to overbake, avoid rolling too tightly, and add extra cream at the starting edge for cushioning.
Can I use all-purpose flour instead of cake flour?
Yes, but the cake will be slightly less tender. For best results, use cake flour or a cake/pastry flour blend.
Can I change the flavor?
Absolutely. Swap cotton candy extract for vanilla, strawberry, almond, or other bakery extracts. Just keep the liquid amount the same.
Can I use a different pan size?
This recipe is optimized for an 8 x 12-inch pan to give the ideal thickness and rollability. If using a larger pan, create a smaller “dam” with folded foil to mimic the correct size.
Do I have to stabilize the whipped cream?
Stabilizing with gelatin ensures the cream holds its shape, especially if serving later. If serving immediately, you can skip the gelatin, but the roll may be softer and less stable over time.
Final Thoughts
This Japanese Cotton Candy Swiss Cake Roll combines a feather-light chiffon sponge with whimsical cotton candy flavor for a dessert that’s as pretty as it is delicious. With a flexible, crack-resistant base and stable whipped cream filling, it’s a fantastic showpiece for parties, pastel dessert tables, and special celebrations.
Once you master this technique, you can easily adapt the recipe with different colors and flavors—turning one reliable base into an entire collection of elegant cake rolls.
📖 Recipe
Japanese Cotton Candy Swiss Cake Roll
Ingredients
Dry Mix for Cake Base
- 70 g cake flour
- ¼ teaspoon sea salt
Wet Mix for Cake Base
- 90 ml whole milk
- 20 ml vegetable oil neutral, such as canola, grapeseed, or avocado
- 30 g granulated sugar
- ½ teaspoon cotton candy extract
Meringue
- 6 large egg whites at room temperature
- 55 g granulated sugar
- ¼ teaspoon cream of tartar
- Gel food coloring pink or desired color
Stabilized Cotton Candy Whipped Cream
- 1 cup heavy cream 36%+ milk fat, chilled
- 1 tablespoon + 1 teaspoon granulated sugar to taste
- 1 teaspoon cotton candy extract
- 1 teaspoon unflavored gelatin powder
- 4 teaspoons water
Instructions
Make the Cotton Candy Chiffon Cake
- Prep the pan and oven
- Line an 8 x 12-inch (20 x 30 cm) rectangular cake pan with a silicone baking mat or parchment paper.
- Preheat oven to 325°F (160°C).
Combine dry ingredients
- In a large mixing bowl, sift together the cake flour and sea salt. Stir to combine and create a well in the center.
Combine wet ingredients
- In a small bowl, whisk together the milk, vegetable oil, 30 g sugar, and cotton candy extract until blended.
Make the flour batter
- Pour the wet mixture into the well in the dry ingredients.
- Whisk gently until just combined and smooth. Do not overmix to avoid developing gluten. Set aside.
Whip the meringue
- In a clean, dry, non-plastic mixing bowl, add the egg whites and beat on low speed until frothy.
- Add the cream of tartar and increase speed to medium.
- When the whites are opaque and the bubbles have tightened, gradually add the 55 g sugar, a little at a time.
- Increase mixer speed to medium-high and beat to soft peaks. Add a few drops of gel food coloring.
- Continue beating to stiff peaks (the tip stands straight when the whisk is lifted).
Fold meringue into batter
- Add the meringue to the flour batter in three additions, folding gently with a spatula each time.
- Use broad, sweeping motions, scraping from bottom to top, to keep as much air in the batter as possible.
Bake the cake
- Pour the batter into the prepared pan and spread evenly with an angled spatula.
- Tap the pan firmly on the counter a few times to release large air pockets.
- Bake for 10–12 minutes, or until the cake springs back lightly in the center and a skewer comes out clean.
Cool the cake
- Let the cake cool in the pan for 5 minutes.
- Place a cooling rack over the cake pan and invert the cake onto the rack.
- Carefully peel off the parchment or mat.
- Let the cake cool completely on the rack. The side now facing up will be the outer surface of the roll.
- Make the Stabilized Cotton Candy Whipped Cream
Chill tools
- Place the mixing bowl, beaters, and cream in the refrigerator until well-chilled.
Bloom the gelatin
- Add 4 teaspoons water to a small heatproof cup.
- Sprinkle 1 teaspoon unflavored gelatin evenly over the water. Let sit for 5 minutes to bloom.
Melt the gelatin
- Place the cup in a small saucepan with gently simmering water (do not let water enter the cup).
- Heat just until the gelatin is completely dissolved and liquid. Remove the cup and let it cool to lukewarm (not hot).
Whip the cream
- In the chilled mixing bowl, add heavy cream and sugar.
- Whip on medium speed until the whisk starts to leave visible tracks in the cream.
Add gelatin and extract
- With the mixer running on medium-low, slowly pour in the cooled liquid gelatin in a thin stream, aiming between the whisk and the side of the bowl.
Add the cotton candy extract.
- Increase speed to medium-high and whip until stiff peaks form. Do not overwhip.
Use immediately
- The cream should be smooth, thick, and pipeable/spreadable. Use right away to fill the cooled cake.
- Assemble the Japanese Cotton Candy Swiss Roll
Prepare the cake
- Place the cooled cake on a clean sheet of parchment.
- Decide which short side you’ll roll from; that edge will get slightly more cream.
Spread the whipped cream
- Spread an even layer of cotton candy whipped cream over the cake, leaving a small border at the far short edge.
- Add a little extra cream along the short edge that will be rolled first to prevent gaps and cracks.
Roll the cake
- Using the parchment to help, gently roll the cake starting from the cream-heavy short edge.
- Apply light, even pressure as you roll, focusing on keeping the log round rather than extremely tight.
Wrap and chill
- Once rolled, wrap the cake log tightly in plastic wrap.
- For a rounder shape, place the wrapped log on a fresh sheet of plastic and roll again, gently shaping into a cylinder.
- Refrigerate for at least 1 hour to set.
Slice and serve
- Before serving, trim a thin slice off each end for a clean look.
- Slice into 8 even pieces with a sharp serrated knife, wiping the blade between cuts for neat spirals.
Notes



Leave a Reply