

Want to save this recipe?
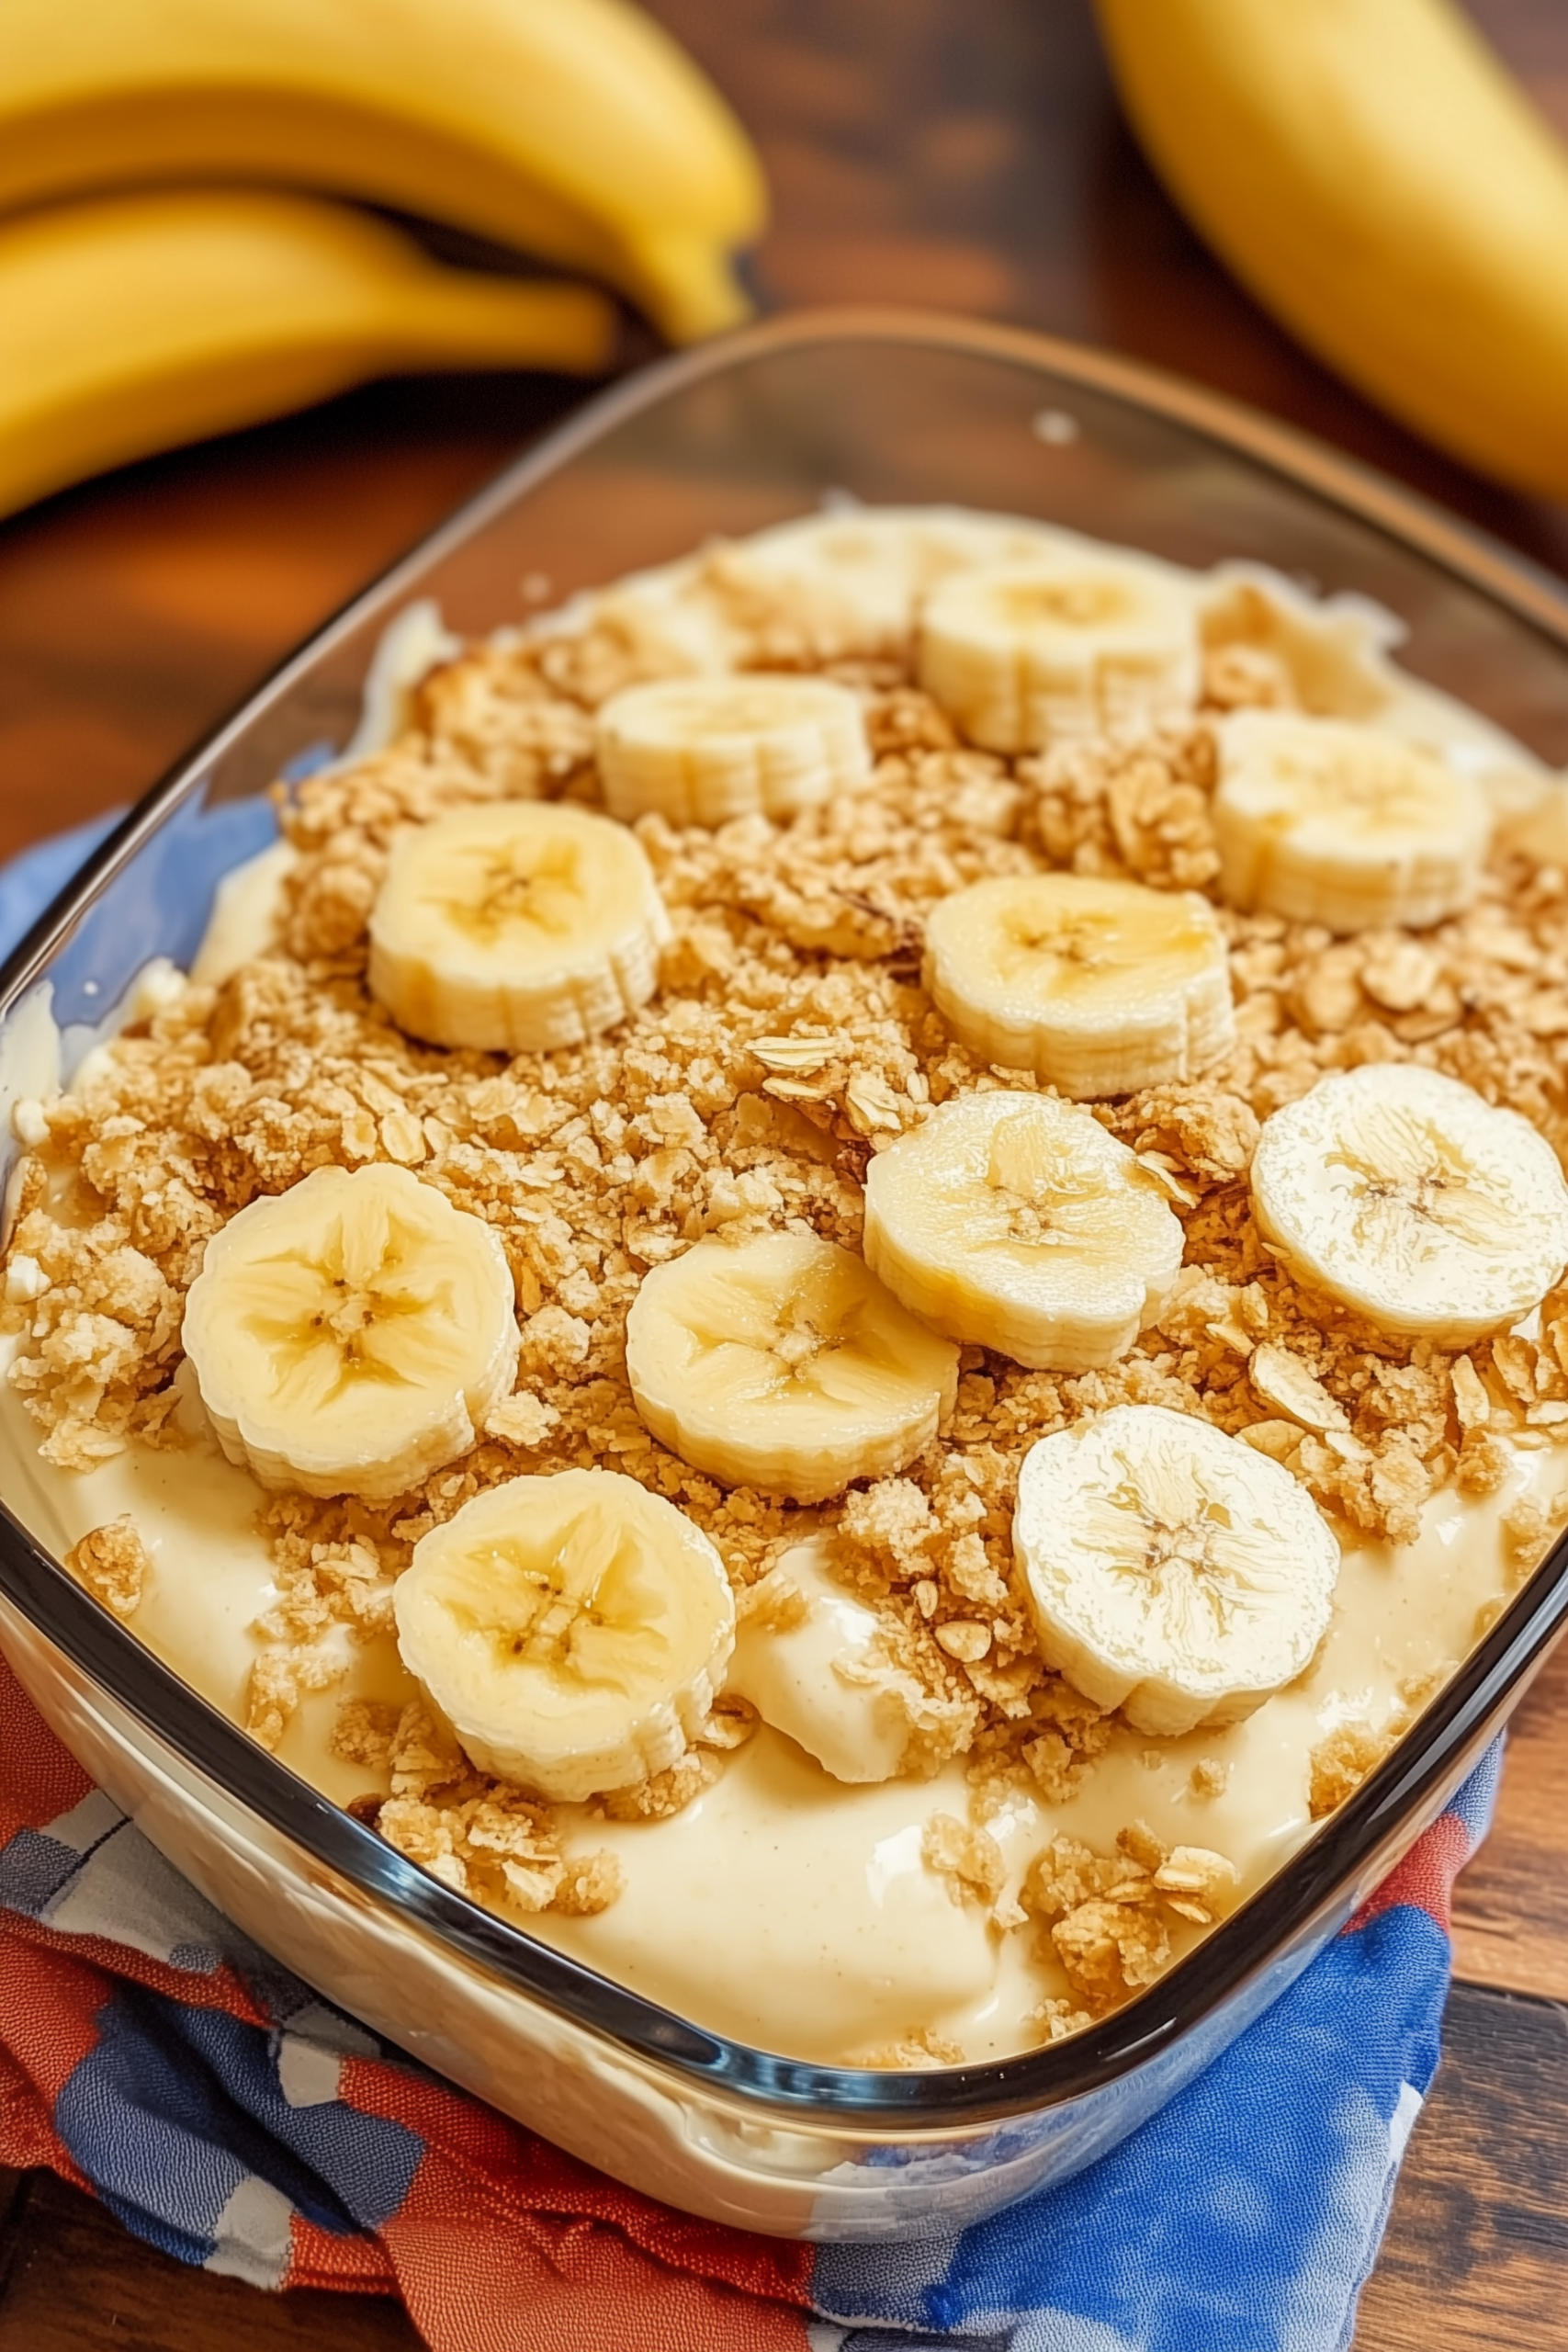
Some desserts never go out of style, and Old-Fashioned Homemade Banana Pudding is one of them. For many of us, banana pudding brings back sweet memories of summer picnics, church potlucks, or family gatherings where the scent of vanilla and fresh bananas filled the air. Inspired by my grandmother’s tried-and-true recipe, this American classic layers crisp vanilla wafers, creamy homemade pudding, and perfectly ripe bananas for a dessert that is comforting, nostalgic, and simply irresistible.
Unlike the shortcut versions made with boxed pudding, this recipe is entirely from scratch, delivering a smooth, velvety custard that’s well worth the effort. Whether you serve it in the heat of summer or as a cozy winter dessert, this banana pudding promises a homemade taste that will transport you straight back to childhood.
Why You’ll Love This Old-Fashioned Homemade Banana Pudding
- Made from scratch with real eggs and milk
- Layers of creamy vanilla pudding, fresh banana slices, and crunchy vanilla wafers
- Perfect for potlucks, holidays, or weeknight treats
- Easy to prepare ahead of time
- Comforting, familiar flavors that everyone will love

Ingredients
This recipe yields approximately 8 servings:
- ¾ cup sugar
- ¼ cup all-purpose flour
- ¼ teaspoon salt
- 3 cups milk
- 3 large eggs
- 2 teaspoons vanilla extract
- 1 box vanilla wafers (about 8 oz)
- 4 ripe bananas, sliced
How to Make Old-Fashioned Homemade Banana Pudding
Prep time: 15 minutes
Cook time: 15 minutes
Chill time: 4 hours (or overnight)
1. Prepare the Custard
In a medium saucepan, whisk together the sugar, flour, and salt. Slowly pour in the milk, stirring constantly until fully combined. Place the saucepan over medium heat, cooking and whisking regularly until the mixture begins to thicken and bubble. Once thickened, reduce the heat to low and continue to cook for another 2 minutes. Remove the pan from heat.
In a separate small bowl, beat the eggs. To temper them and prevent curdling, whisk a small amount of the hot pudding mixture into the eggs. Then slowly pour the egg mixture back into the saucepan with the rest of the pudding, stirring continuously. Return the pan to medium heat and bring the custard to a gentle boil, cooking for an additional 2 minutes until thick and glossy. Remove from the heat and stir in the vanilla extract. Allow the custard to cool for about 15 minutes, stirring occasionally.
2. Assemble the Banana Pudding
In an ungreased 8-inch square baking dish, arrange about 25 vanilla wafers on the bottom in a single layer. Add half of the banana slices on top of the wafers. Pour half of the warm pudding mixture over the bananas, spreading evenly with a spatula.
Repeat the layers with the remaining vanilla wafers, bananas, and pudding, ending with the final layer of pudding on top.
3. Chill and Serve
Cover the dish tightly with plastic wrap, making sure the wrap touches the surface of the pudding to prevent a skin from forming. Place the dish in the refrigerator for at least 4 hours, preferably overnight, to allow the flavors to develop and the pudding to set.
Before serving, crush the remaining vanilla wafers and sprinkle them on top for extra crunch and a decorative finish. Serve cold and enjoy the creamy, nostalgic taste of this homemade dessert.
Storage Tips
- Refrigerator: Store tightly covered for up to 3 days
- Freezer: Not recommended, as bananas will turn mushy
- Make ahead: This pudding tastes best after chilling overnight
Flavor Variations
If you want to add a twist to the classic, try one of these variations:
- Caramel Banana Pudding: Drizzle caramel sauce between the layers
- Chocolate Banana Pudding: Add a thin layer of chocolate ganache between the pudding layers
- Nutty Banana Pudding: Sprinkle chopped pecans or walnuts on top for a bit of crunch
Tips for Success
- Use fully ripe bananas for the best flavor and sweetness
- Stir the custard frequently while cooking to prevent scorching
- Always temper the eggs with a bit of hot custard before adding them back in
- For the most nostalgic flavor, stick with classic vanilla wafers rather than fancy cookies
Serving Suggestions
- Perfect for summer picnics, BBQs, or church gatherings
- A comforting dessert for winter holiday tables
- Serve in individual jars for a fun party presentation
- Top with fresh whipped cream if desired
Share Your Experience
If you try this Old-Fashioned Homemade Banana Pudding, I’d love to hear about it. Did you stick to the classic, or add your own twist? Share your version and leave a comment to let me know how it turned out. Your memories and kitchen stories make this dessert even sweeter.
📖 Recipe

Old-Fashioned Homemade Banana Pudding
Ingredients
- ¾ cup sugar
- ¼ cup all-purpose flour
- ¼ teaspoon salt
- 3 cups milk
- 3 large eggs
- 2 teaspoons vanilla extract
- 1 box vanilla wafers about 8 oz
- 4 ripe bananas sliced
Instructions
Prepare the Custard
- In a medium saucepan, whisk together the sugar, flour, and salt. Slowly pour in the milk, stirring constantly until fully combined. Place the saucepan over medium heat, cooking and whisking regularly until the mixture begins to thicken and bubble. Once thickened, reduce the heat to low and continue to cook for another 2 minutes. Remove the pan from heat.
- In a separate small bowl, beat the eggs. To temper them and prevent curdling, whisk a small amount of the hot pudding mixture into the eggs. Then slowly pour the egg mixture back into the saucepan with the rest of the pudding, stirring continuously. Return the pan to medium heat and bring the custard to a gentle boil, cooking for an additional 2 minutes until thick and glossy. Remove from the heat and stir in the vanilla extract. Allow the custard to cool for about 15 minutes, stirring occasionally.
Assemble the Banana Pudding
- In an ungreased 8-inch square baking dish, arrange about 25 vanilla wafers on the bottom in a single layer. Add half of the banana slices on top of the wafers. Pour half of the warm pudding mixture over the bananas, spreading evenly with a spatula.
- Repeat the layers with the remaining vanilla wafers, bananas, and pudding, ending with the final layer of pudding on top.
Chill and Serve
- Cover the dish tightly with plastic wrap, making sure the wrap touches the surface of the pudding to prevent a skin from forming. Place the dish in the refrigerator for at least 4 hours, preferably overnight, to allow the flavors to develop and the pudding to set.
- Before serving, crush the remaining vanilla wafers and sprinkle them on top for extra crunch and a decorative finish. Serve cold and enjoy the creamy, nostalgic taste of this homemade dessert.


Leave a Reply