












Want to save this recipe?
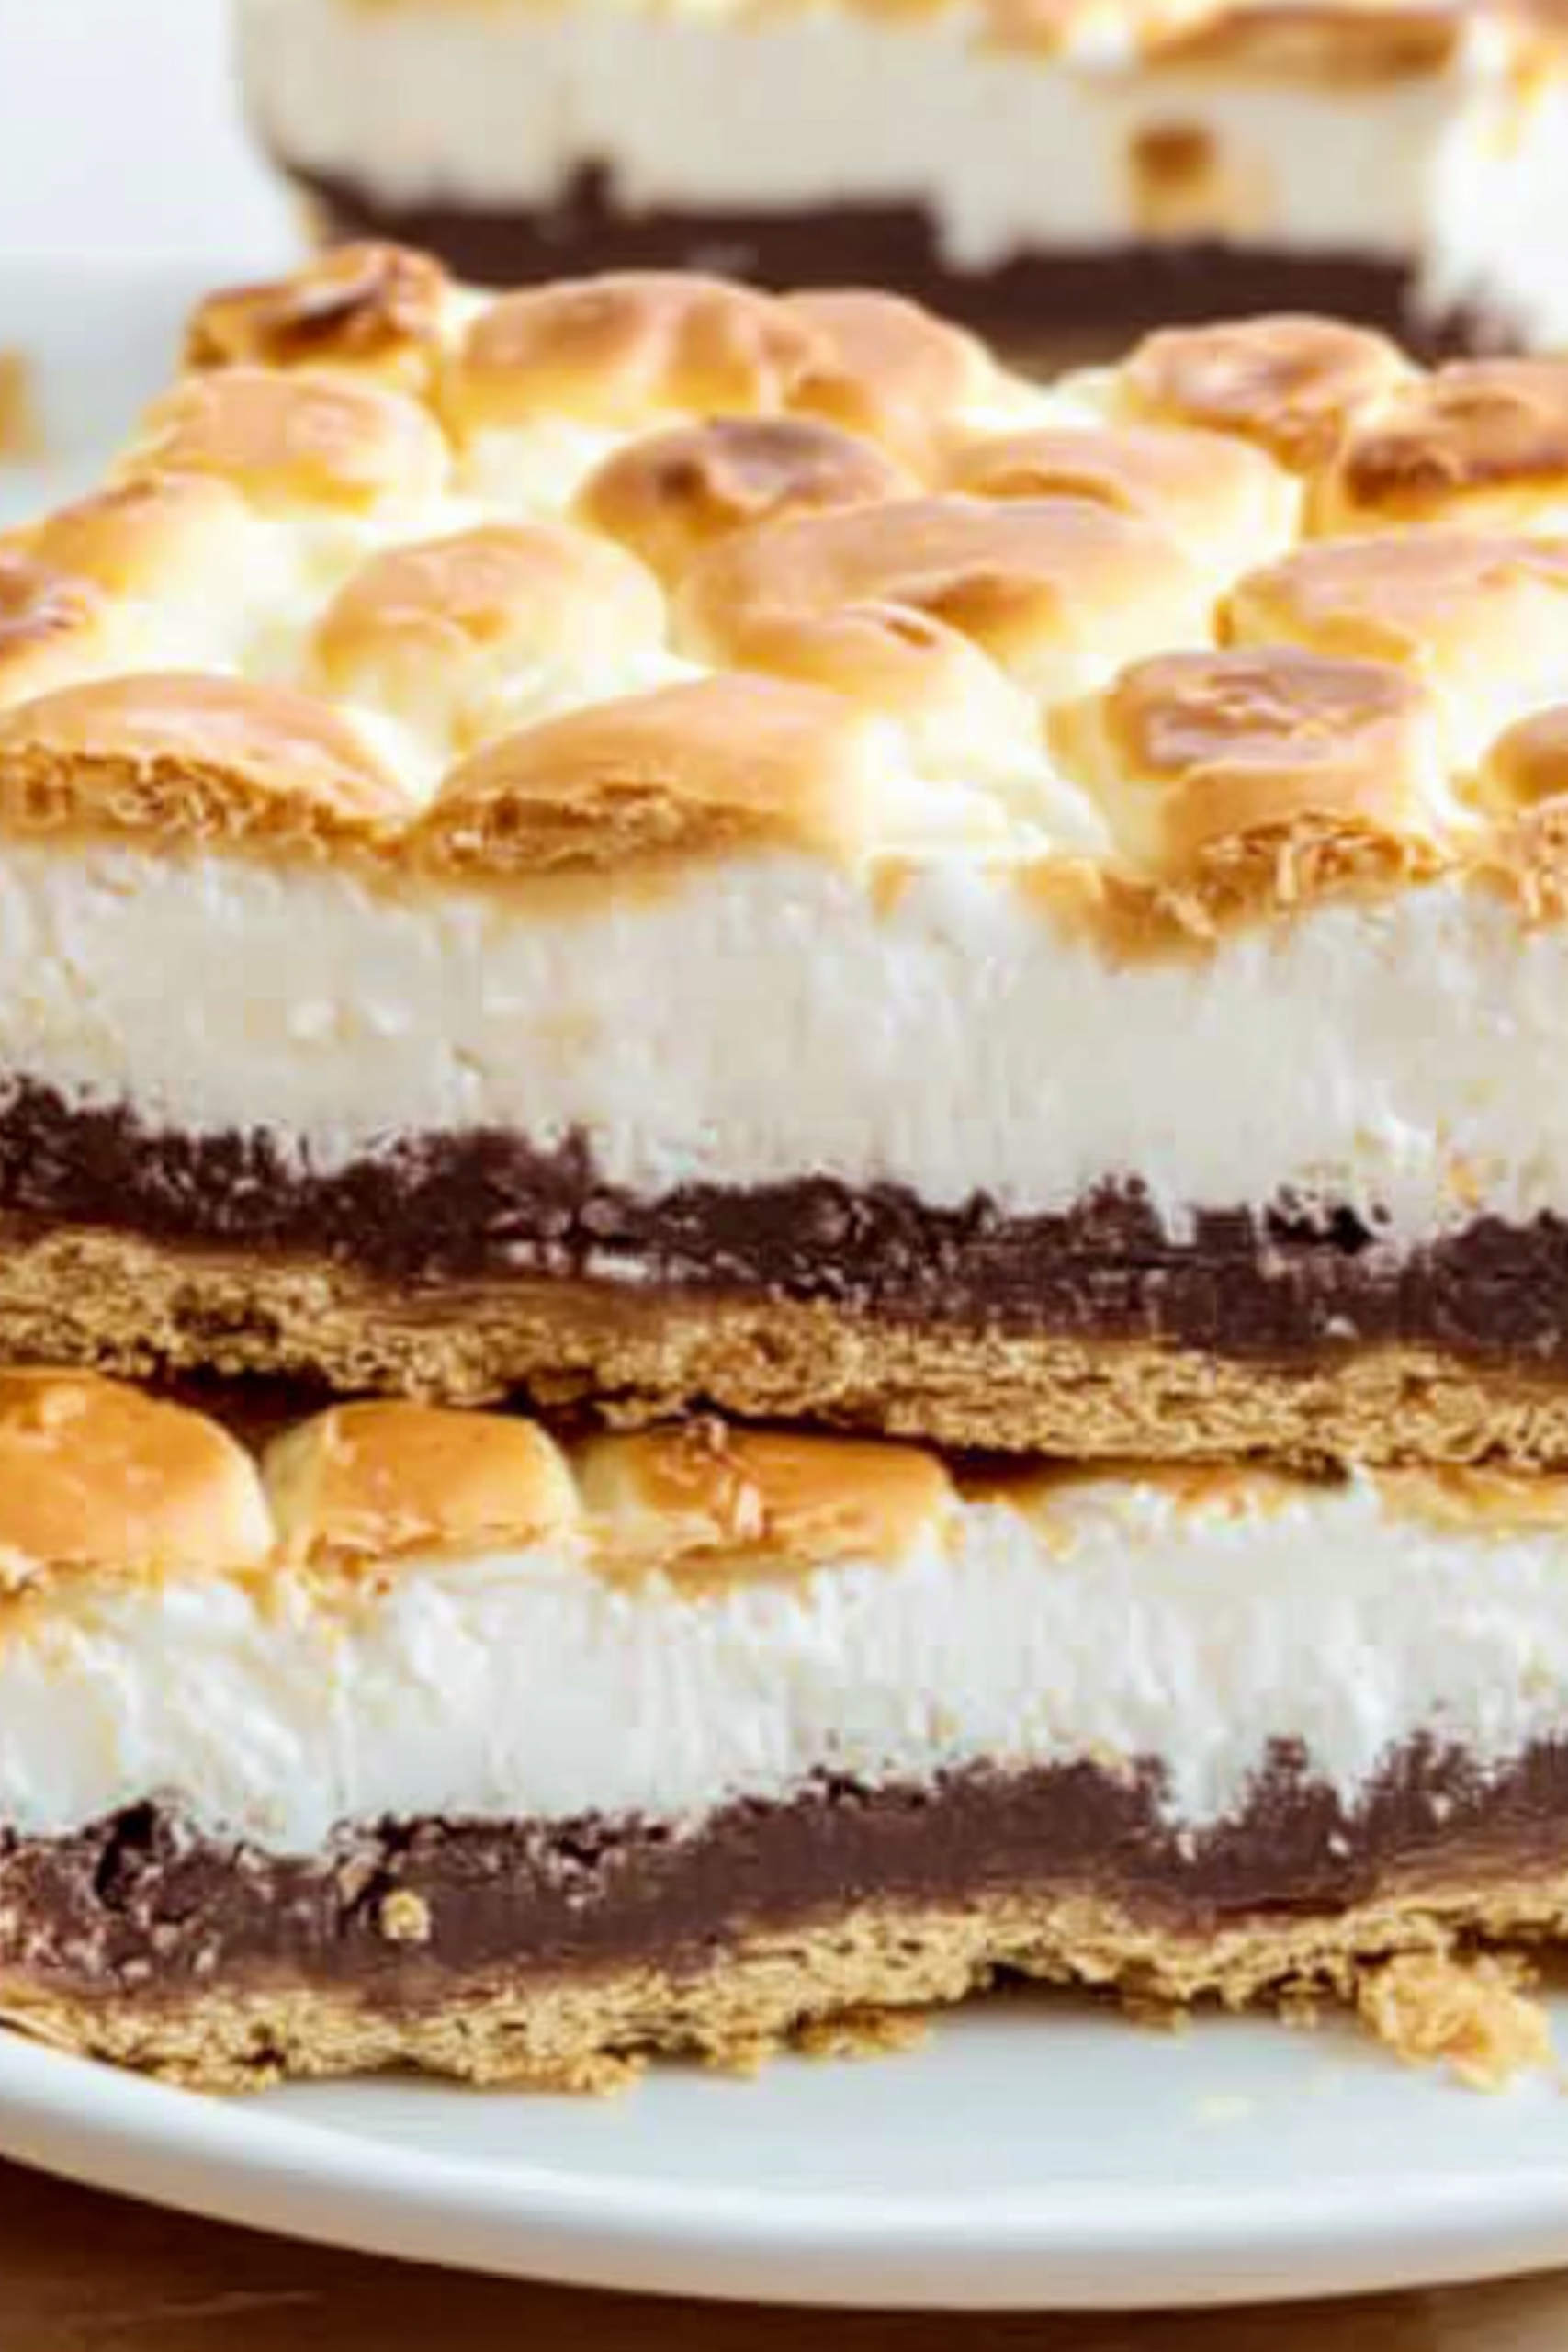
If you crave the gooey goodness of classic s’mores but want something easier to bake and slice, these S’mores Bars are your sweet solution. With a crisp graham cracker crust, melty Hershey’s chocolate, and toasted marshmallows on top, each bar is a dreamy handheld version of the campfire favorite. Whether it’s a summer BBQ or a cozy winter night treat, these bars bring nostalgia and delight with every bite.
Why You’ll Love These S’mores Bars
- Campfire flavor, without the campfire – All the smoky marshmallow goodness, prepared indoors.
- Simple ingredients – Using pantry staples for quick dessert satisfaction.
- Year-round appeal – Warm and comforting in winter; gooey and fun in summer.
- Perfect for sharing – Easy to make in a 9×13 pan and serve 16 bars.
- Customizable – Feel free to add nuts, flavored marshmallows, or even caramel.

Ingredients (Serves 16)
- 2 cups graham cracker crumbs (about 12–16 crackers)
- 8–12 tablespoons melted butter
- ½ cup powdered sugar
- 4 Hershey’s chocolate bars (4.4 oz each)
- 1 package mini marshmallows (about 10 oz)
Step-By-Step Instructions
1. Preheat & Prep
- Preheat your oven to 350°F (175°C).
- Grease a 9×13 baking pan with non-stick spray or butter.
2. Make the Crust
- Combine graham cracker crumbs, powdered sugar, and 8 tablespoons of melted butter in a bowl. Mix until evenly moistened.
- Press firmly along the bottom (and optionally up the sides) of the pan to form a compact crust.
- Bake for 5–8 minutes, until the edges start to turn light golden. The crust will firm up upon cooling.
3. Add the Chocolate Layer
- Let the crust cool for a few minutes.
- Arrange four Hershey’s bars to cover the crust fully.
- Bake for about 3 minutes, until the chocolate just begins to melt and shine.
4. Top with Marshmallows
- Remove from the oven; space mini marshmallows closely across the melted chocolate.
- Switch the oven to broil.
- Return the pan to the oven for 1.5–2 minutes, watching closely until marshmallows are puffed and golden. Remove immediately.
5. Cool & Slice
- Allow the bars to cool completely—chill in the fridge to speed it up and help cleanup.
- Use a warm, wet knife for cleaner cuts: heat under hot water, dry, and slice. Wipe between cuts if needed.
Secrets to Success
- Consistent crust texture: Use exactly 8 tbsp of butter for easy slicing; add up to 12 tbsp for a richer flavor but denser bars.
- Safe broil: Don’t walk away—the marshmallows toast fast and can burn within seconds.
- Even cooling: Chilling before cutting helps prevent messy slicing.
- Sharp clean cuts: Wiping your knife between passes keeps edges neat.
Flavor Variations
- Nutty crunch: Add chopped pecans or almonds to the marshmallow layer.
- Flavored marshmallows: Use cinnamon, strawberry, or coconut varieties for fun twists.
- Cookies & cream: Sprinkle crushed sandwich cookies on top before the marshmallows.
- Salted caramel: Drizzle caramel sauce over the chocolate before topping with marshmallows.
- Double chocolate: Mix cocoa powder into the graham base or use dark chocolate bars.
Serving & Presentation
- Cut into 16 evenly sized bars for easy portion control.
- Serve warm (soft and gooey) or cool (firmer, more sliceable). Both are delicious!
- Plate with vanilla ice cream, raspberries, or a dusting of powdered sugar.
- Perfect for family gatherings, potlucks, or movie nights.
Storage Tips
- Room temperature: Store in an airtight container up to 2 days for gooey bars.
- Refrigeration: Keep chilled up to 4 days; bars firm and you can microwave briefly to soften.
- Freezing: Wrap slices individually and freeze for 1 month. Thaw on the counter before serving.
Why They Work
These bars capture all the elements of a classic s’more—crunchy graham, melty chocolate, and toasted marshmallow—in an easy pan-baked treat. The mellow sweetness combines with fun textures, and minimal ingredients make it a stress-free dessert that delivers maximum comfort.
Final Thoughts
These S’mores Bars bring summer camp nostalgia to your oven and keep that joy alive all year. With a buttery crust, gooey chocolate, and perfectly toasted marshmallows, they’re pure comfort food magic. Easy to whip up, fun to watch toast, and satisfying to eat—what’s not to love?
📖 Recipe
S’mores Bars
Ingredients
- 2 cups graham cracker crumbs about 12–16 crackers
- 8 –12 tablespoons melted butter
- ½ cup powdered sugar
- 4 Hershey’s chocolate bars 4.4 oz each
- 1 package mini marshmallows about 10 oz
Instructions
Preheat & Prep
- Preheat your oven to 350°F (175°C).
- Grease a 9×13 baking pan with non-stick spray or butter.
Make the Crust
- Combine graham cracker crumbs, powdered sugar, and 8 tablespoons of melted butter in a bowl. Mix until evenly moistened.
- Press firmly along the bottom (and optionally up the sides) of the pan to form a compact crust.
- Bake for 5–8 minutes, until the edges start to turn light golden. The crust will firm up upon cooling.
Add the Chocolate Layer
- Let the crust cool for a few minutes.
- Arrange four Hershey’s bars to cover the crust fully.
- Bake for about 3 minutes, until the chocolate just begins to melt and shine.
Top with Marshmallows
- Remove from the oven; space mini marshmallows closely across the melted chocolate.
- Switch the oven to broil.
- Return the pan to the oven for 1.5–2 minutes, watching closely until marshmallows are puffed and golden. Remove immediately.
Cool & Slice
- Allow the bars to cool completely—chill in the fridge to speed it up and help cleanup.
- Use a warm, wet knife for cleaner cuts: heat under hot water, dry, and slice. Wipe between cuts if needed.

Leave a Reply