

Want to save this recipe?
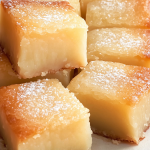
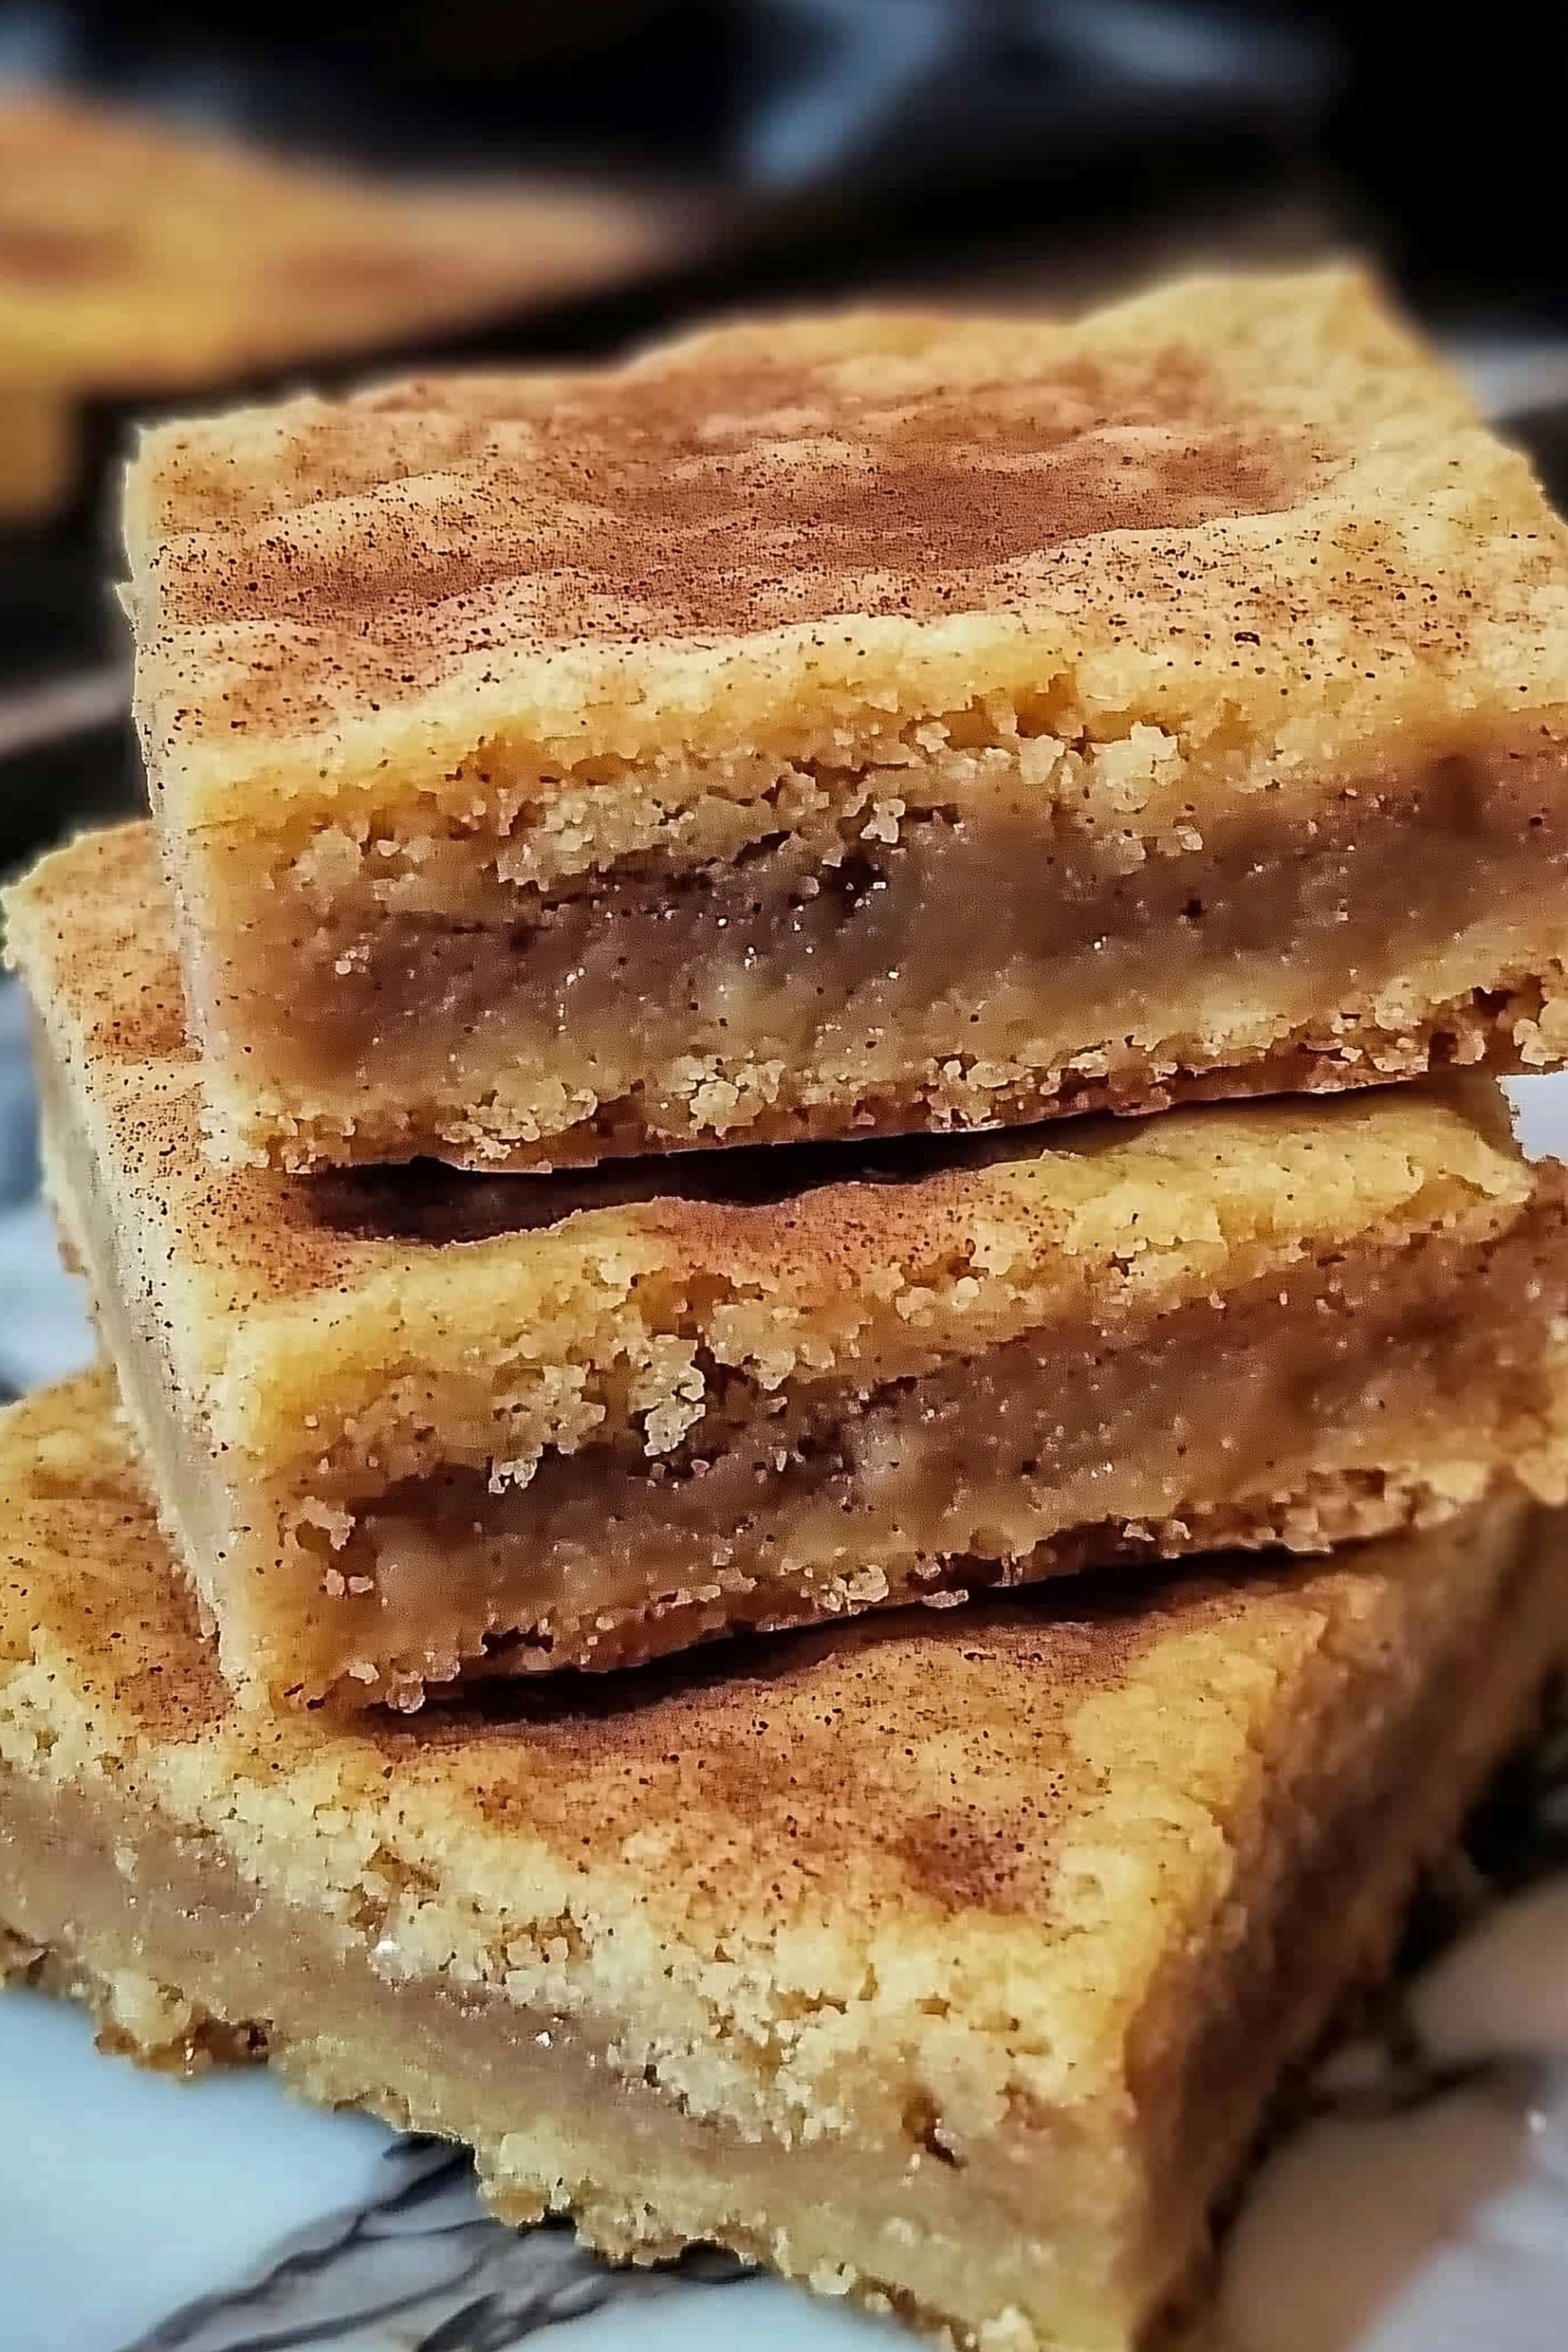
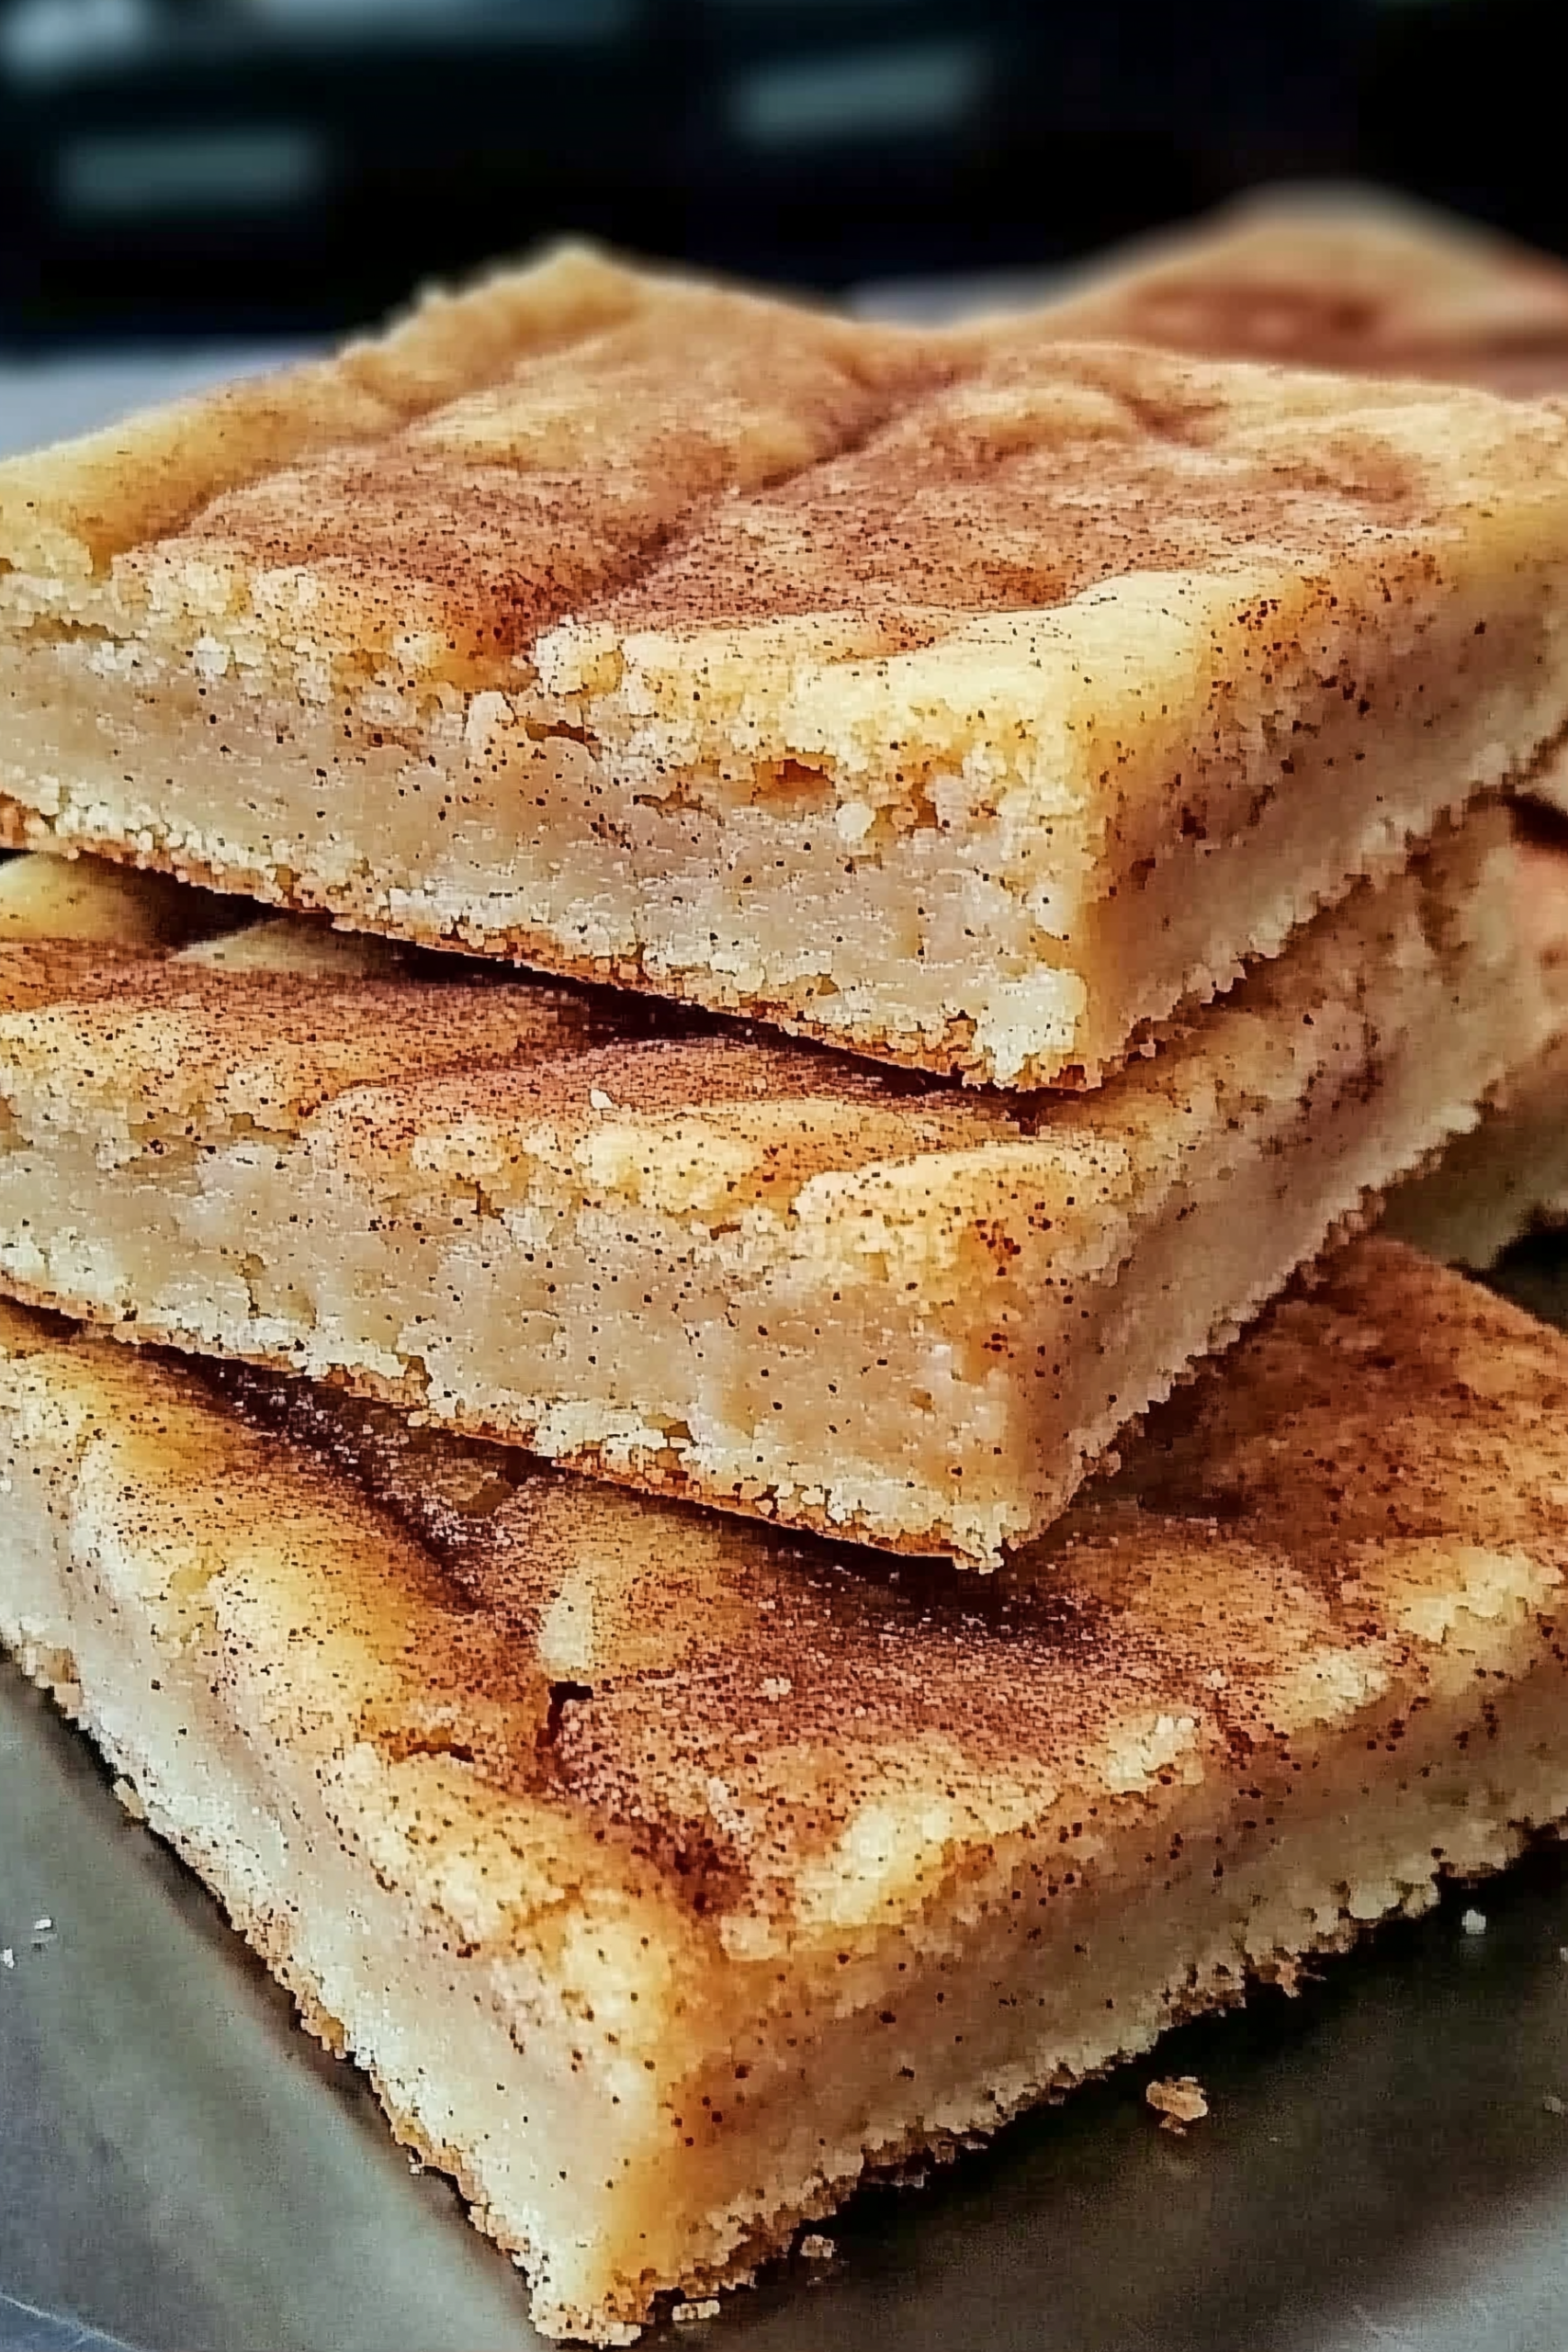
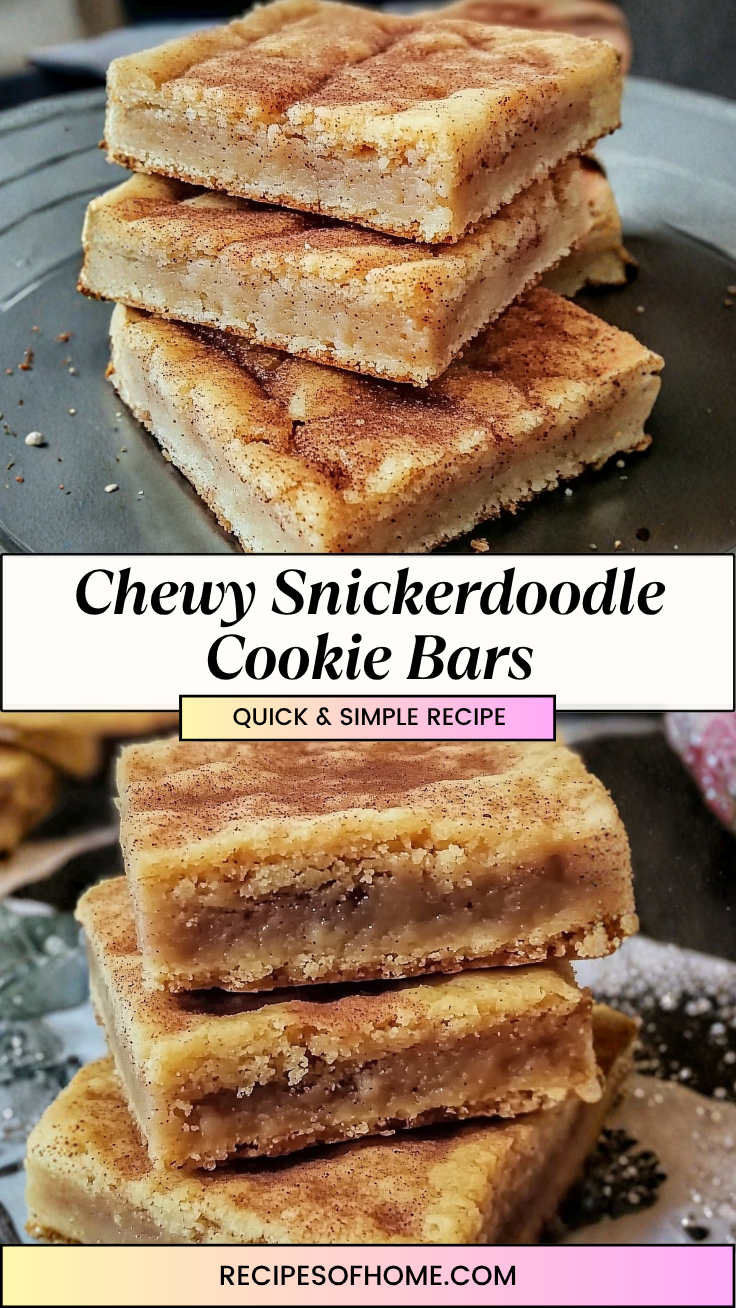
Walking into a kitchen filled with the scent of warm cinnamon and toasted butter is the quickest way to ground yourself after a long day. These Chewy Snickerdoodle Cookie Bars are a permanent fixture in my baking rotation because they offer all the nostalgia of the classic cookie but with a thick, pillowy texture that melts in your mouth. Unlike the individual round cookies that can sometimes turn out crisp, these bars maintain a dense, fudgy center that feels incredibly indulgent.
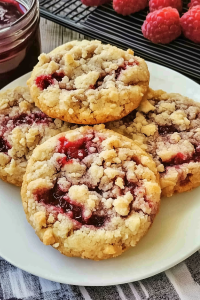
When I pull a pan of these out of the oven, the first thing I notice is the crackly, sugar-dusted surface. It’s a golden-brown landscape that yields to a buttery, soft interior with that signature snickerdoodle “tang.” I love serving these while they’re still slightly warm, sliced into generous squares. They aren’t just a dessert; they’re a cozy afternoon ritual. Whether they’re tucked into a lunchbox or served on a platter at a neighborhood potluck, they have a way of making everyone feel right at home.
Why You’ll Love It
- No Chilling Required: Unlike many cookie recipes that demand hours in the fridge, this dough goes straight into the pan, meaning you’re only 30 minutes away from a warm treat.
- The Perfect “Crinkle” Top: A generous dusting of cinnamon sugar creates a delicate, crunchy crust that provides a beautiful contrast to the soft, chewy bar underneath.
- Batch-Baking Ease: Instead of scooping and rolling 36 individual dough balls, you simply press the dough into one pan and bake, saving you significant time and effort.
- Classic Snickerdoodle Tang: By using cream of tartar, we achieve that authentic, slightly acidic flavor profile that distinguishes a true snickerdoodle from a basic sugar cookie.
- Lunchbox Sturdy: These bars are dense enough to hold their shape during travel, making them the ideal mess-free sweet treat for school lunches or office snacks.
Ingredient Notes & Details
- Unsalted Butter: Use softened, room-temperature butter. This allows for proper aeration during the creaming process, which creates that light yet chewy structure.
- Cream of Tartar: This is the most critical ingredient. It provides the signature “tang” and acts as a leavening agent that prevents the bars from becoming too cakey.
- Cinnamon and Granulated Sugar: This duo is used both in the dough and as a heavy coating on top. The cinnamon should be fresh for the most vibrant aroma.
- Large Eggs: Room temperature eggs emulsify better with the butter and sugar, ensuring a smooth dough and a consistent bake.
- Vanilla Extract: A high-quality pure vanilla enhances the buttery notes of the dough.
Natural Substitutions:
- Gluten-Free: A 1:1 gluten-free flour blend works perfectly here due to the density of the bars.
- Dairy-Free: You can swap the butter for a high-quality vegan butter stick; just ensure it is firm enough to cream with the sugar.
- Spice it up: Add a pinch of nutmeg or cardamom to the cinnamon-sugar topping for a deeper, more complex spice profile.
Step-by-Step Instructions
To start, you’ll want to cream your butter and sugars until the mixture is pale and voluminous. This step is the “why” behind the bar’s texture—incorporating air at the beginning ensures they aren’t overly heavy. Once the eggs and vanilla are in, you’ll gradually add your dry ingredients. The goal is to mix until the flour streaks just disappear. Over-mixing at this stage will develop the gluten, which leads to a tough, bready bar rather than a chewy one.
The dough will be quite thick and slightly sticky. Press it evenly into your prepared pan using a piece of parchment paper or lightly floured hands to prevent sticking. The “secret” to that bakery-style finish is the topping. Don’t be shy—sprinkle the cinnamon-sugar mixture so it covers every square inch.
Bake just until the edges are a light golden brown and the center looks slightly “underdone.” This is crucial: the bars will continue to set as they cool in the pan. If you wait until the center is firm to the touch, they will be hard once cooled. That residual heat is what perfects the fudgy, chewy middle we’re after. Let them cool completely before slicing to ensure you get those clean, sharp edges.
Tips
- Line the Pan: Use parchment paper with a slight overhang on the sides. This allows you to lift the entire block of bars out of the pan for easy, even slicing.
- Room Temp is Key: If your butter is too cold, it won’t trap air; if it’s melted, the bars will be greasy. Aim for “soft but not shiny.”
- Measure Flour Correctly: Spoon the flour into your measuring cup and level it off. Packing it down will result in dry, crumbly bars.
- Don’t Overbake: Check the bars 2 minutes before the timer goes off. Every oven is different, and 60 seconds can be the difference between chewy and crunchy.
- The Slicing Hack: For perfectly clean cuts, wipe your knife with a warm, damp cloth between every single slice.
Storage & Reheating
These bars stay remarkably soft for several days. Store them in an airtight container at room temperature for up to 5 days. If you find they’ve firmed up more than you like, a quick 8-second zap in the microwave will restore that “fresh-from-the-oven” softness.
For longer storage, these bars freeze beautifully. Wrap individual squares in plastic wrap and place them in a freezer-safe bag for up to 3 months. Thaw them at room temperature for an hour, and they’ll be as good as the day you baked them.
Serving & FAQs
What should I serve with snickerdoodle bars? A cold glass of milk is the traditional partner, but these are also incredible when served warm with a scoop of salted caramel ice cream. The spices in the bar perfectly complement the buttery caramel.
Can I add mix-ins? While a classic snickerdoodle is plain, white chocolate chips or chopped pecans added to the batter provide a delicious twist that doesn’t overwhelm the cinnamon flavor.
Why did my bars sink in the middle? This usually happens if the butter was too hot/melty or if the bars were pulled out much too early. Ensure your oven is fully preheated before the pan goes in!
Soft-Baked Homemade Snickerdoodle Bars
A thick, buttery, and ultra-chewy cookie bar finished with a signature crackly cinnamon-sugar topping and that classic snickerdoodle tang.
- Prep time: 12 minutes
- Cook time: 24 minutes
- Total time: 36 minutes
- Servings: 16 bars
Ingredients
The Dough
- 1 cup (2 sticks) Unsalted butter, softened
- 1 cup Granulated sugar
- ½ cup Light brown sugar, packed
- 2 Large eggs, room temperature
- 2 tsp Pure vanilla extract
- 2.5 cups All-purpose flour
- 2 tsp Cream of tartar
- 1 tsp Baking soda
- ½ tsp Salt
The Topping
- 2 tbsp Granulated sugar
- 1.5 tsp Ground cinnamon
Instructions
- Preparation: Preheat your oven to 350°F (175°C). Line a 9×9 inch square baking pan with parchment paper, leaving a slight overhang on the sides.
- Cream Butter: In a large bowl or stand mixer, beat the softened butter, granulated sugar, and brown sugar on medium-high speed for about 3 minutes until light and fluffy.
- Add Wet Ingredients: Add the eggs one at a time, beating well after each addition. Stir in the vanilla extract.
- Incorporate Dry: In a separate bowl, whisk together the flour, cream of tartar, baking soda, and salt. Gradually add to the wet ingredients, mixing on low speed until just combined.
- Press into Pan: Spread the thick dough into the prepared pan, smoothing the top with a spatula or your fingers.
- Top: In a small bowl, mix the topping ingredients (sugar and cinnamon). Sprinkle evenly over the top of the dough.
- Bake: Bake for 22–26 minutes. The edges should be lightly golden and the center should still look a tiny bit soft.
- Cool: Let the bars cool completely in the pan before using the parchment overhang to lift them out and slice into squares.
Leave a Reply