












Want to save this recipe?
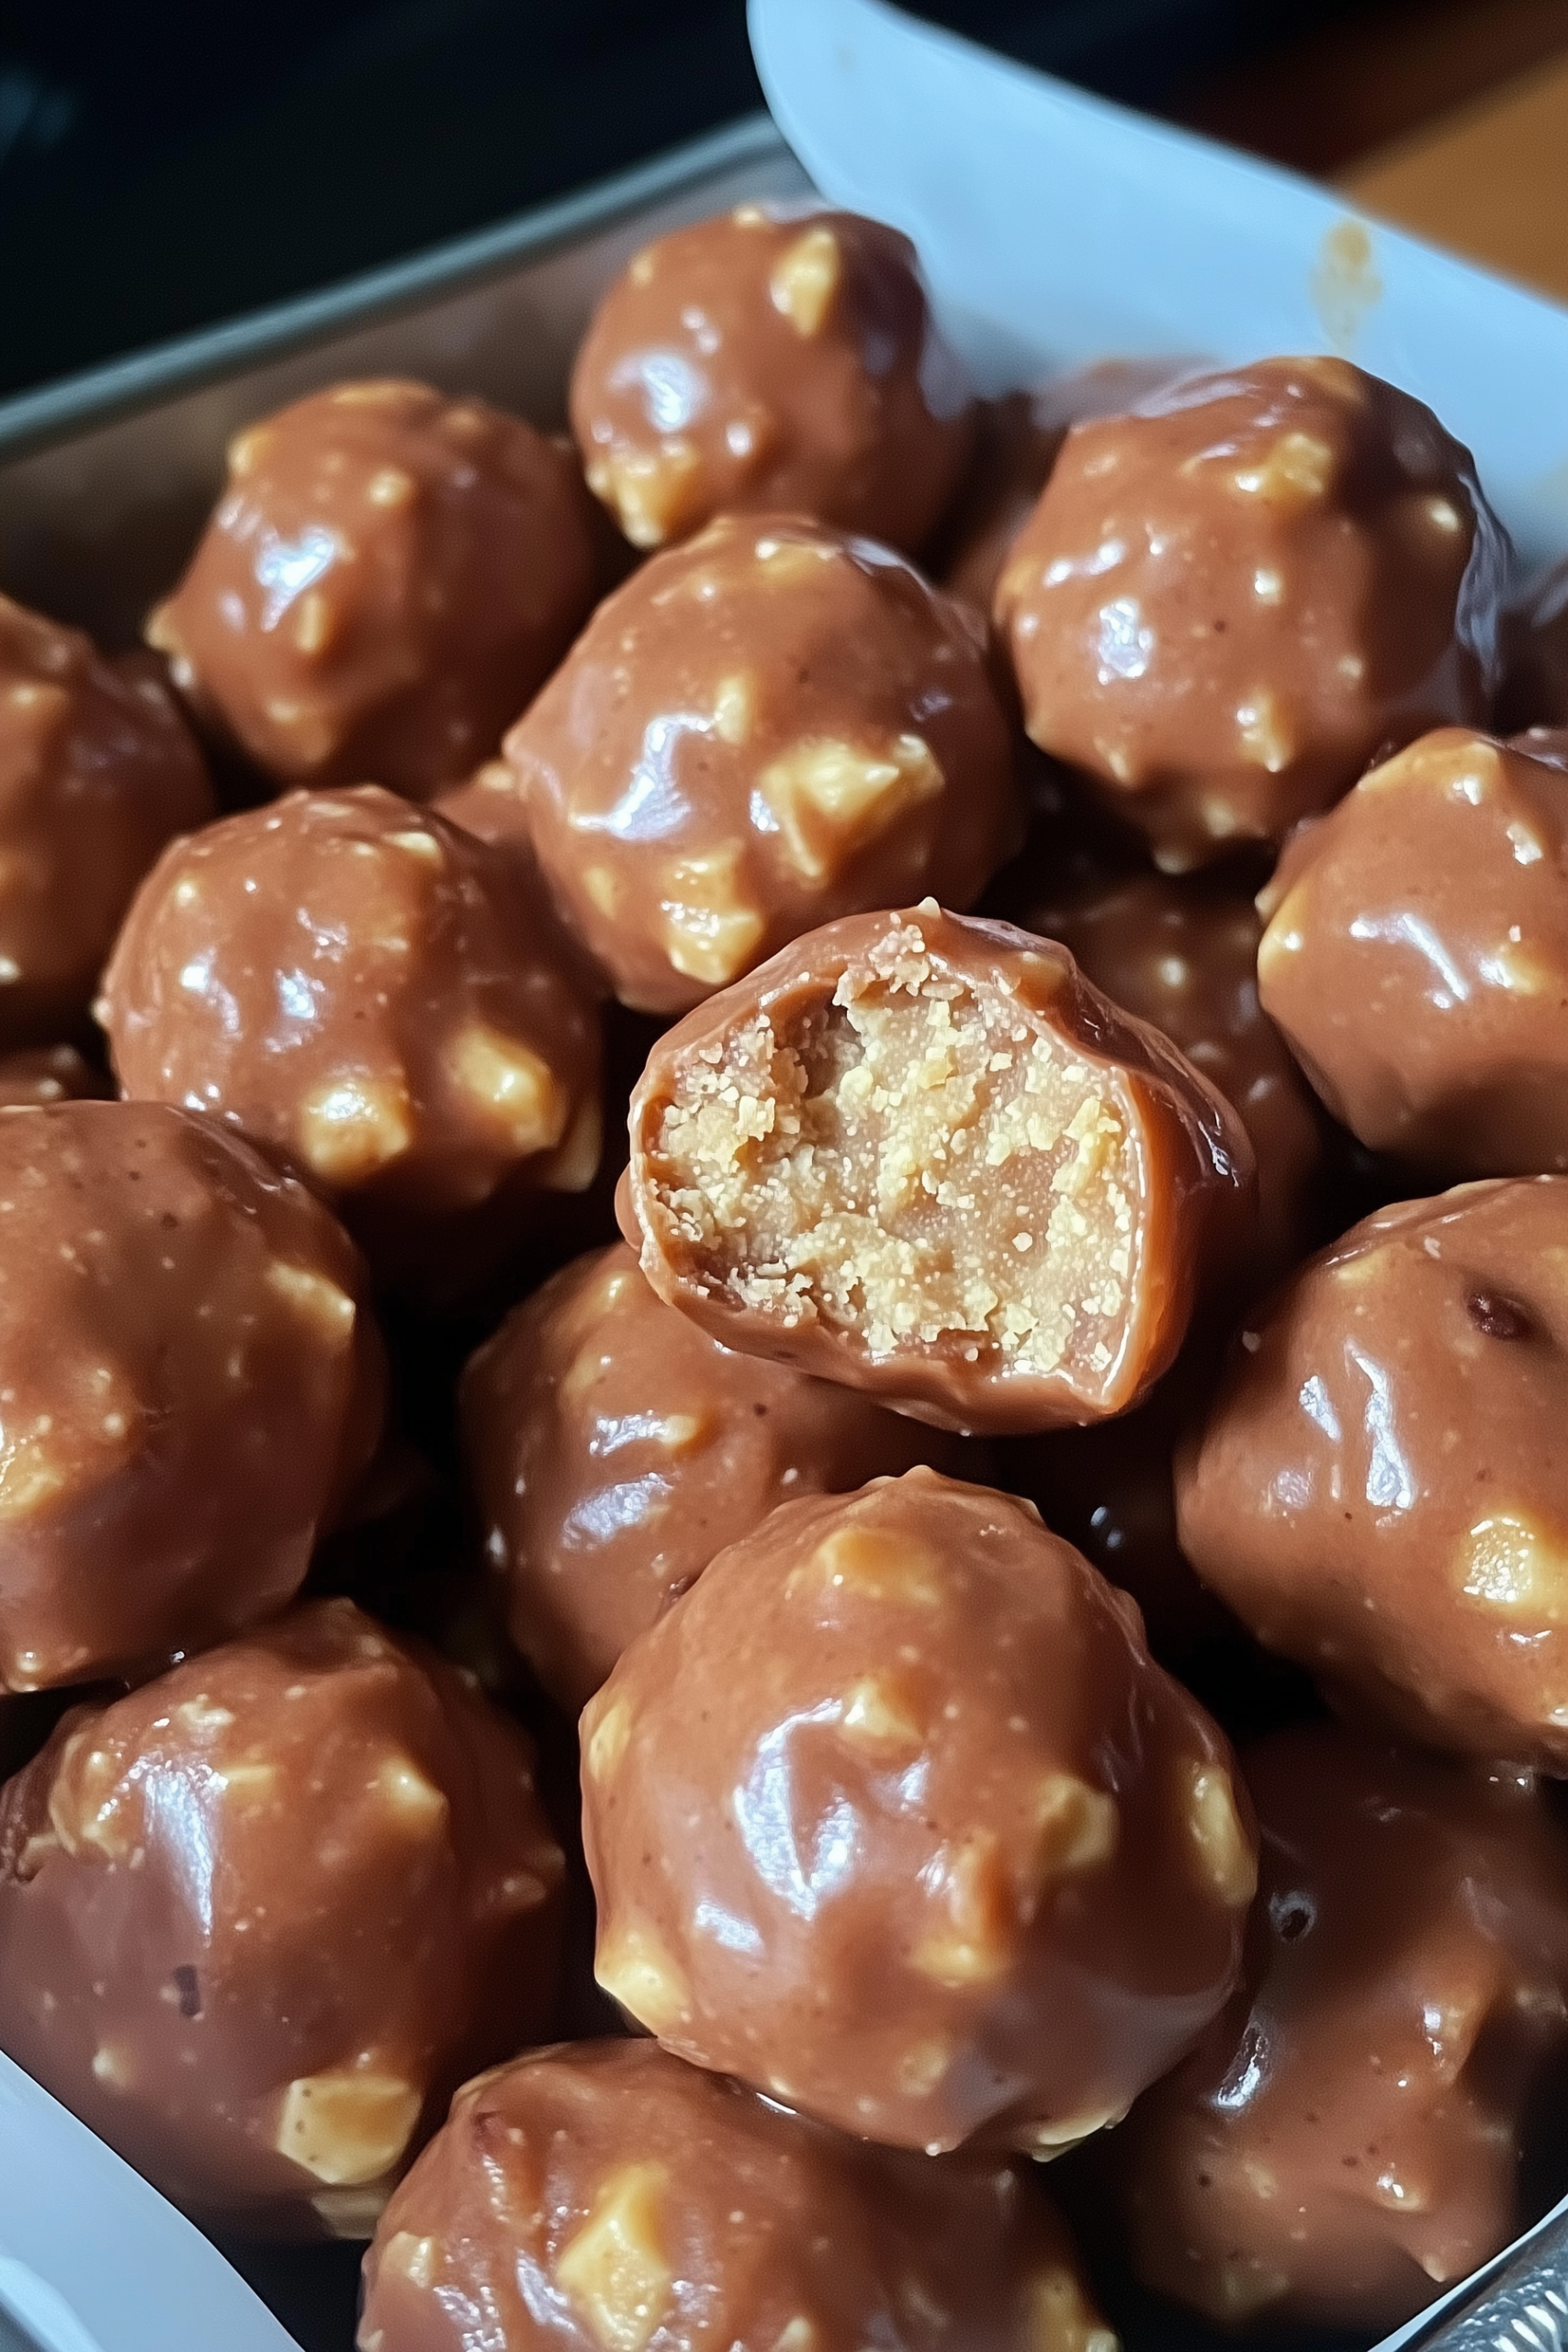
If you’re on the hunt for the perfect party treat or just want to indulge your sweet tooth, these Butterfinger Balls are calling your name. Creamy peanut butter, graham cracker crumbs, and crushed Butterfinger bars come together in a blissful mix, then dipped in rich melted chocolate for a no-bake dessert that’s downright addictive.
They’re ideal for potlucks, holidays, bake sales, or anytime you want to make something quick, fun, and outrageously delicious.
Why You’ll Love This Recipe
- No Baking Required: Minimal effort, maximum flavor
- Party Perfect: Makes 20 bite-sized treats—ideal for sharing
- Fun to Customize: Add sprinkles, flaky salt, or extra Butterfinger on top
- Kid-Friendly: Easy enough to make with little helpers
- Keeps Well: Stores beautifully in the fridge or freezer

Ingredients You’ll Need
(Makes about 20 balls)
- 4 tablespoons (½ stick) softened butter
- 1 cup peanut butter (avoid natural varieties)
- 1 teaspoon vanilla extract
- 1 cup powdered sugar
- ¾ cup graham cracker crumbs
- ½ cup crushed Butterfinger candy bars
- 8 ounces chocolate bark or chocolate chips
Optional Garnishes:
- Extra crushed Butterfinger
- Festive sprinkles
- Coarse sea salt
How to Make Butterfinger Balls
Step 1: Make the Dough
In a large mixing bowl, combine the peanut butter and softened butter.
Beat with a stand or electric mixer on medium speed until smooth and creamy.
Step 2: Add Flavor and Sweetness
Mix in the vanilla extract. Gradually add the powdered sugar, blending on low speed until incorporated. Scrape down the bowl as needed.
Step 3: Add Crunch
Fold in the graham cracker crumbs and crushed Butterfinger bars by hand until evenly mixed.
Step 4: Shape the Balls
Line a large cookie sheet with parchment paper.
Scoop 1 to 1½ tablespoons of dough and roll into balls. Place on the sheet, evenly spaced.
Step 5: Chill
Freeze the dough balls for about 30 minutes, or until completely firm.
Melting the Chocolate & Coating
Step 6: Melt the Chocolate
Place the chocolate bark or chips in a microwave-safe bowl.
Microwave in 30-second bursts at 50% power, stirring between each round, until mostly melted (a few lumps are okay—they’ll melt as you stir).
Step 7: Dip and Decorate
Using a fork or dipping tool, submerge each ball into the melted chocolate, letting the excess drip off.
Place back on the parchment-lined sheet. While the chocolate is still soft, add your toppings: extra crushed Butterfinger, sprinkles, or flaky sea salt.
Step 8: Set and Serve
Let the chocolate harden completely at room temperature or in the fridge. Once set, they’re ready to enjoy!
Serving Suggestions
- Serve chilled on a dessert platter at parties
- Wrap individually for edible gifts or treat bags
- Add to holiday cookie trays for variety
Tips for Success
- Use commercial peanut butter like Jif or Skippy for best texture
- Don’t overheat the chocolate—stir often and gently
- Store in an airtight container in the fridge for up to 1 week
FAQs
Can I freeze Butterfinger Balls?
Yes! They freeze well. Store in an airtight container for up to 2 months.
Can I use different candy bars?
Absolutely—try Reese’s, Crunch bars, or Snickers for fun variations.
How long do they take to set?
At room temp, about 30 minutes. In the fridge, they’ll set in 10–15 minutes.
Final Thoughts
These Butterfinger Balls are rich, crunchy, and seriously addictive—basically everything you want in a bite-sized dessert. Whether you’re making them for the holidays or a last-minute get-together, this easy no-bake recipe is guaranteed to impress.
Share Your Creation
Whipping these up for your next celebration? I’d love to see! Tag #ButterfingerBlissBalls on Instagram or Pinterest and show off your toppings and twists!
📖 Recipe
Butterfinger Balls
Ingredients
- 4 tablespoons ½ stick softened butter
- 1 cup peanut butter avoid natural varieties
- 1 teaspoon vanilla extract
- 1 cup powdered sugar
- ¾ cup graham cracker crumbs
- ½ cup crushed Butterfinger candy bars
- 8 ounces chocolate bark or chocolate chips
Optional Garnishes:
- Extra crushed Butterfinger
- Festive sprinkles
- Coarse sea salt
Instructions
Step 1: Make the Dough
- In a large mixing bowl, combine the peanut butter and softened butter.
- Beat with a stand or electric mixer on medium speed until smooth and creamy.
Step 2: Add Flavor and Sweetness
- Mix in the vanilla extract. Gradually add the powdered sugar, blending on low speed until incorporated. Scrape down the bowl as needed.
Step 3: Add Crunch
- Fold in the graham cracker crumbs and crushed Butterfinger bars by hand until evenly mixed.
Step 4: Shape the Balls
- Line a large cookie sheet with parchment paper.
- Scoop 1 to 1½ tablespoons of dough and roll into balls. Place on the sheet, evenly spaced.
Step 5: Chill
- Freeze the dough balls for about 30 minutes, or until completely firm.
Melting the Chocolate & Coating
Step 6: Melt the Chocolate
- Place the chocolate bark or chips in a microwave-safe bowl.
- Microwave in 30-second bursts at 50% power, stirring between each round, until mostly melted (a few lumps are okay—they’ll melt as you stir).
Step 7: Dip and Decorate
- Using a fork or dipping tool, submerge each ball into the melted chocolate, letting the excess drip off.
- Place back on the parchment-lined sheet. While the chocolate is still soft, add your toppings: extra crushed Butterfinger, sprinkles, or flaky sea salt.
Step 8: Set and Serve
- Let the chocolate harden completely at room temperature or in the fridge. Once set, they’re ready to enjoy!

Leave a Reply