












Want to save this recipe?
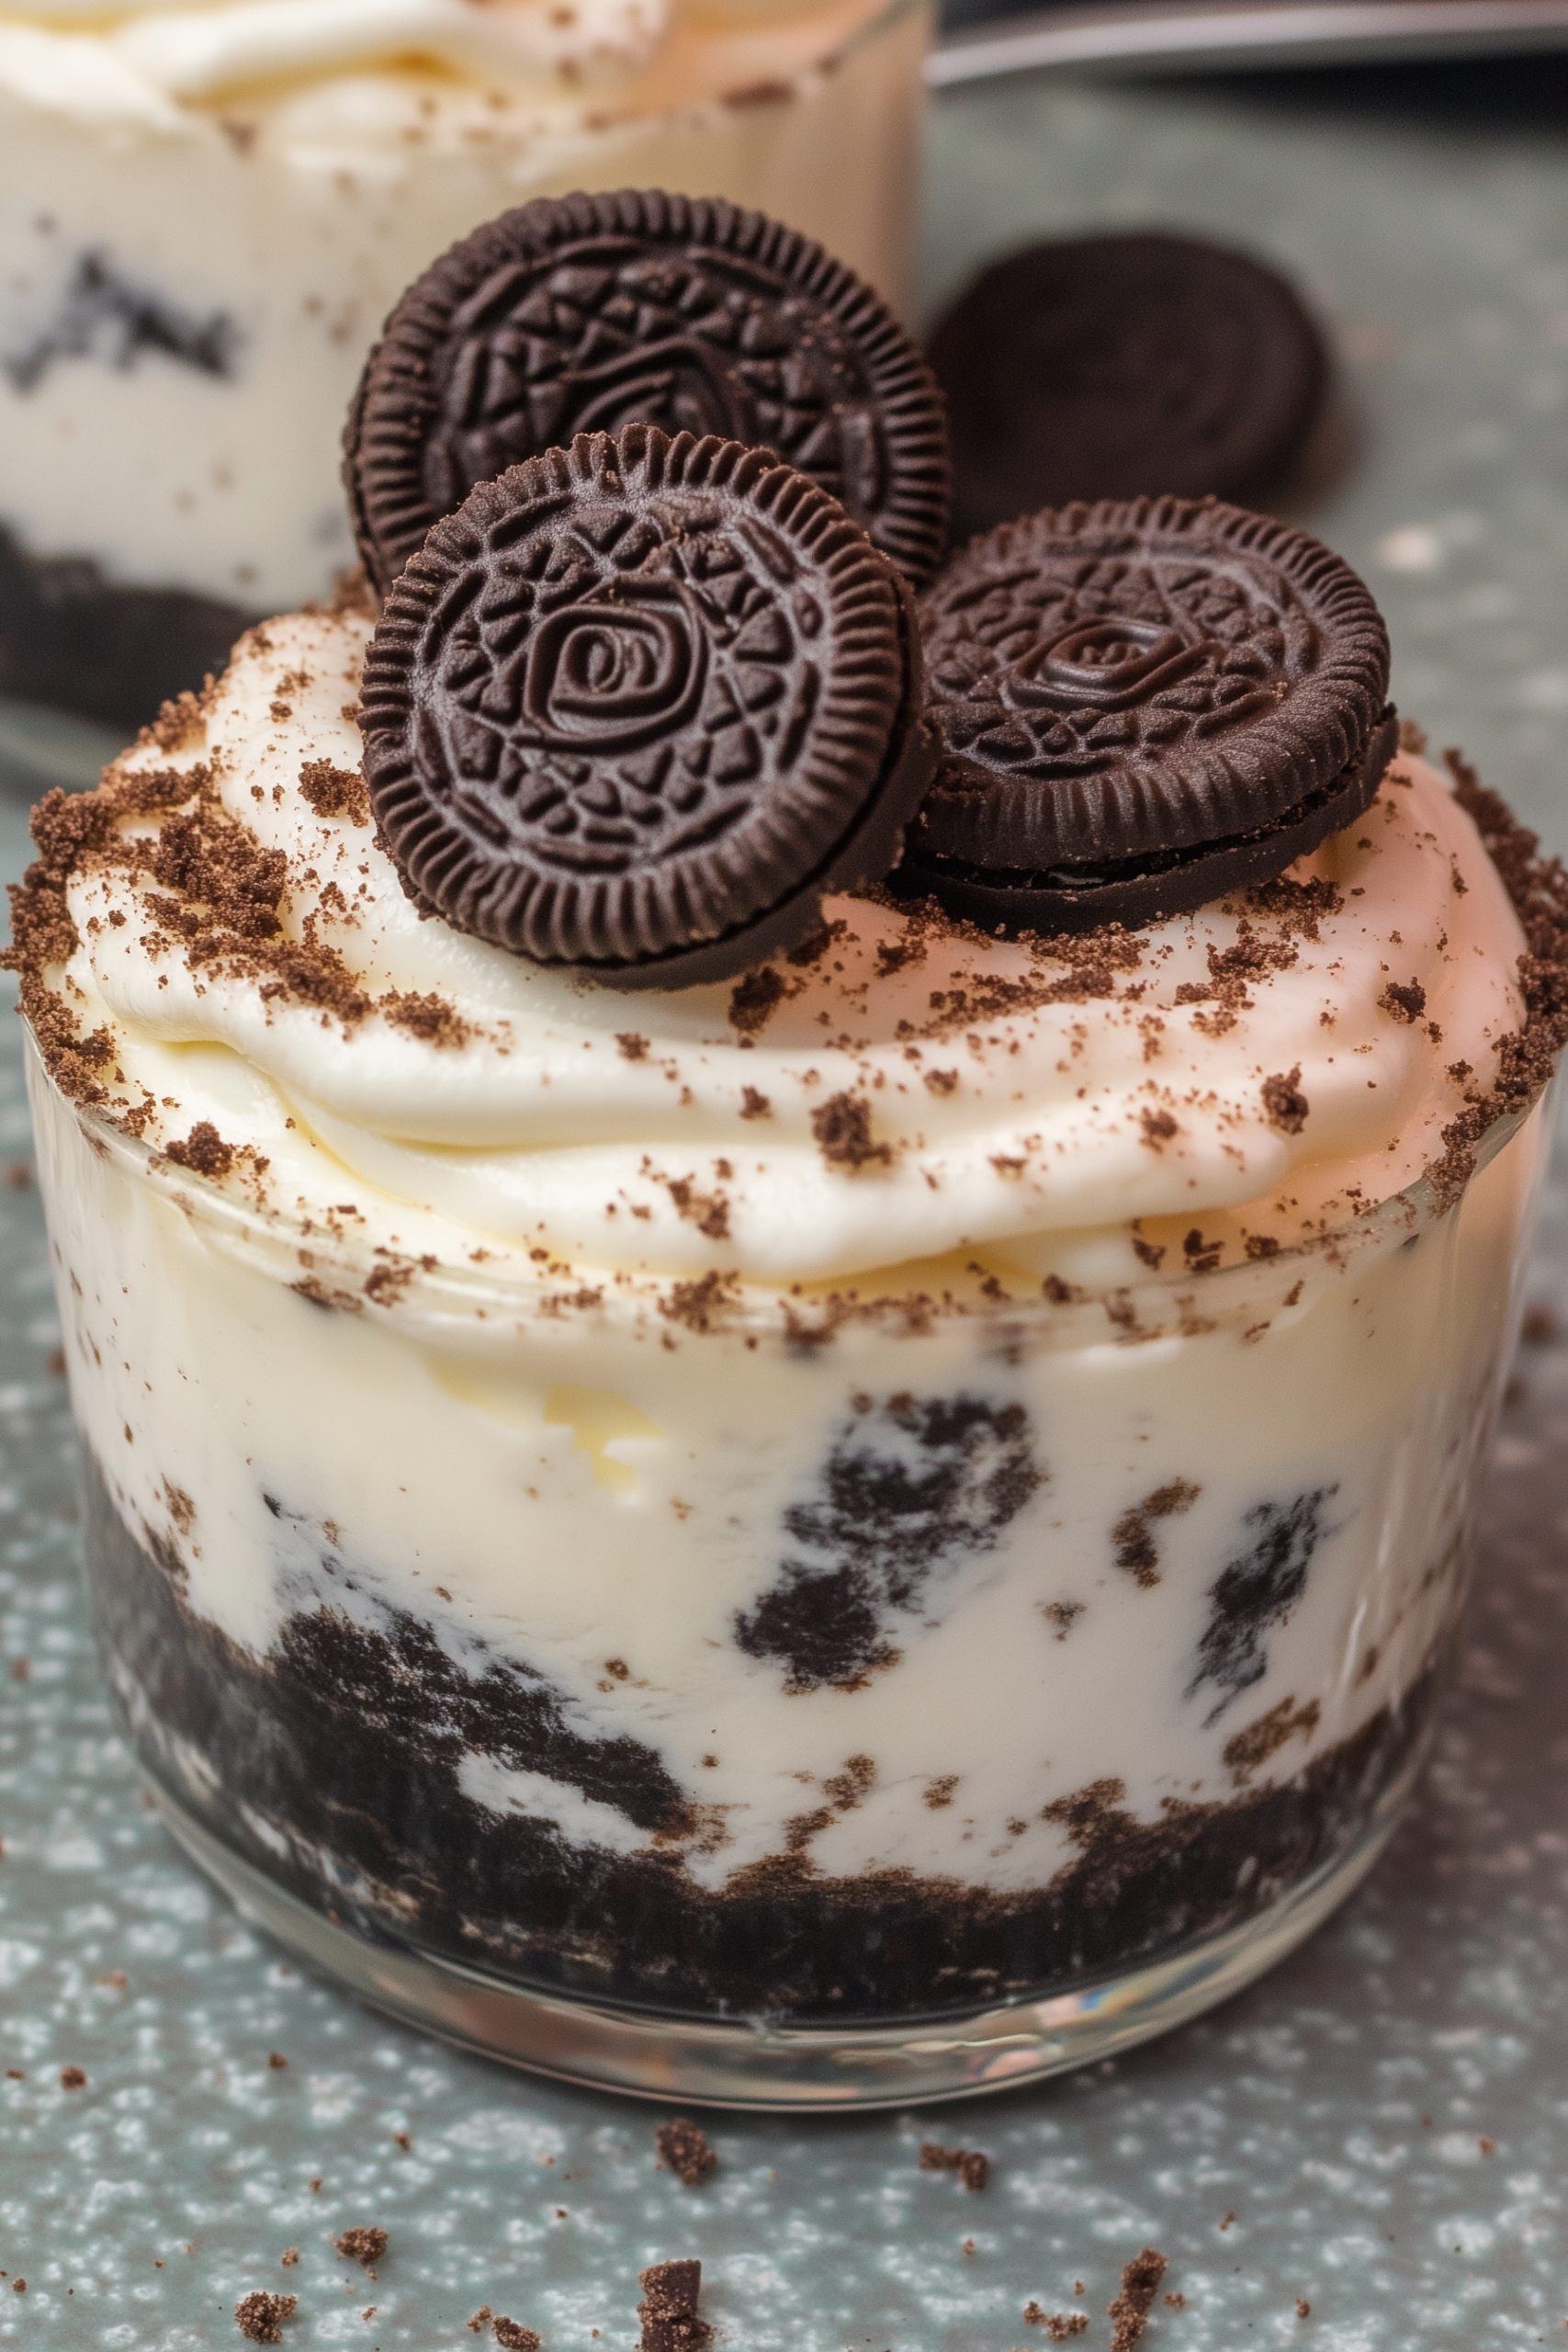
If there’s one dessert that’s guaranteed to win over any crowd, it’s a creamy, dreamy cheesecake. But what if we made it even easier—and a little more playful? Enter Oreo No-Bake Cheesecake Cups. This is the dessert that delivers big flavor, minimal effort, and zero oven time. Perfect for warm summer days or quick holiday prep, these personal-sized cups are irresistibly creamy, loaded with crushed Oreos, and topped with a dollop of whipped cream for the ultimate finish.
A Personal Favorite From My Kitchen
Growing up, cheesecake was a big deal in our house—always reserved for birthdays or special occasions. But my grandmother, ever the clever cook, had a trick up her sleeve for summer: she’d make a no-bake version in cups using leftover cookies and her signature whipped topping. Over the years, I’ve made her original recipe my own, using Oreos to give it that extra touch of nostalgic joy.
Why You’ll Love These Oreo No-Bake Cheesecake Cups
- Quick & Easy – No oven, no water baths, no fuss!
- Perfect for Summer – Chill and serve; no need to heat up the kitchen.
- Individual Servings – Great for parties, picnics, or anytime portion control.
- Just 5 Ingredients – You might already have everything you need.
- Customizable – Try flavored Oreos, add fruit, or swap in different toppings.

Ingredients
Here’s everything you’ll need to whip up this crowd-pleasing treat:
- 1 (8 oz) block cream cheese, softened
- 1 (8 oz) tub Cool Whip or any whipped topping
- ⅔ cup powdered sugar
- 1 teaspoon vanilla extract
- 24–26 Oreo cookies, more for garnish
Optional toppings:
- Extra whipped cream
- Crushed Oreos
- Mini chocolate chips
- Fresh berries
How to Make Oreo No-Bake Cheesecake Cups
Step 1: Prepare the Oreo Crust Base
Place the Oreos in a sealed plastic bag and crush them using a rolling pin or the bottom of a sturdy mug. You want a mix of crumbs and small chunks for texture. Spoon 1½ to 2 tablespoons into the bottom of each of your 6 dessert cups.
Step 2: Make the Cheesecake Filling
In a large bowl, beat the softened cream cheese and powdered sugar together until smooth and creamy. Add vanilla extract and mix again.
Step 3: Fold in the Whipped Topping
Gently fold in the Cool Whip until the mixture is fully combined. Then, stir in the remaining crushed Oreos.
Step 4: Assemble the Cups
Divide the cheesecake mixture evenly across the 6 cups. Press it gently onto the crushed Oreo layer to remove any air gaps. Smooth the tops with a spoon or spatula.
Step 5: Chill
Place the cups in the refrigerator for at least 30–60 minutes. This helps the cheesecake set and makes it even more refreshing.
Step 6: Garnish & Serve
Top with whipped cream, extra crushed Oreos, or your favorite garnishes. Serve chilled and enjoy!
Tips for the Perfect No-Bake Cheesecake Cups
- Use room temperature cream cheese for the smoothest filling.
- Don’t overmix the whipped topping—fold gently to keep it light and airy.
- Chill time matters! The longer these chill, the more set and creamy they become.
Variations to Try
- Strawberry Oreo Cheesecake Cups – Add diced strawberries for a fruity twist.
- Mint Oreo Cups – Use mint-flavored Oreos and a touch of peppermint extract.
- Nutella Swirl – Swirl in 1 tablespoon of Nutella per cup before chilling.
Serving Ideas
These make the perfect dessert for:
- Backyard BBQs
- Summer birthday parties
- Baby or bridal showers
- Family night treats
- School events or bake sales
They travel well in mason jars with lids, too!
Storage & Make-Ahead Tips
- Refrigerator: Store in an airtight container for up to 3 days.
- Freezer: You can freeze these for up to 2 months. Let them thaw in the fridge before serving.
Serving & Time Summary
- Yield: 6 servings
- Prep Time: 15 minutes
- Chill Time: 30 minutes
- Total Time: 45 minutes
Final Thoughts
These Oreo No-Bake Cheesecake Cups are as fun to make as they are to eat. They strike the perfect balance between creamy cheesecake and crunchy cookie, all wrapped in a no-bake format that’s ideal for busy days or hot kitchens. Whether you’re making them for a summer potluck or just a mid-week treat, this recipe is sure to be a hit!
📖 Recipe
Oreo No-Bake Cheesecake Cups
Ingredients
- 1 8 oz block cream cheese, softened
- 1 8 oz tub Cool Whip or any whipped topping
- ⅔ cup powdered sugar
- 1 teaspoon vanilla extract
- 24 –26 Oreo cookies more for garnish
Optional toppings:
- Extra whipped cream
- Crushed Oreos
- Mini chocolate chips
- Fresh berries
Instructions
Step 1: Prepare the Oreo Crust Base
- Place the Oreos in a sealed plastic bag and crush them using a rolling pin or the bottom of a sturdy mug. You want a mix of crumbs and small chunks for texture. Spoon 1½ to 2 tablespoons into the bottom of each of your 6 dessert cups.
Step 2: Make the Cheesecake Filling
- In a large bowl, beat the softened cream cheese and powdered sugar together until smooth and creamy. Add vanilla extract and mix again.
Step 3: Fold in the Whipped Topping
- Gently fold in the Cool Whip until the mixture is fully combined. Then, stir in the remaining crushed Oreos.
Step 4: Assemble the Cups
- Divide the cheesecake mixture evenly across the 6 cups. Press it gently onto the crushed Oreo layer to remove any air gaps. Smooth the tops with a spoon or spatula.
Step 5: Chill
- Place the cups in the refrigerator for at least 30–60 minutes. This helps the cheesecake set and makes it even more refreshing.
Step 6: Garnish & Serve
- Top with whipped cream, extra crushed Oreos, or your favorite garnishes. Serve chilled and enjoy!

Leave a Reply